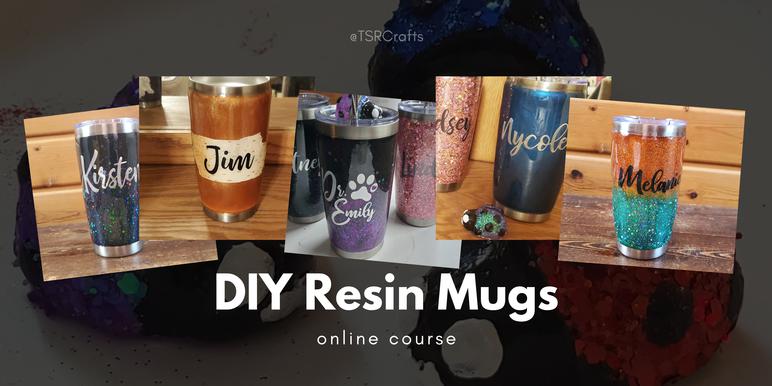
How to Make Resin Tumbler Mugs
Learn how to make different kinds of resin tumbler mugs, plus a waste-minimizing project for your leftover resin!
You're here to make mugs right?
Good! 'Cause we're making mugs!
In this easy to follow course you're going to go from beginner to pro when it comes to making resin tumbler mugs!
And not just "glitter mugs". We'll be making glitter mugs, mica powder mugs, and even printed decal mugs!
I'm going to teach you ALL my secrets, all my tips, show you ALL my must have supplies and tools, and you're going to walk away being able to make mugs that will have people asking you what store you custom ordered it from!
This type of mug usually sells for anywhere between $30 and $65 on places like Etsy, but you're going to learn how to make them for a fraction of the price! In fact, you can make your first 8 tumblers for around $200 (about $25 per finished tumbler) in tools and supplies, and if you're making more than that, it gets even cheaper, since you'll already have the mug turner, and many of the other tools and supplies still on hand! I STILL have lots of great colors of glitter left over for all kinds of crafts, vinyl for crafting projects down the road, and of course, the mug turner, for future mug projects.
The tools and supplies are not included with the course and you'll need to purchase them separately. See the "Supplies" section below for links to the items that I used.
If you enjoyed my DIY Resin Tumbler Mug Course or found value in it, I'd appreciate it if you gave it a little love on social media!
Disclaimer: Please note that some of the links in this post may be affiliate links or ads. There is no additional cost to you, but The Scrap Room will earn a small commission should you choose to purchase through those links. Click here for my full disclaimer. Thank you for your support.
No matter what style of mug you decide to use, you're going to need most of the same supplies. Keep in mind that larger mugs will use more supplies than smaller ones. You may also need to adjust the size of the decal you use. On the skinny tumblers, I kept decals under 3 inches long. On the other mugs, most of the decals are 3.5" - 4". Depending on the decal you choose, you may need to adjust things accordingly.
I've used a few different tumblers throughout this course, and you can also use this same process on ceramic mugs, wine glasses and other glassware of your choosing too!
Here are the supplies that you will need for this project:
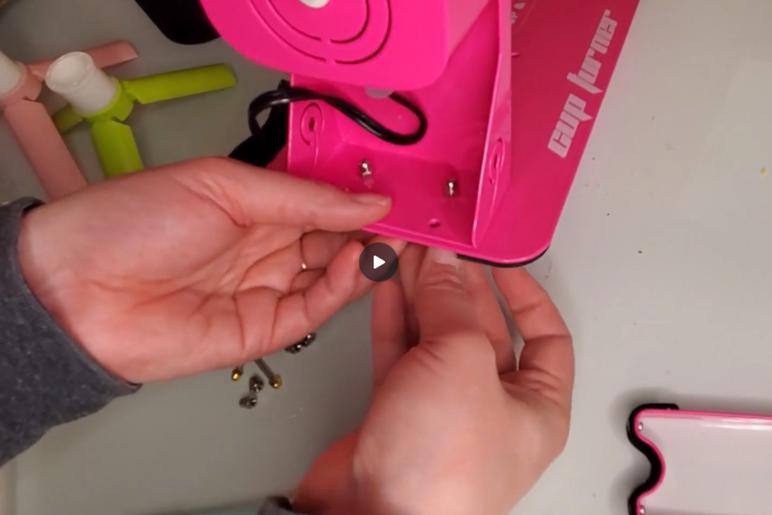
Mug Turner - This is the (updated version of) the one I used by LFSUM. It was inexpensive, came with some extras, and works great!
Silicone Craft Mat - An easy to clean up way to protect your workspace. I bought this inexpensive duo and they've held up great -- I've used them for so many craft projects!
Mugs - I used a couple 20 oz skinny tumblers and few different shorter wider 20 oz mugs. If you can find powder coated mugs, your first coat will be a little easier to put on, but you can use mugs that are not powder coated as well. This was my favorite choice for mugs, and they have loads of color options to choose from!
NON-TOXIC Acrylic Resin - This is the one I used in the video, but I've actually since switched to ArtResins' resin, because like Unicone's it's BPA free and non-toxic, but unlike it, ArtResin has actually been approved by the FDA to be used with food items, so it's the one I recommend. You can find it on Amazon here. It's virtually odor free and is completely non-toxic, so you can use it inside no worries -- just crack a window or turn on a fan to be "extra" safe. ;)
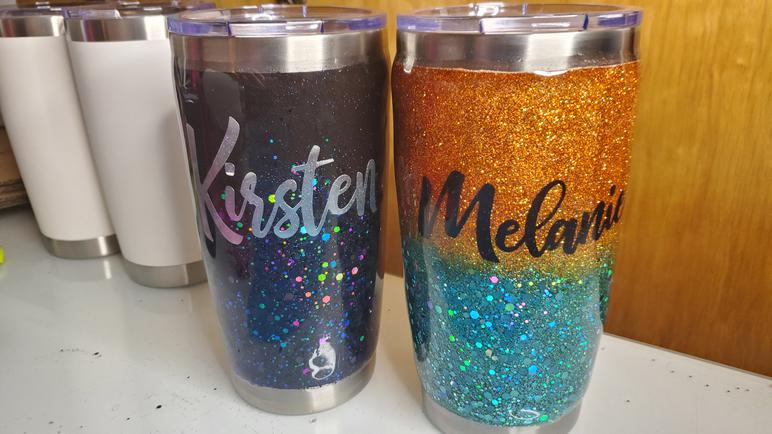
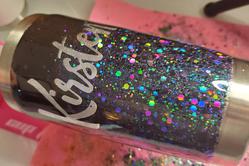
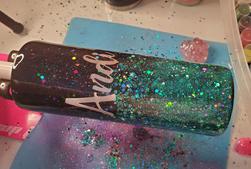
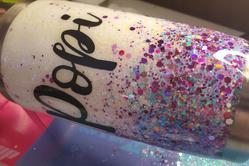
Glitter - I used a combination of chunky hexagon glitter, as well as super fine glitter. And because I know people will ask, because I get this question a LOT, the glitter on the "Kirsten" mug is black. The bigger pieces of black glitter look like a rainbow in the right lighting. I just love it -- out of all the mugs I did, the black ones had to be my favorites, and I've gotten so many comments from people on them. <3
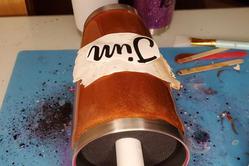
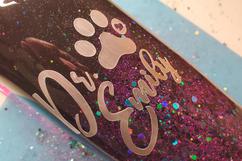
Mica Powder (for the non glitter mugs) - This is the blue I used for the "Nycole" Mug, and this is the set I got the orange in for the "Jim" mug
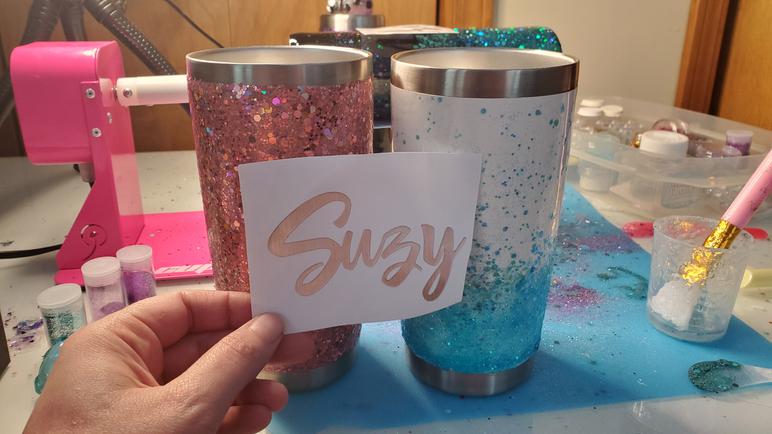
Vinyl Decal adhesive backed paper - for cutting decals for your mugs. This is the black one I used in the tutorials, and this is the brushed silver.
Electronic cutting machine - (optional) to use to electronically cut out SVG / EPS designs to use on your mugs. I used a Cricut Explore Air 2. Otherwise you'll need to cut your decals out with an old fashioned craft knife, or purchase them already cut out from your favorite supply shop.
The Font I used to create the text on this series of named mugs is called Bhatoshine, and can be found and purchased through Fontbundles.net, here.
Safety Gear:
Protective gloves ✔
Safety glasses ✔
*Please note, the resin I recommend is non-toxic and safe to use, but it's very messy and sticky, and one can never be too careful. I always recommend you use gloves and protective eye wear to be safe.
If you *DO* happen to get resin on something like your hand, your tools, etc, just use a little jojoba oil to wipe it off before it dries. This is the one that I use. As long as the resin is still wet, this works almost every time. ;)
Supplies You'll Need

Resin Tumbler Mug Lessons
Thanks so much for stopping by my DIY Resin Tumbler Mug Online Course! I've created a bundle of 10 digital decal designs that you can use to decorate your handmade mugs -- click below to download a copy for free!
(Please note the files are zipped for easy download -- you'll need to extract them from the zipped folder to use them.)