You might
also enjoy...
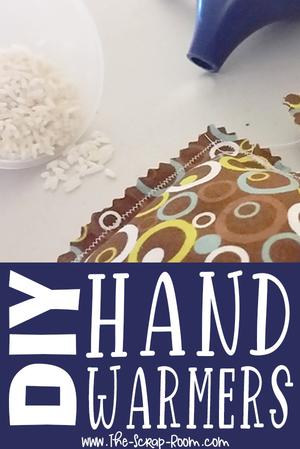
DIY Hand Warmers
This eco-friendly project is budget friendly and makes a great gift!
These hand warmers do nicely to keep pockets warm on walks and make great gifts for your friends and family! They are *GREAT* for using up FABRIC SCRAPS, don't take long to make and don't cost very much in supplies. You might even have everything you need already on hand!
SUPPLIES FOR THIS PROJECT:
-Fabric scraps measuring approx 3" x 3" (2 pieces per warmer)
-Rice or dried beans
-Pinking Shears
-Sewing Machine & thread (you can hand sew these too, but they'll take a little longer to make)
-Lavender Essential Oil (optional)
If you enjoyed my tutorial or found value in it, I'd appreciate it if you gave it a little love on social media!
Disclaimer: Please note that some of the links in this post may be affiliate links or ads. There is no additional cost to you, but The Scrap Room will earn a small commission should you choose to purchase through those links. Click here for my full disclaimer. Thank you for your support.


This is a project you'll want to remember for sure! Bookmark this page, and don't forget it! I've made SO MANY of these little guys over the years and they ALWAYS come in handy!
Whether as stocking stuffers at Christmas, Galentine gifts for pals, presents for coworkers, something for a walking buddy -- these little reusable warmers make a warm and useful gift!
These little warmers take almost no time to put together. You can make a big batch of them in an hour or so, no problem! I usually make a couple of extras to keep on hand for random last-minute gifts. ;)
But if you know who you're planning to give them to, you could even personalize them with some embroidery if you want! They would be so cute with monogrammed initials or other little designs!
You *could* buy special fabric for this project, but if you're a regular crafter, you may already have some scraps laying around. (I like store all of my fabric AND paper scraps in organized bins so I can easily find them for other projects, like this one!) Sort through your scraps and pick out some FABRIC! You'll need two 3" x 3" pieces per warmer (so 4 pieces per PAIR). I usually use a Post-It note as a quick guide when I'm making my squares.

| ||||||||

| ||||||||


Are you a CRAFT BLOGGER? Join my networking group here!

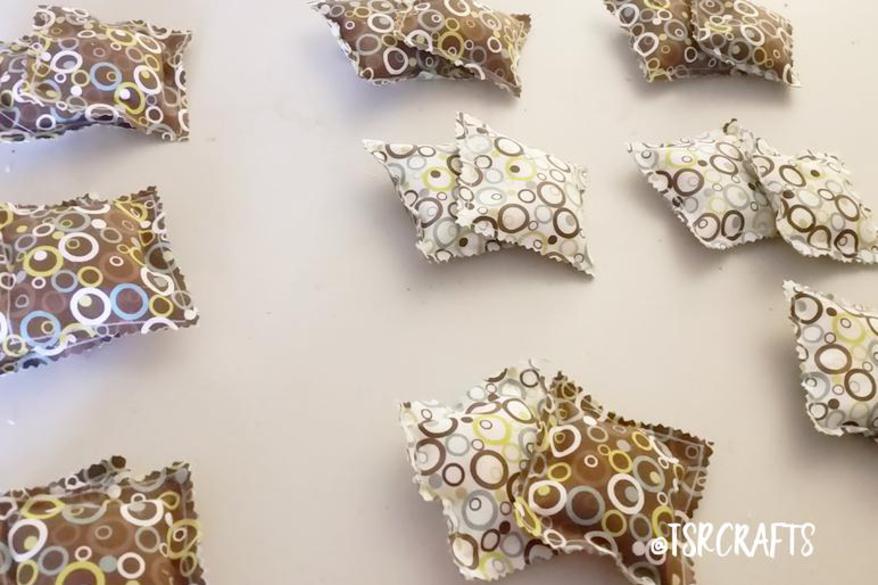
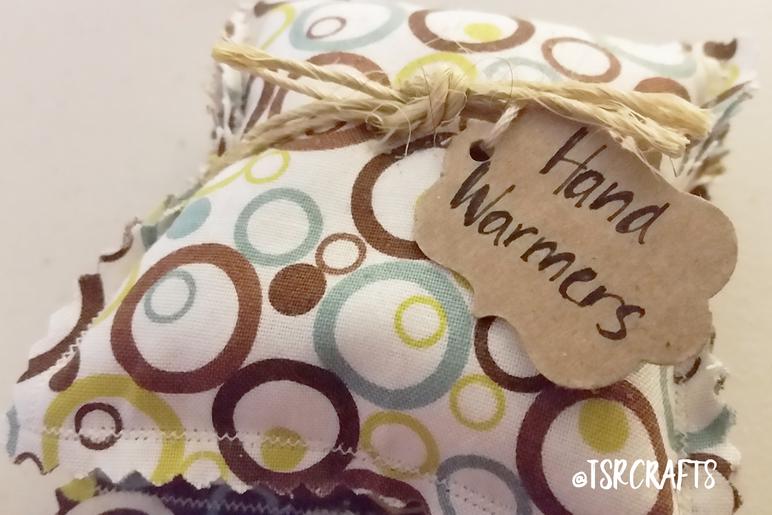
When you have a pair of warmers completed, simply tie them together with a bit of string or ribbon. EASY! EASY! EASY!
I like to add a handmade tag on mine with heating instructions. They don't need to cook long! (And *shouldn't* cook long!) To use them, heat them in the microwave on high for only about 15 -20 seconds (until warm, not hot!).
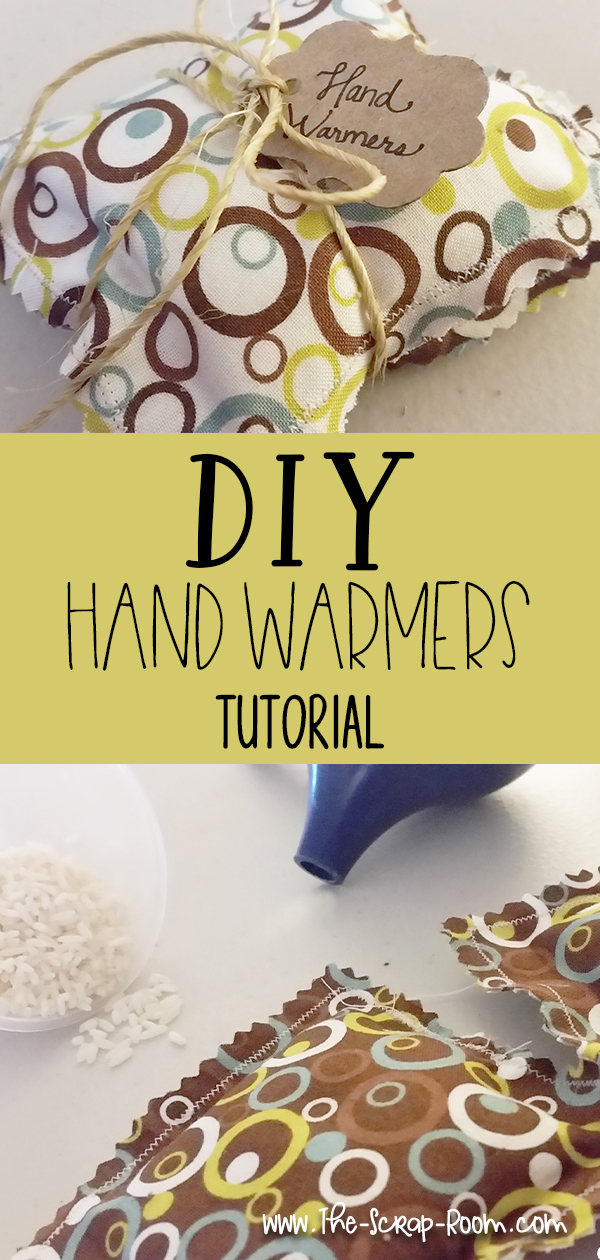
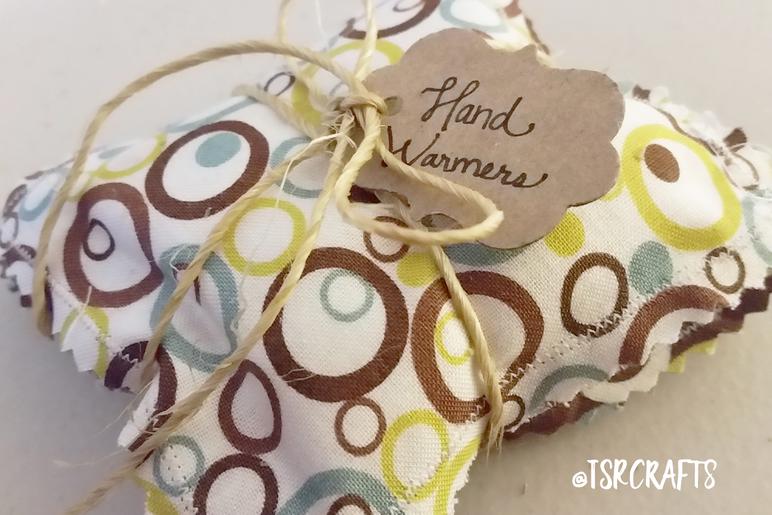
MAKE SURE THAT YOU CUT YOUR SQUARES WITH PINKING SHEARS! Since we're making these with a rough edge, we don't want them to FRAY. Pinking shears will help avoid this problem.
Once you've cut all the squares of fabric that you're going to need (you'll need 4 squares per PAIR of warmers) lay them out in sets to two, with the back side of the fabric pieces touching each other. (So the printed design is facing out on both sides.)
With the fabric pieces lined up carefully, sew a hem around about 90% of the edge of the warmer, leaving a hole about a half inch to an inch long. Use a funnel to carefully fill your warmer with uncooked rice or beans. Don't overfill the bag. You'll need to be able to hold it closed and sew it shut. BEFORE sewing it shut, add in a couple of drops of the essential oil (optional.)