You might
also enjoy...
Adding a Distressed Edge
to Your Printable Designs
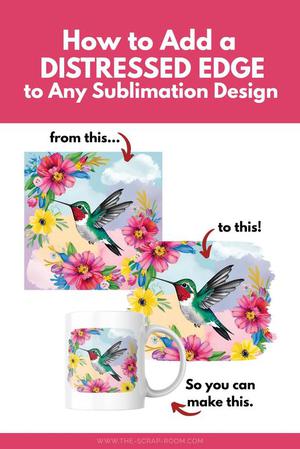
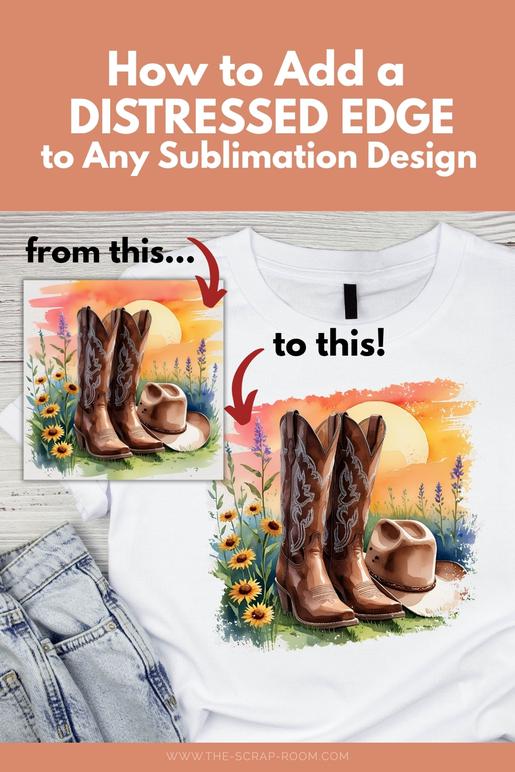
How to Add a Distressed Edge to Any Sublimation Design
Disclaimer: Please note that some of the links in this post may be affiliate links or ads. There is no additional cost to you, but The Scrap Room will earn a small commission should you choose to purchase through those links. Click here for my full disclaimer. Thank you for your support.


Why Add a Distressed Edge to Your Sublimation Design?
Here are a few reasons this technique is so helpful:
Blends your design more naturally with fabric or curved surfaces like mugs and tumblers.
Eliminates the harsh square edge that can feel too digital or boxed-in.
Lets you highlight your favorite parts of a square design by zooming in or cropping in a soft-edged shape.
Creates a handmade or bleached t-shirt look without needing bleach at all!
Adds depth and texture for more visual interest.
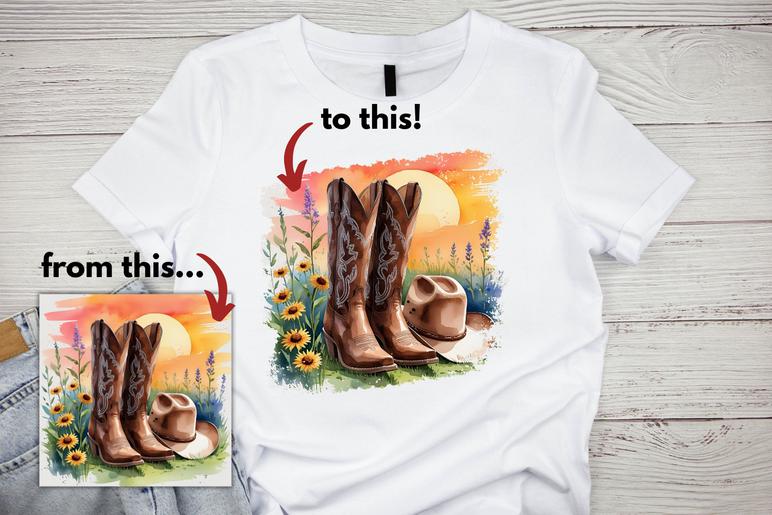
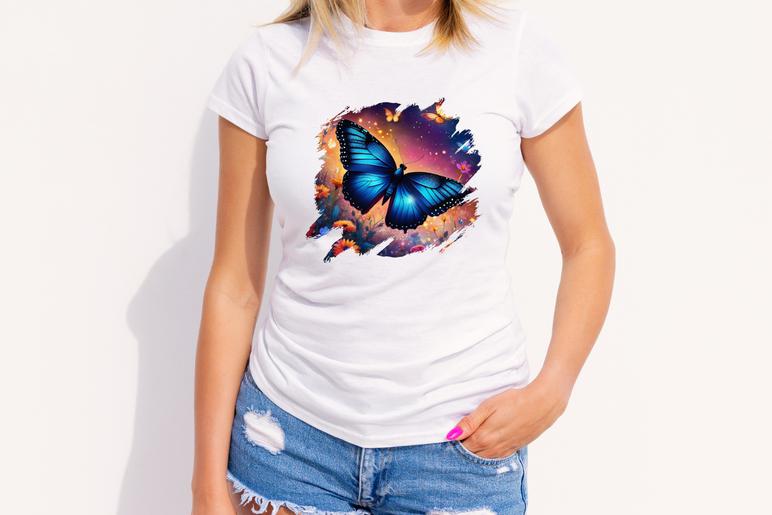
If you’ve ever printed a beautiful image on a shirt only to think, “Hmm, it looks like I slapped a square sticker on it,” this is for you.
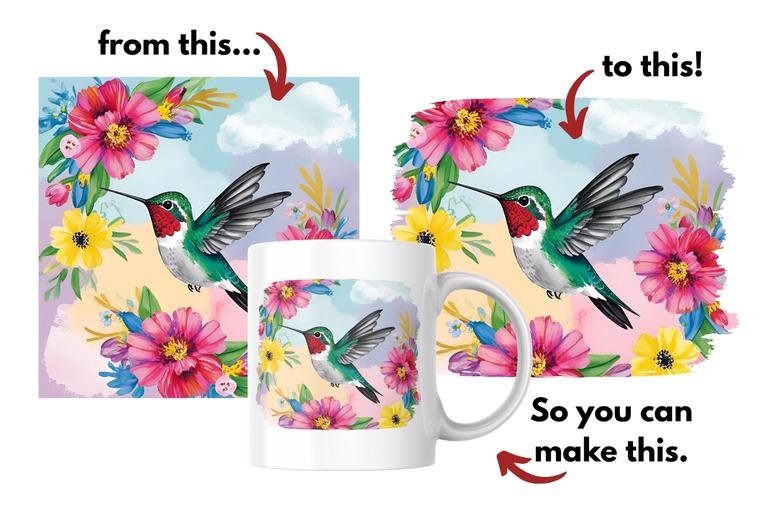


If you're a sublimation crafter just getting started—or even if you've been using printed images for a while—you've probably come across the problem of square, harsh-edged digital images that just don't look quite right on a tee, tote, mug, or tumbler. That clean-edged square design might look amazing in your folder... but once it's printed, it can feel a little stiff or generic, especially on soft fabric or rounded surfaces. That’s where this quick and easy technique comes in!
In this tutorial, I’m going to show you how to use Canva’s free design program to give ANY square digital image a more organic, distressed edge that looks handmade and flows better on your final project. Whether you’re working on sublimation t-shirts, tote bags, mugs, tumblers, socks, or even earrings and keychains, this is an essential skill that will help your projects look more natural and professional.
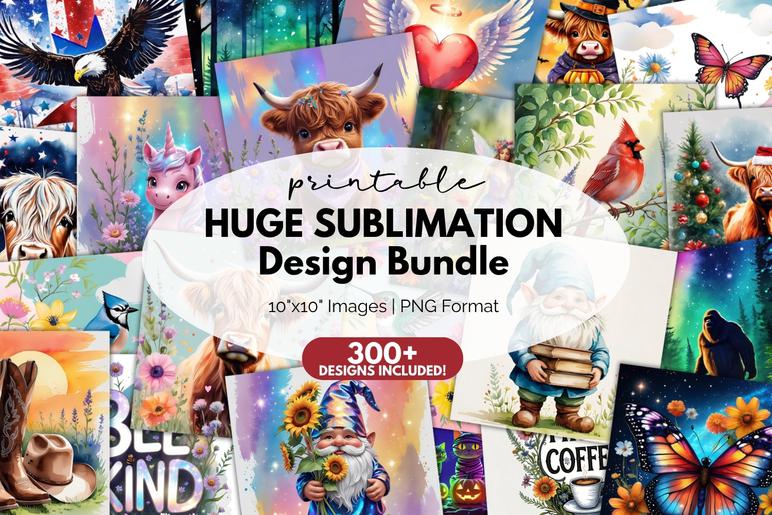
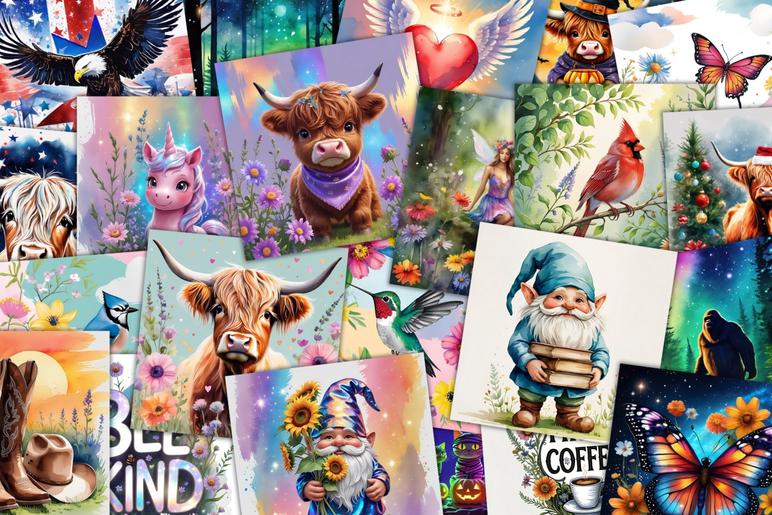
All of the designs I'm using in this tutorial are from my Huge Printable Sublimation Design Bundle, so if you love the looks I’m using, you can grab the whole set right here. It's a crazy good deal with over 300 high quality printable PNG designs in a wide variety of themes. Great for making all kinds of gifts and decor -- you can even use the designs to make handmade items that you sell, so be sure to add this amazing bundle to your collection!


What You'll Need:
A free Canva account (you can sign up at canva.com)
A square sublimation image or digital design (like one from my Huge Printable Sublimation Design Bundle!)
A distressed or grunge-style frame (Canva has a few free options, and I’ll also link to some frame sets I use from Design Bundles below)
It's SO Easy!
In this video below, I’ll guide you through the entire process step-by-step. First, I'll start with a brand-new design workspace in Canva's free design program and show you how to search for and insert a frame with a distressed or grunge-style edge. Then, I'll show you how to easily drag and drop your chosen image into that frame, making it look more organic and handmade. We’ll also walk through how to resize, reposition, or zoom in on your design so you can highlight your favorite parts. I'll cover how to download and save your new, customized image so it’s ready to print for your sublimation project too—whether that's a tee, tote, tumbler, mug, or something else creative!
Ready to see how simple it is? Watch my quick video below.
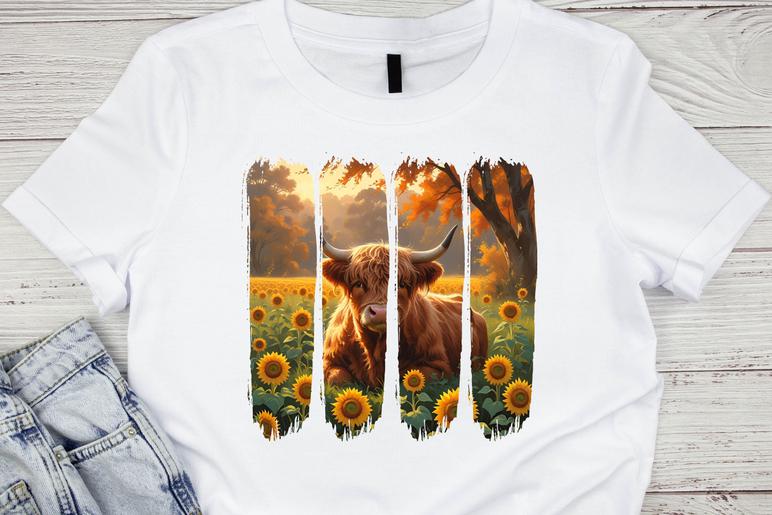
The Brushstroke Collage Frame
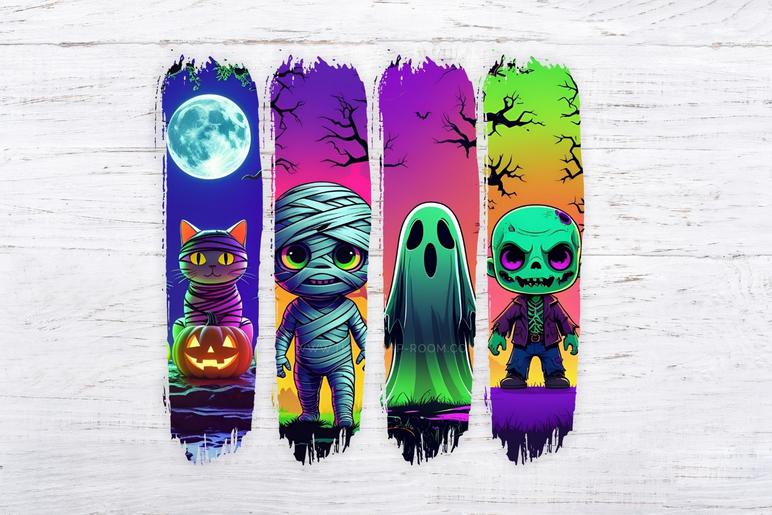
This frame that I've used in the pic above (and below) is one of my favorites. I splurged and signed up for the Design Bundles Plus Membership, and this frame set was one of the first downloads I got. I love it. It comes with 2 versions of this trendy brushstroke design. This one in the pic above is designed to drag and drop 1 picture into it, and it splits it up into these 4 vertical brushstroke designs. This trend is so popular right now, and this frame design makes it effortless to pull off! I love that it also comes with a 4 frame version as well, making it so easy to drag and drop 4 different pictures into it to make a really neat "collage" style image, like I've done to create the fun Halloween themed design below.
Both this Halloween and the Highland cow designs are in my Huge Printable Sublimation Bundle, so if you haven't picked up this set yet, be sure to check it out, or sign up to get the Autumn Highland Cow design for FREE, here.
Canva Frame Template with Bleach Effect
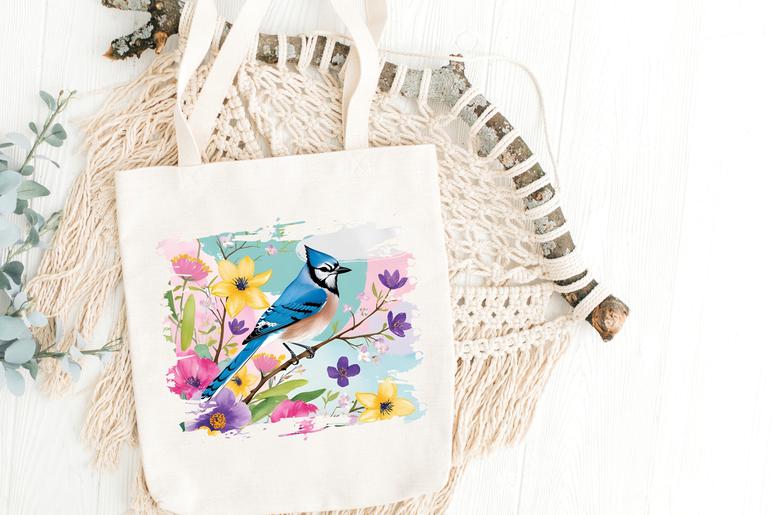
Another Canva frame design set that I scooped up with my Design Bundles Plus Membership was this fantastic bundle of "bleached" frame designs. (There's a LOT of great Canva frames available on Design Bundles, especially through their membership platform. It's definitely worth taking advantage of their free trial to get some awesome frames without it costing you a penny. You can always cancel the membership if you don't want to keep it.) This bundle comes with 8 different really great distressed frames to choose from, like this one I've used to customize the blue jay design from my Huge Sublimation Bundle.
How to Use Your Purchased Canva Frames
These Canva frames are so easy to use. If you buy them from DesignBundles or some other online Market Place, you'll likely get a clickable PDF file for the download. To use the frame design, all you'll need to do is open the PDF file and click on the Canva Template Link within. That will pop up a page that lets you "create a new design" using the template, which should save the template to you Canva account to use freely over and over again. You can even copy/paste the frames into your other Canva workspaces, making it so easy to work with these frames and customize your sublimation designs to your heart's content.
Where to Get the Best Distressed Frames
Canva has several different organic looking frames to choose from, but if you want some more options, pop over to Design Bundles -- there are a lot of designers who've made some pretty neat drag-and-drop style frames that you can buy to use in Canva.
I've picked up several of them and below are a few of my favorites. (Note: all the designs used in the frames are from my Huge Printable Sublimation Bundle and are not included with the frame designs, which can be found separately over on Design Bundles. I'll be sure to include the links below.)
Canva Heart Frame Template with Bleach Effect
This Canva template that I found over on Design Bundles is so sweet! It incorporates a heart shape, with the popular bleached/distressed edge effect, and is perfect for making shirts, gifts, decor, and accessories with a love them. I love the organic feel of the softer edges, and it's perfect for making memorial gifts, awareness designs, or just great designs featuring images of things you love. It's another great Canva frame design to add to your design collection, and you can grab it with a Design Bundles Plus membership, here.
Why I Leave My Designs as Square PNGs
If you’ve ever wondered why my sublimation designs come as full square PNGs, it’s because:
A full square gives maximum flexibility. You can zoom in on part of the image, crop it into any shape, or use the whole thing!
You can customize it for your specific blank—whether that’s a t-shirt or a set of socks—without being locked into one format.
Pairing my square designs with this distressing technique means you get the best of both worlds: freedom AND a polished, organic look.
By learning this simple method, you’ll be able to make the most of every square design you download from my shop (or anywhere else!).
Grab My Huge Printable Sublimation Design Bundle!
If you loved the designs used in the tutorial, you can find them all in my Huge Printable Sublimation Design Bundle. It’s packed with fun, colorful, high-resolution PNGs perfect for tees, tumblers, mugs, socks, and so much more.
These designs are versatile, beginner-friendly, and made to play nicely with this exact technique!