You might
also enjoy...
Your Complete Guide to
Making Soy Wax Candles
Inexpensive, long burning candles for decorating your home, giving as gifts, and re
supplying your emergency kit
Disclaimer: Please note that some of the links in this post may be affiliate links or ads. There is no additional cost to you, but The Scrap Room will earn a small commission should you choose to purchase through those links. Click here for my full disclaimer. Thank you for your support.


Anyone who knows me knows that I’m a complete pack rat when it comes to craft supplies. There are so many projects I want to do, and I’m always on the hunt. If I had to pay full price for new supplies all the time, I’d go broke. So when I find free things I know I can use, I try to keep them organized and safely stashed for a day when they are needed.


These Natural Soy Wax candles are so easy to make! Excellent gifts for friends or family, décor for your own home, or survival candles for your emergency kit, the possibilities are endless! This tutorial will give you the foundation you need to start making candles right away, and is full of tips and tricks even the more advanced candle maker can
appreciate.


For this project you will need:
-Upcycled Jars, tins, or other heat safe containers
-Candle dye block melts (optional)
-Hot glue gun and glue
I have meant to write this tutorial so many times over, but I found I liked making them so much, I always had my next candle project close on the horizon, and I kept telling myself “I’ll write it after I make THOSE! They will turn out so cute!”
So now, several hundred candles later, I’m finally sitting down to write about this project, nay hobby! (That said, my next candle project is one I’m so excited for! I have the honor of throwing a tea party wedding shower for a very dear friend in a couple of months and I’m making some decoupaged Jane Austen themed votive candles to share as favor gifts. They’ll be made with pages from all of Austen’s popular novels, and have either a Jane silhouette or a die cut window on the front.)

Jars are something I especially hoard. Although we have recycle pick up at our house, they do not pick up glass. Whenever I come across an empty jar that I decide *might* be useful, I add it to my empty jar stash. This not only repurposes the jars, it helps limit my drives to the recycling center and provides me with free crafting supplies so it’s a win-win…win! I also save jars from any store-bought candles given to me as gifts. Did you know that you can put them in the freezer for several minutes, and the small amount of remaining wax will just pop out? With a little time and effort, they will look brand new once more! If they have a label on them, soak them in warm soapy water for 10 or 15 minutes and scrape the labels off. I bought a metal grill spatula just for this purpose. It has a nice handle to grab, is sturdy and does a good job, and isn’t as sharp and dangerous as using say, a razor blade. Make sure you
don’t use any jars that have any cracks in them. Not only can they leak when the wax melts, but the temperature change can worsen the crack, creating a bigger problem. So be sure to inspect all jars carefully before upcycling them into candles.

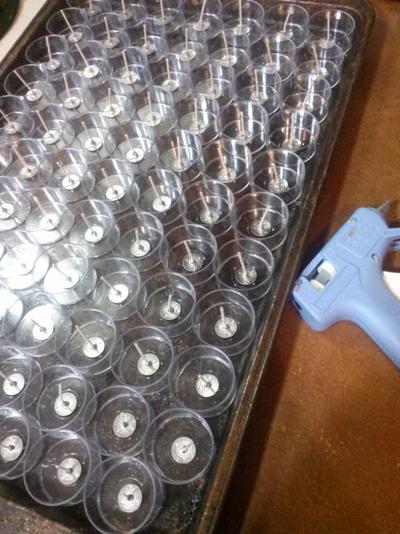
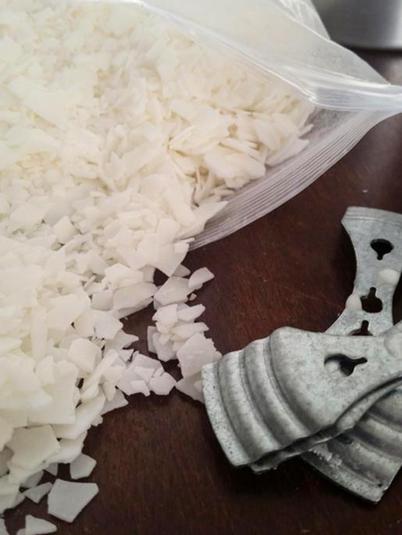
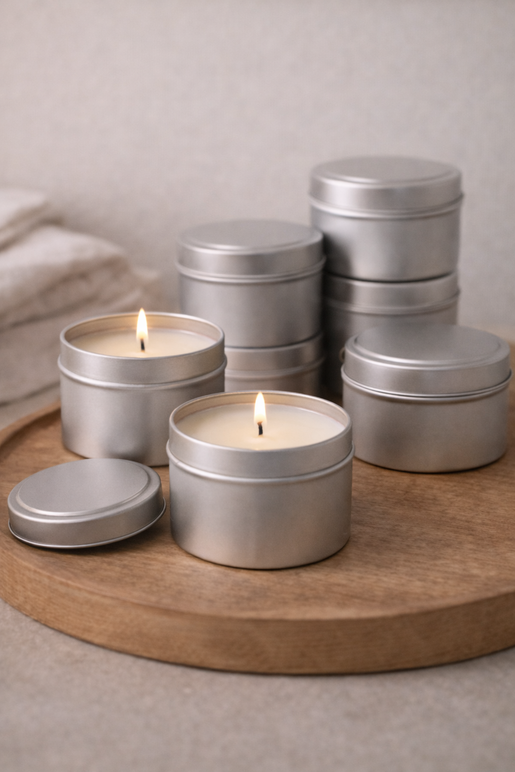
I’ve found that many tins I have come across and wanted to upcycle into candles, are not as tightly sealed as I might think! I use E6000 to form a tighter seal over any seams – just in case! Specific candle making tins should be fine as-is, and won’t need any glue. The tins shown in the title page for this project and the photo above, are 6 oz CandleScience Candle Tins. They worked great and didn’t need any reinforcement! Test any tins you want to use out with water first, and thoroughly dry before using. When it comes to tealight cups, you have two choices – plastic or metal. I purchased the below set of clear plastic 100 tea light candle containers, with wicks for about $20 on Amazon.com and although I gifted half of them away, the other half I kept and have been able to reuse several times over. I also buy the metal tealight cups. I personally think the plastic are prettier, but they don’t do as well in enclosed containers, and can get too hot and warp. They work better in candle holders with a more open style to them. The metal cups can withstand hotter temperatures and are often half the price, but can be difficult to find -- I buy mine on Amazon.com, where a bag of 100 will run you around $10. If you just need the tea light wicks and metal tabs, these are the ones I usually buy when I want to reuse tea light containers.

I started out with pre-tabbed natural candle wicks, and shifted to a roll of braided wick and tabs separately to see if I could cut costs at all, but quickly went back to the pre-tabbed wicks. I still purchase separate tabs (I’ll go into that in a minute) but I just like the pre-waxed, low smoke, slow burning wicks better, and they were much easier to work with. Most of the candles that I make are medium sized, and under 6” so that is the size wicks I buy. I end up with a lot of pieces that I set aside for later.
Keep in mind when you purchase your supplies that there are different thicknesses when it comes to wicks. Buy the right size wick for the project you are working on. If you try to use a small wick for a large candle, you’ll find the wax won’t melt well, and you can end up with a tealight width hole down through your candle. It will eventually snuff itself out from lack of oxygen. If you use a large wick for a small candle, it can melt the candle down too quickly and even make the jar or other heat safe container your candle is in extremely hot, and if plastic, possibly melt. Save the wick scraps from your candle projects and buy additional wick tabs. It’s very easy to feed the end of the wick through the hole on the tab and pinch it closed with some needle nosed pliers. You can use all these extra bits on more candles! Even scraps as small as about an inch can be used to make tealights, so waste-not, want-not!

If your budget allows, spend the money to invest in some metal candle wick centering devices. I bought a pack of four after I made my first couple batches of candles and they are very helpful. But I find I often make more than four at a time so you’ll see in my pictures some of my alternative wick centering methods that I’ve used when I’ve run out. My favorite is the wooden clothes pin method, but I’ve also used pens, popsicle sticks, hair clips and other similar items. If you’re using a non-waxed wick, you can simply wrap the end a couple of times around the middle of a pencil and balance the pencil across the opening of the candle holder. (You won’t need to do this if you’re only making tealights using pre-waxed and tabbed wicks.)
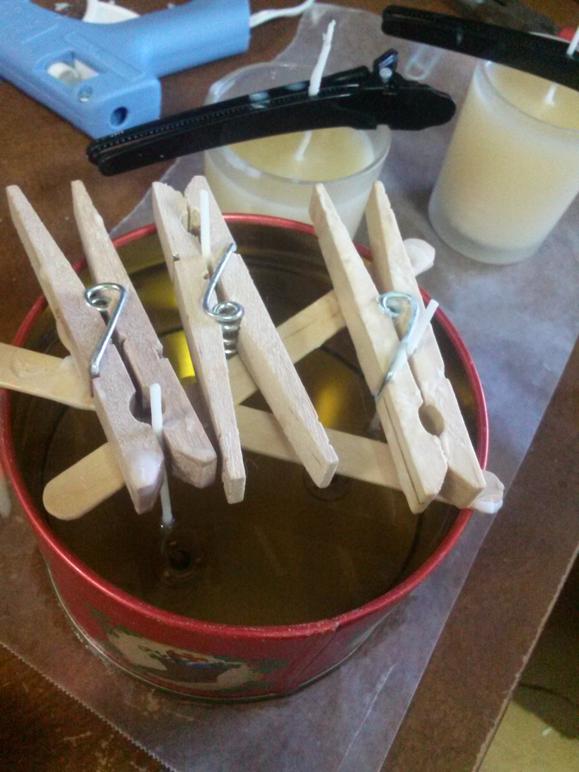

You’re also going to need a way to secure the wicks in place from the bottom. Once you add the hot wax, they will want to move. You can either weigh them down or adhere them into place. I prefer to adhere them. If I’m just making a couple of candles, I usually use Glue Dots. They are convenient, fast, and from what I’ve seen, hold best. They hold so well in fact, that my only gripe is that they are a little harder to clean off when you re-use the container to make more candles! My usual method to adhere the wick tabs to the bottom of the candle container is good old fashioned Hot Glue. Quick, simple, and inexpensive. For medium and large containers, I use my trusty needle nosed pliers to reach in and place the glued tab in the center.
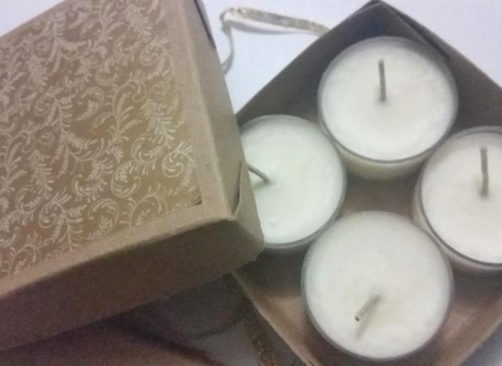
When it comes to wax, I buy Natural Soy Wax in 10 pound bags on Amazon.com, and go through about 20-30 pounds a year. I enjoy burning candles in my home and they always make great gifts, especially when you just need something small and thoughtful. Each pound of wax will yield about 20 tealight candles.
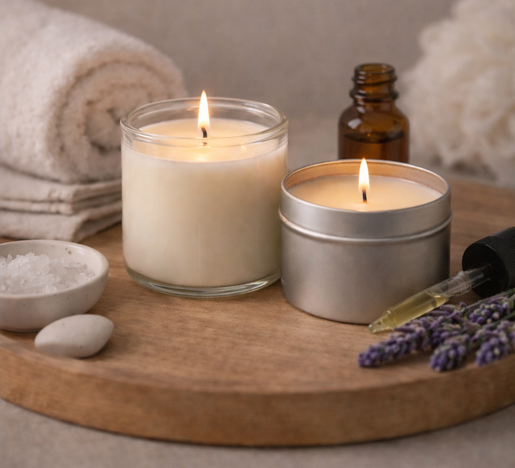
I keep a variety of premium fragrance oils on hand – I use these for a handful of projects. My very favorite candle scent is Mulberry, but I also keep lavender, holiday and seasonal variety packs, citronella (yes, I even make candles for my mosquitos!) and several other scents on hand. Plan ahead and watch for sales on this stuff! The fragrance oils are definitely the most expensive part of this project! Depending on what scent you choose you’ll usually pay anywhere from $2-6 an ounce. I usually use about 1 ounce of fragrance for each pound of wax. If you like stronger smelling candles, you may want to put in a little closer to 1.5 ounces, so plan accordingly when picking up your supplies. Better to have a little too much fragrance on hand then not enough. We have several projects on our blog you can use it up on! I also make unscented candles for our family’s emergency preparedness kit. A soy wax tealight candle can burn for about 8 hours! I save the metal tops from my screw top wine bottles too and pop out the small plastic seal to make extra tiny survival candles. These burn for several hours and cost almost nothing to make!

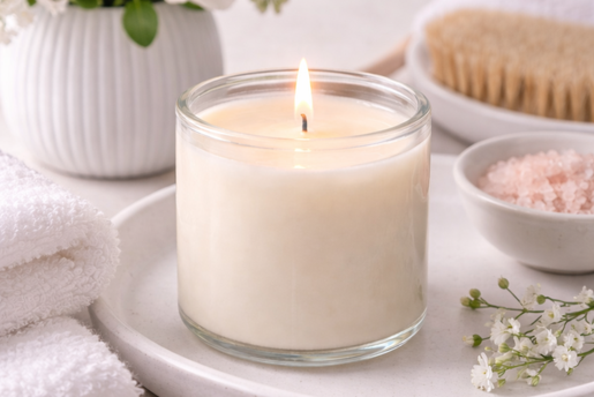
I personally don’t color my candles. Soy wax is a beautiful cream color, and it matches everything so I don’t spend the money or time on that step. It’s very easy to do though, and if you’d like to change the wax’s color, you can purchase dye blocks that you add in near the end of the candle-making process. You’ll definitely need a pot to melt your wax in and a thermometer for an accurate temperature reading. I use an inexpensive aluminum 4 pound capacity pouring pot. You can purchase more expensive warmers, but I like this simple pot that I can just set on low on my stove. A digital thermometer is an absolute must! Fragrance and color must be added at specific temperatures and if you pour your candles while the wax mixture is too hot, you can cause discoloration and air bubbles. Too cold and things won’t mix together and blend well. Lastly, wax paper makes for a quick and easy clean up. Lay some out under your work space to catch any spills!
When you’re ready to start your candles, begin by measuring your wax chips into your melting pot and heat the wax on LOW. You can also put the melting pot in a pan of water to heat is more evenly. You want to slowly melt the wax to avoid any discoloration. Keeping an eye on your melting wax, and giving it the occasional stir, prepare your candle containers. Adhere your tabbed wicks and arrange the containers so you can pour the wax into each one without moving any. Slowly, bring the temperature of the melting wax to between 170-180 degrees. When it’s reached this temperature, remove the melted wax from the heat and add your fragrance oil, stirring gently until it is well mixed. If you’re using colored dye chips, add them in according to the directions on the package – usually when the wax mixture is between 167-185 degrees Fahrenheit. Continue to stir the mixture gently until all is well combined.
If you pour the wax mixture into your candle containers too quickly or when it’s too hot, it can create air bubbles or become discolored. Wait until your mixture has cooled to around 100 degrees before pouring, very slowly, into your containers.
To further reduce the risk of air bubbles, don’t move your candles until they have completely cooled at room
temperature. If you try to speed things along by cooling them in the fridge, you will no doubt see some discoloration – not to mention air bubbles from moving them. 70 degrees is an ideal temperature to cool and solidify your candles. If you need to adjust your wicks after pouring, do so right away. It’s best to use centering devices for this so you don’t inadvertently create air bubbles or puckering in the wax when you adjust the wicks.
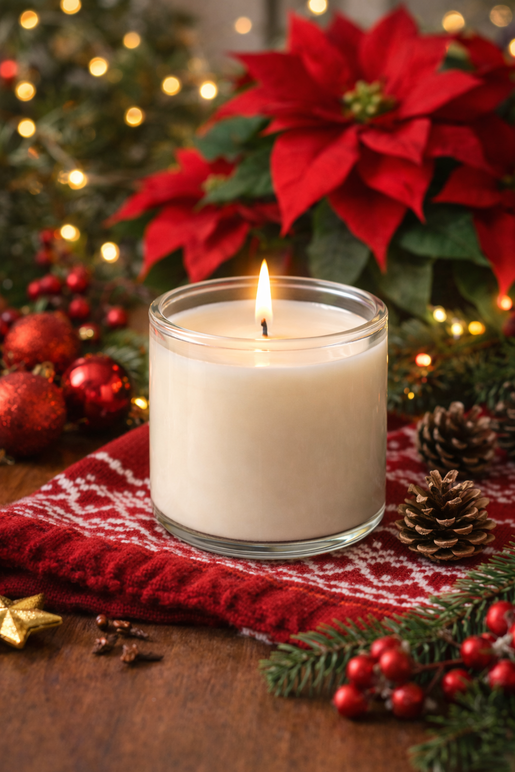
Leave your candles plain or decorate them with twine, ribbon, stickers or other embellishments. One of my favorite ways to decorate them is Mod Podging the outside of glass containers with book pages. I love how the pages glow! You can also wrap glass jars with decorative Washi Tape. I made a bunch for friends and family for Christmas last year and wrapped them in Cricut’s Anna’s Holiday Splendor Washi Sheets and they turned out amazing! They had the same effect of the glowing book pages but with a fraction of the work! I scented the candles using Candle Science’s Holiday Fragrance Sampler with Christmas Hearth, Blue Spruce, Mistletoe, and Amaretto Nog to make them feel extra festive.

Now to create your own custom sized box to store or gift your candles in …