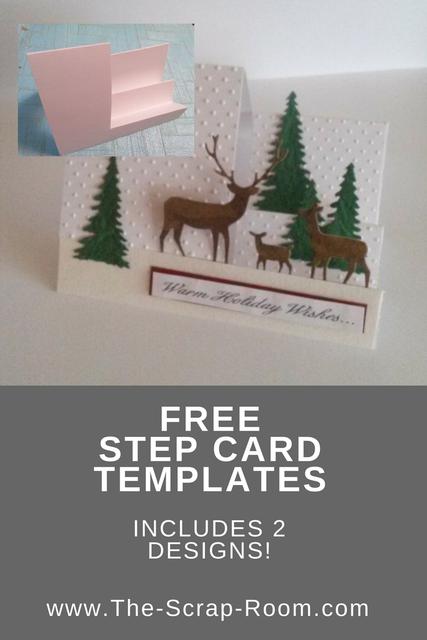
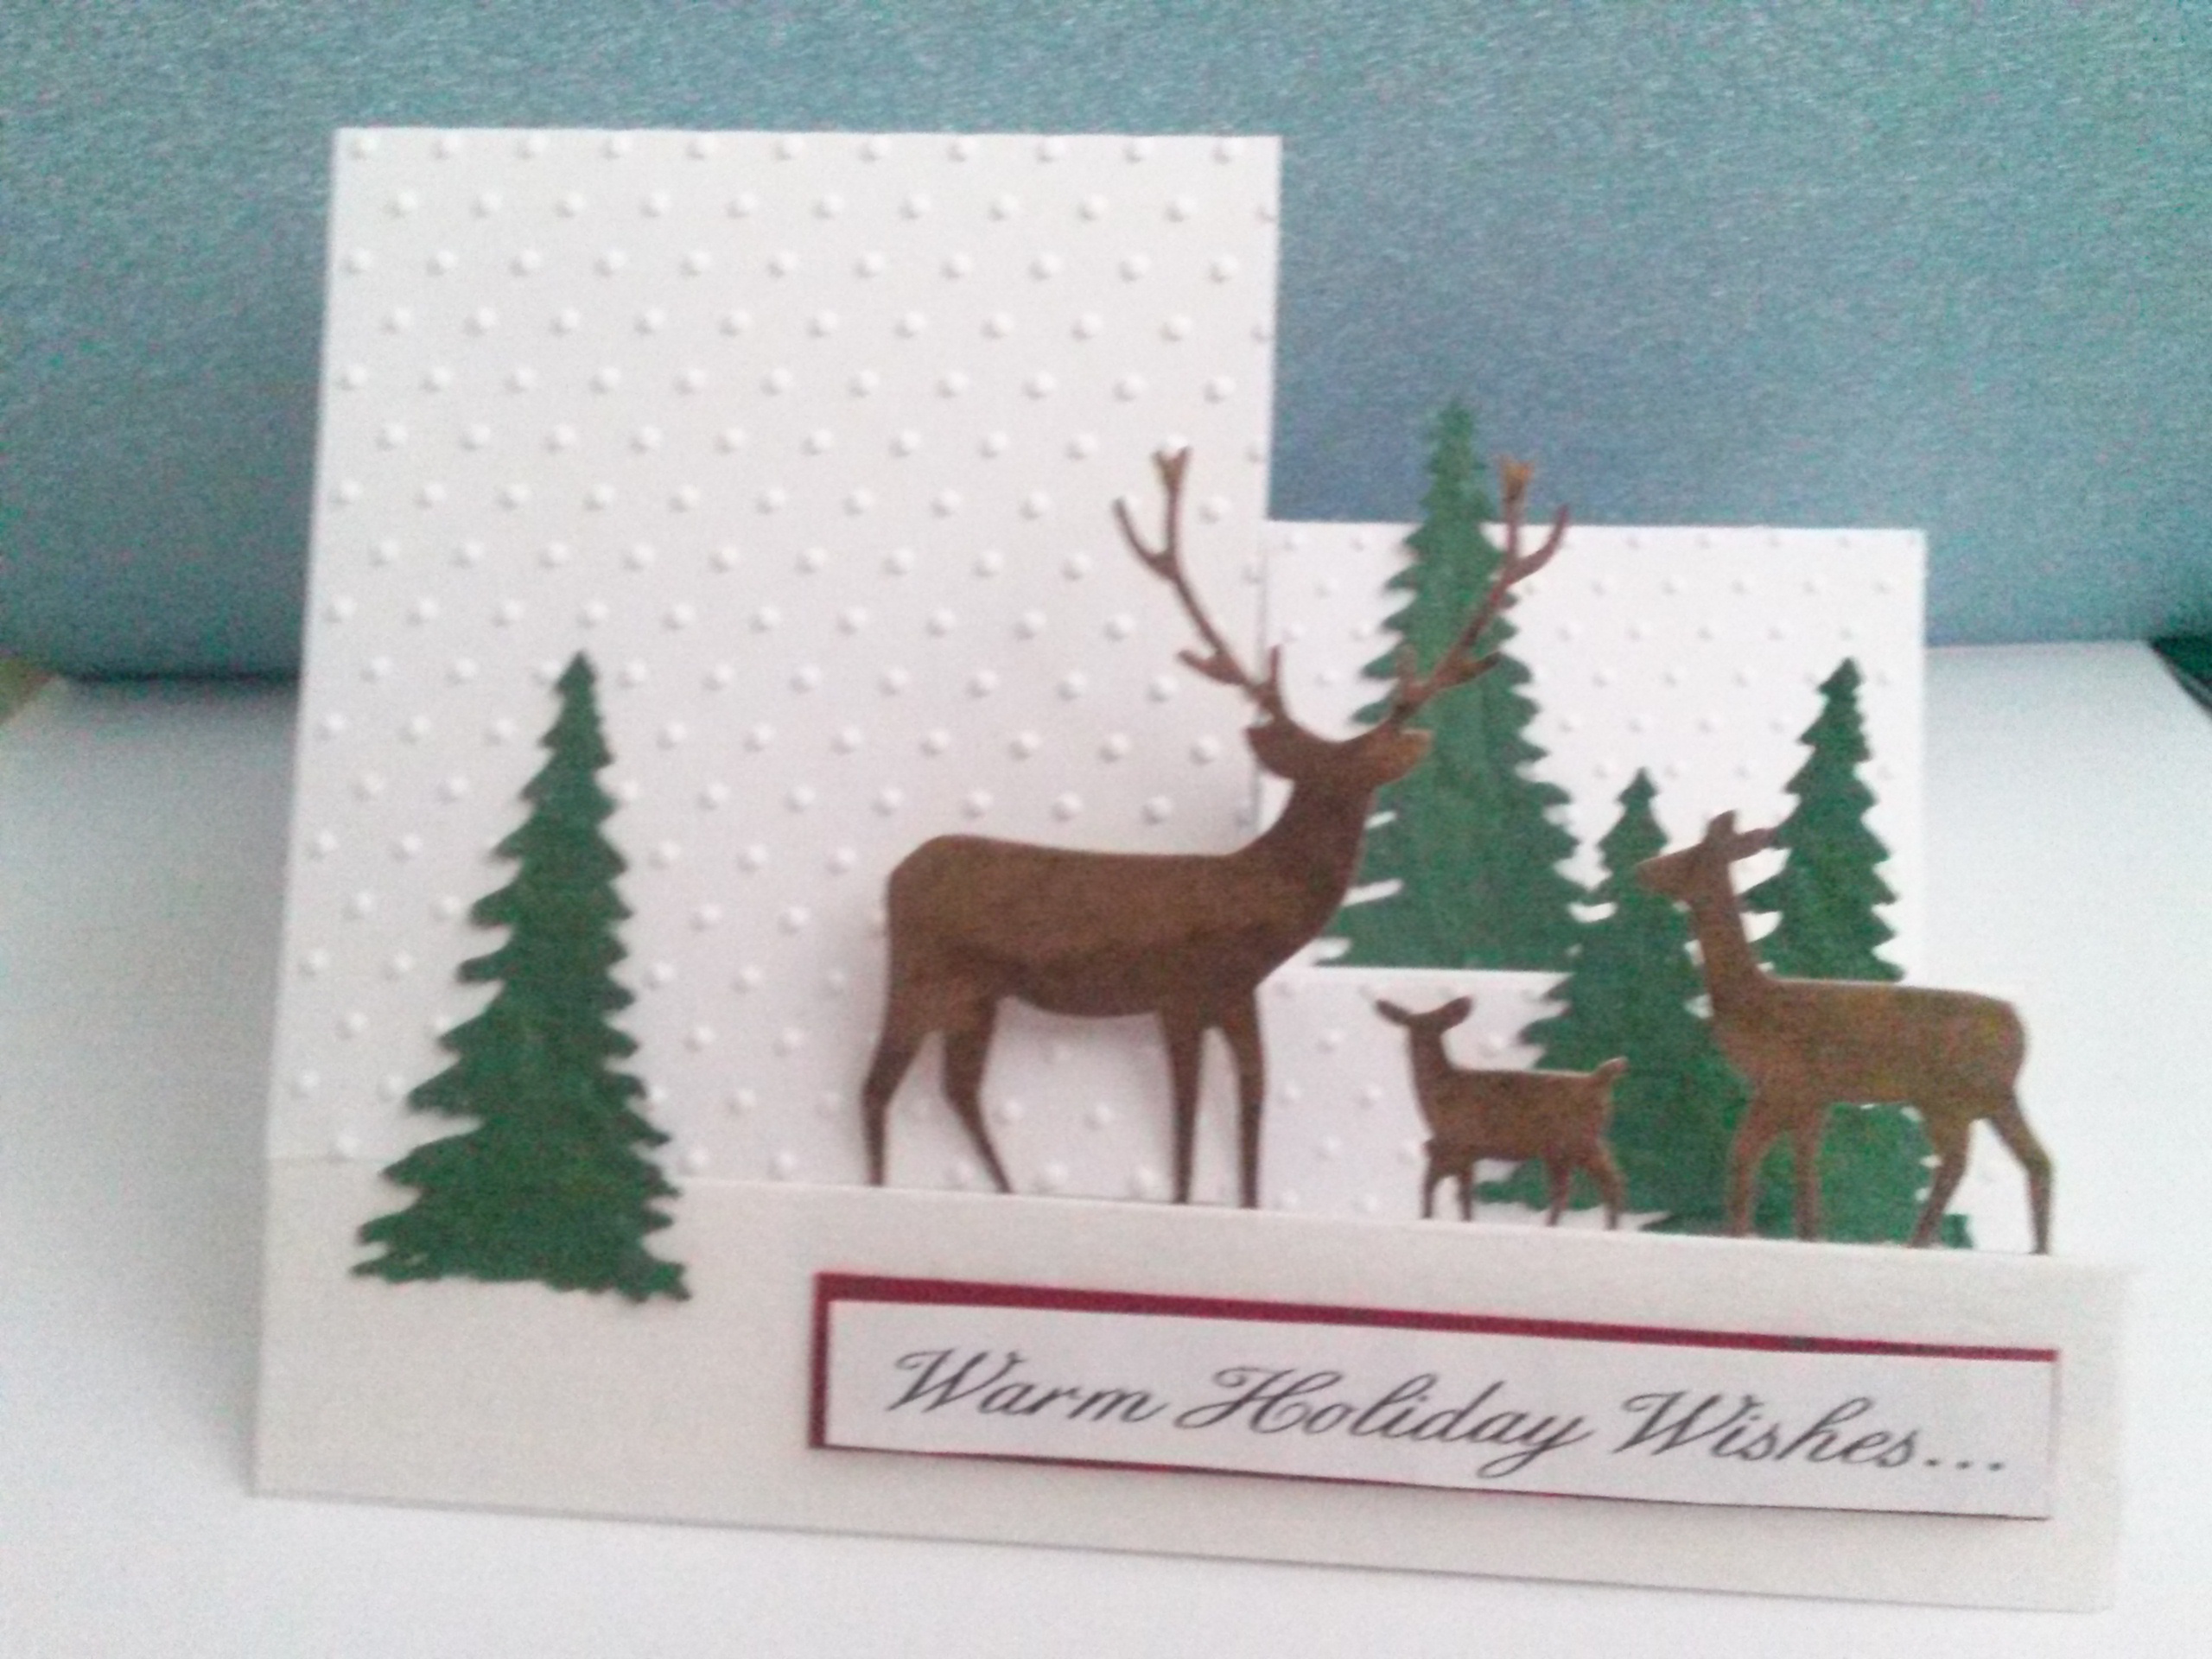
Deer Family
Holiday Step / Pop-Up Card
Add an extra layer of warmth to your holiday cards this year with these handmade pop-up / step cards!
Supplies and Materials:
-Cuttlebug or other embossing/die cutting machine
-Memory Box Dies:
-Small Dots embossing folder
-White, brown and green paper scraps to use for die cuts and background layers
-Sentiments stamp, or supplies to print or write your own
-Pop-Up Card Template (Sign up below to score your free templates!)
It's that time of year again! Time to fashion a holiday card to send out to your friends and family. Handmade cards don't have to take hours to create, and this is a simple, but effective card that you can mass produce to send out to everyone on your list. Cut and emboss your pieces first, then make an assembly line to put them together and each card will only take you about 5 minutes!
For each card you will need:
1 Trio of Deer die cut from brown cardstock
2 Sets of Evergreen Tree dies from green cardstock
1 1"x5 1/2" thick white cardstock (I used watercolor paper. It was not only a good thickness, but it had better texture for "snow" than plain cardstock.
1 1 1/8"x 2 3/4" white cardstock
1 2 1/8" x 2 3/4" white cardstock
1 3 1/4" x 2 3/4" white cardstock
Print out the Step Card Template (see above), and use it as a guide to create two step cards per 8.5"x11" piece of cardstock, or use blank A2 size cards.
If you're using a full 8.5"x11" piece of cardstock, begin by cutting the paper in half horizontally, and following the template.
This card is very easy to customize by sliding that "center", horizontal line a little to either side. You can also make either side of the front of the card pop out or have the folded layers, just switch which side you draw your folds with the stylus. (If you change the placement of the horizontal cut, you'll need to adjust your measurements on the pieces you've cut to layer over the blank card panels.)
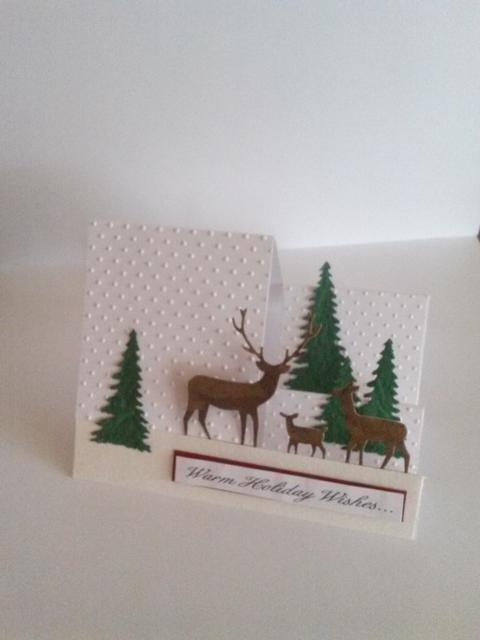
Set the 1"x5 1/2" white piece of paper aside and run all of the other smaller pieces of white cardstock through your embossing machine with the small dots embossing folder. It makes for an awesome "snowing" background! Add the small embossed pieces to the corresponding panels on your card.
Add the deer to your card. When you cut out the die using Memory Box's Deer Trio die, you'll see that there's a little border along the bottom holding the deer together. Leave about 1/2" or so of this border and glue the deer to the card by lining this border up with the top of the 1" border at the bottom of the card. Adhere the 1"x5 1/2" strip of heavy white paper over the top, concealing the brown border. This will allow the deer to appear to stand unaided. If the brown paper you used for the deer shows through, you may need to use a thicker white paper, or use two layers of white.
The Memory Box Evergreen Trees die cuts out 4 trees. I used 6 trees for each card, doubling up a couple of the trees to give a little more depth and dimension. Add a sentiment on the bottom border such as "Warm Holiday Wishes..." to finish it off.
This card could be customized so many ways! We'd love to see what you come up with. To share pictures of your creations, post them on our Facebook page here!
Example of blank folded card with cut slightly off centered.
Deer Friends and Family

You might
also enjoy...

Disclaimer: Please note that some of the links in this post are affiliate links. There is no additional cost to you, but The Scrap Room will earn a small commission should you choose to purchase through those links. Thank you for helping support our business!
Share this on
Pinterest!