Digital Graphics
Whether you're new to graphic art or have a little more experience, our tutorials will walk you through how to create and work with digital files to use in your digital scrapbooking and other digital design projects. Learn to turn your own doodles and drawings into scalable vector graphics that can be resized without distortion or even cut out on an svg compatible electronic cutting machine! You'll be making your own die cuts, creating digital layouts, and digitizing anything you can draw in no time!
Working with Digital Files-svg and png
You might
also enjoy...
What is an SVG? An SVG (Scalable Vector Graphic) is a XML-based vector image format for 2 dimensional images. That means that you can resize them without worrying about distortion and can print or cut them out on SVG compatible cutting machines such as those in the Cricut Explore Family, or use them to create digital projects on your computer!
With a Cricut Explore, you can use Cricut Design Space (FREE!!!) to upload svg files and print or cut them out with ease! Since it's a cloud-based program, you can design anywhere with your phone, tablet or computer and print or cut when it's convenient for you. Cricut also has a great selection of graphics you can purchase and download instantly. Sign up for Cricut Access for huge savings- Memberships start at only $4.99, and allow you unlimited usage of over 370 fonts as well as deep discounts and other perks!
You can also use your own original art and turn them into SVGs and PNGs! This really opens up a world of possibilities, as it enables you to create your own, custom die cuts and graphics.
Okay, ready? Let's learn how to MAKE one! This tutorial will teach you how to turn your artwork into BOTH SVG and PNG files, in a graphic design program that will cost you NOTHING!
PNG images (or "Portable Network Graphics") are compatible with most graphic design software and can be resized without becoming grainy as well. They also support a transparent background, allowing you to layer them with other graphics and text. These are the types of files that you'll likely use for digital scrapbooking and card making, or most other digital projects.
The process to make both PNG and SVG files is pretty much the same, you just need to save them differently. I recommend using Inkscape to digitize your art. It's FREE and pretty easy to use! Just visit www.Inkscape.org to download the program. The video tutorial below will walk you through all the steps for digitizing your basic drawings in Inkscape.
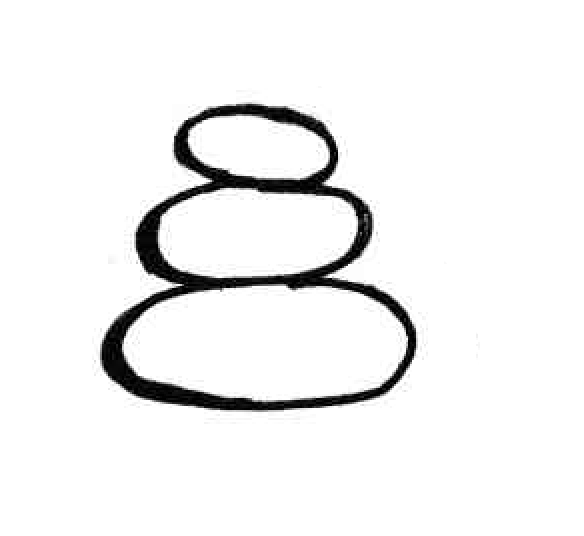
For this lesson we're just going to use a simple doodle or drawing. Use a dark pen and some white paper and get to drawing! Start out with some simple doodles, and make sure that your lines are thick and dark. I use at least a 0.4 mm pen when I'm planning to digitize my art. If you're planning on creating svg files to cut out on compatible electronic cutting machines, don't make your drawing too intricate, otherwise your machine might have a hard time cutting out the small details.
If you mess up your doodle -- say over draw a line or just don't like a part of it -- don't fret! When you go to digitize it, it will be a simple fix. No need to try to get your drawing perfect! Below is my crappy drawing of a cairn or rock stack. The "final" png version (on the blue background) is now a completely editable, re-sizable image. The original (on the left) was hand drawn at about 2 inches tall, while the digital version on the right is stretched across as 12" x 12" canvas with no distortion.
Once you've finished your masterpiece, scan it, or take a high resolution digital photograph of it, and upload it onto your computer. The video below will talk you through the rest of the process doodle-to-digital process.
Once you master digitizing your doodles and drawings, the sky is the limit! You can create your own custom, one-of-a-kind graphics and die cuts to use in all kinds of projects or even sell them online!
If you enjoyed our tutorial or found value in it, we'd love it if you'd give us a thumbs up or a share on Facebook or Pinterest!
Disclaimer: Please note that some of the links in this post are affiliate links. There is no additional cost to you, but The Scrap Room will earn a small commission should you choose to purchase through those links. Thank you for helping support our business!
