Airplane Diaper Cake
Decorative and useful baby shower decor for your next baby shower!
Planning a baby shower? This decorative diaper display is worth the time and effort! Learn how to make it using our step-by-step tutorial!
Looking for something a little easier? Try our Basic Diaper Cake HERE!

Thank you for your patience while we're updating our website!
Disclaimer: Please note that some of the links in this post are affiliate links. There is no additional cost to you, but I will earn a small commission should you choose to purchase through those links. Thank you for your support.
You Might
Also Enjoy:
Supplies and Materials:
-A Crafting buddy (optional). This project is easier with an extra set of hands!
-Yarn (Again amount will vary. We used probably around 30')
-Tissue paper (I buy mine in bulk on Amazon)
-Hot glue gun with several sticks of glue
-Box / Craft knife and scissors
-Clear tape (such as packing tape)
Optional Extra
Decorating Supplies:
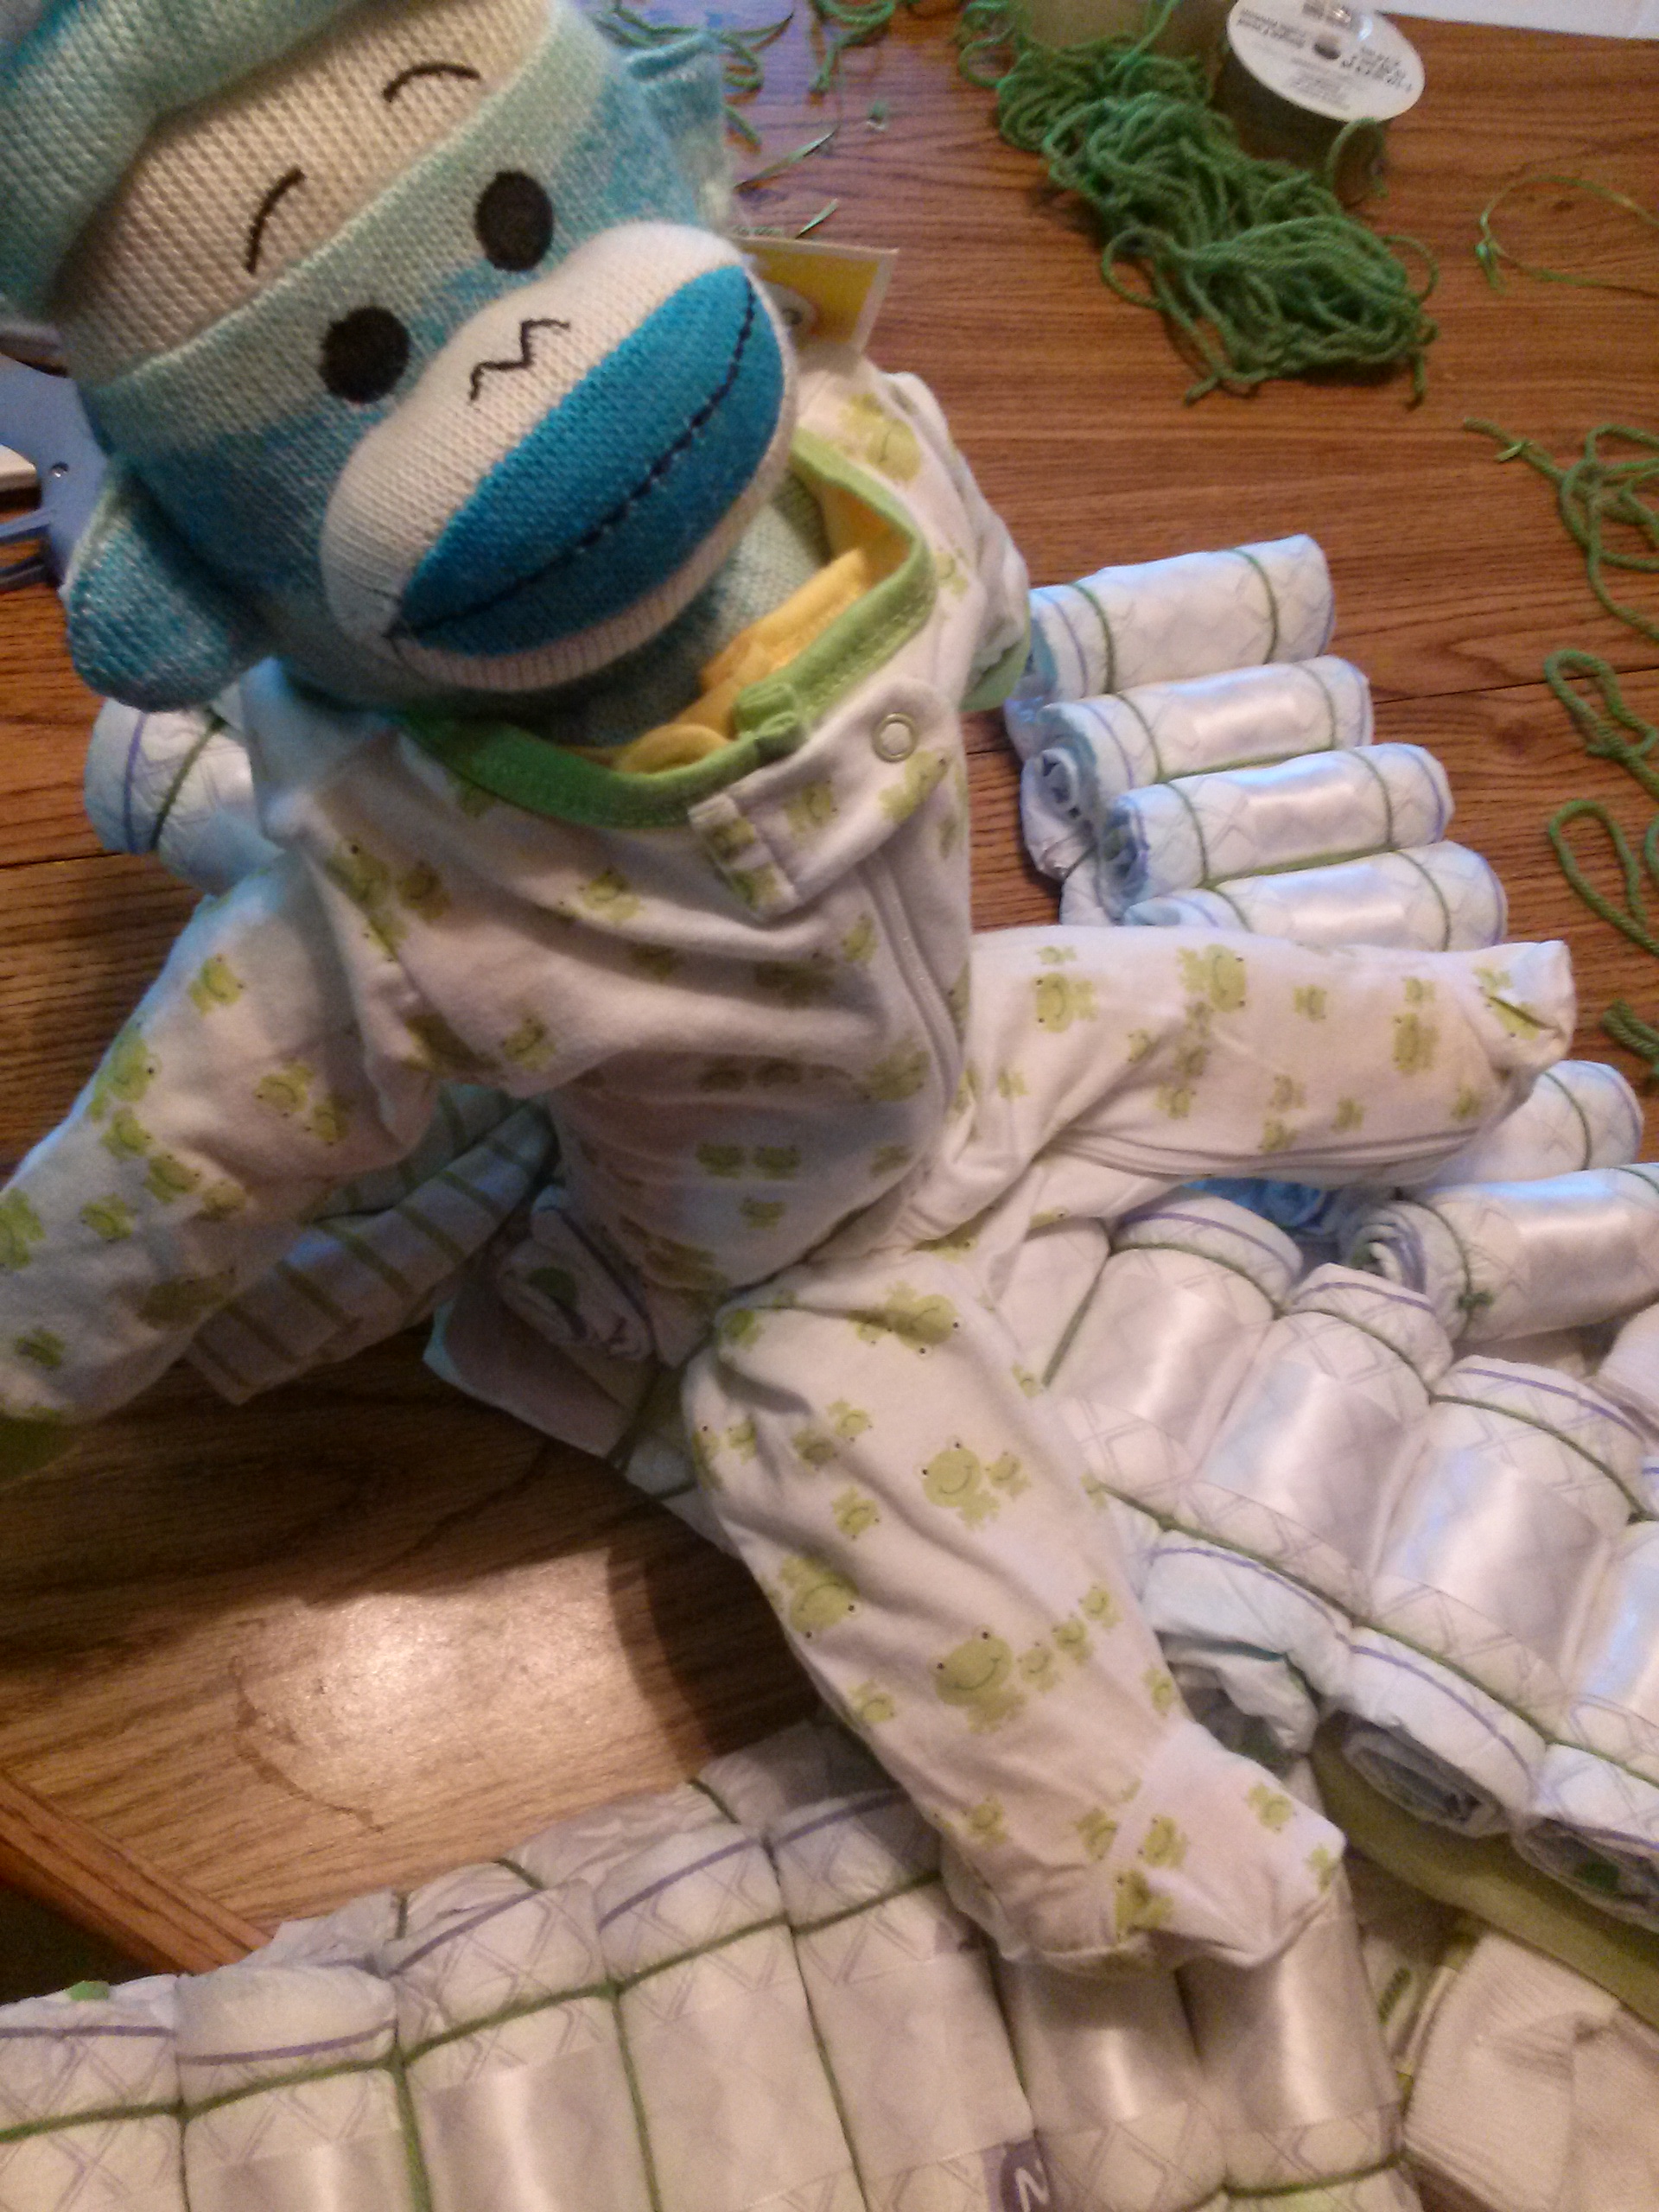
-Sock monkey or other stuffed animal of your choice. (Preferably with long legs or some other way to help conceal his seatbelt -- aka yarn ;) )
This project requires time and patience, so if you're short of either, consider hiring a professional. Our Diaper Cakes start at around $75 and are completely customizable. Send us an email today to start designing one for your next shower!
This custom B1 Bomber diaper cake was made for an Air Force family, but you could easily modify the shape of the wings to create an airplane with a different look.
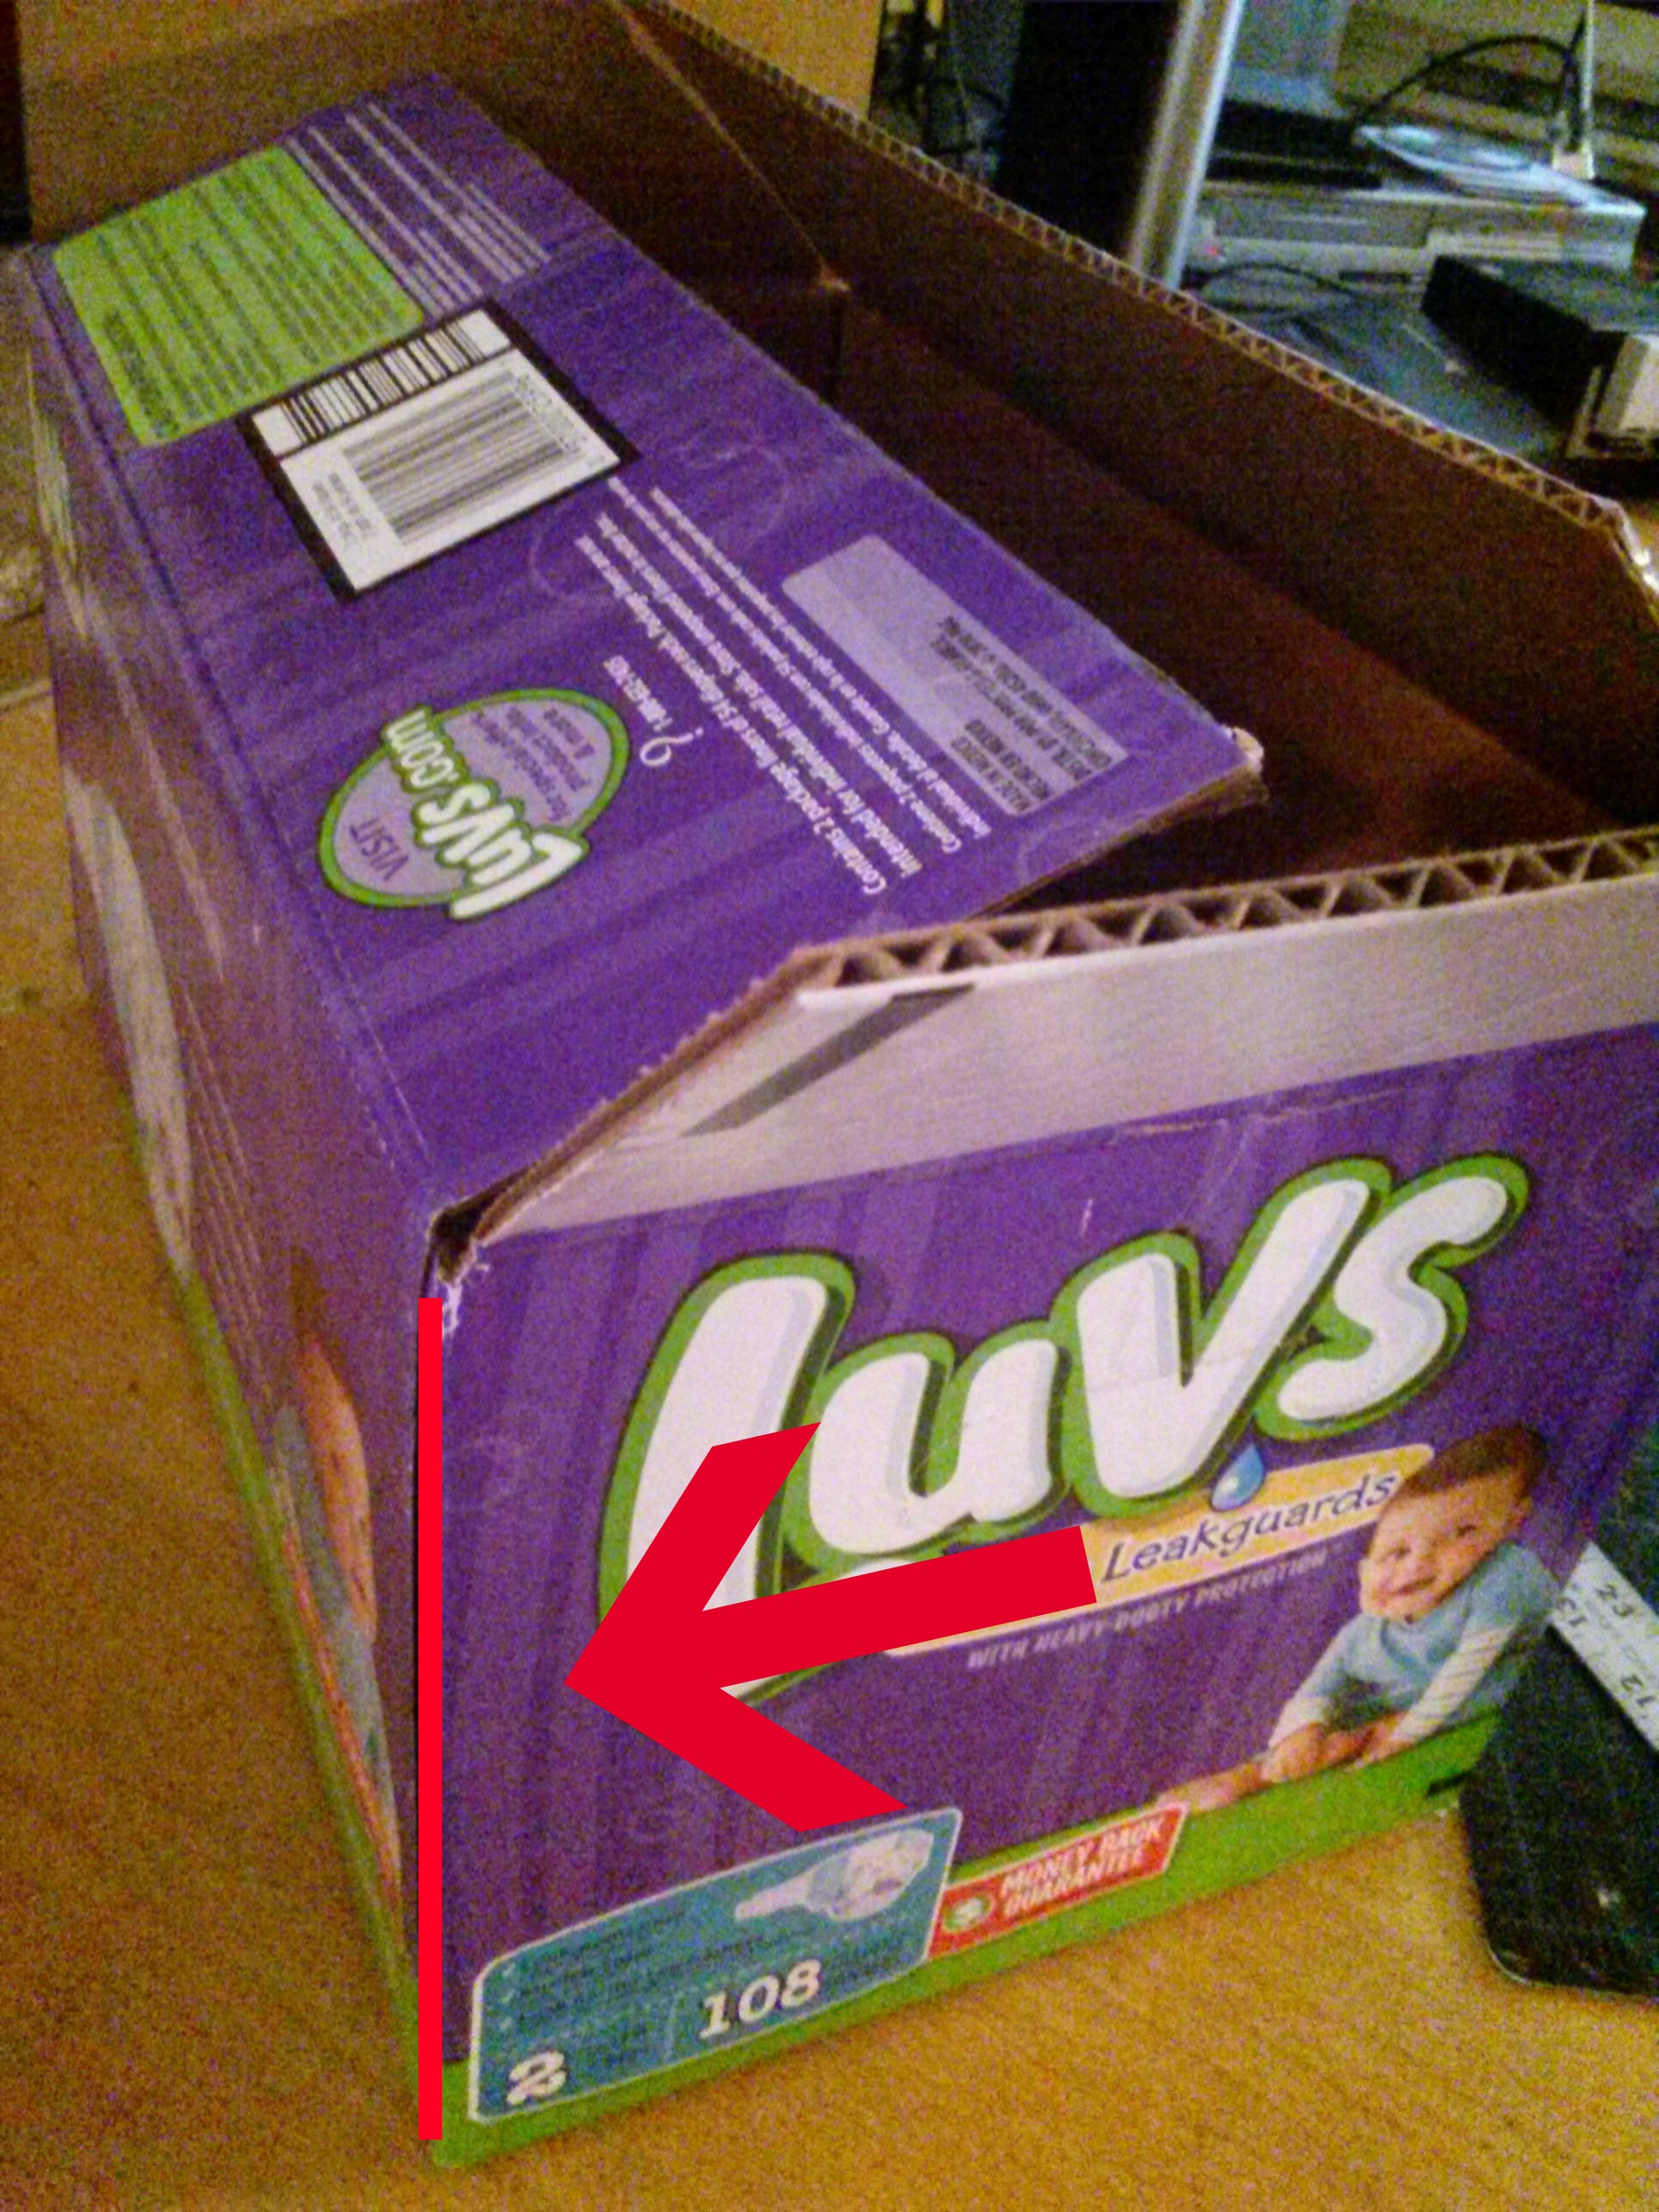
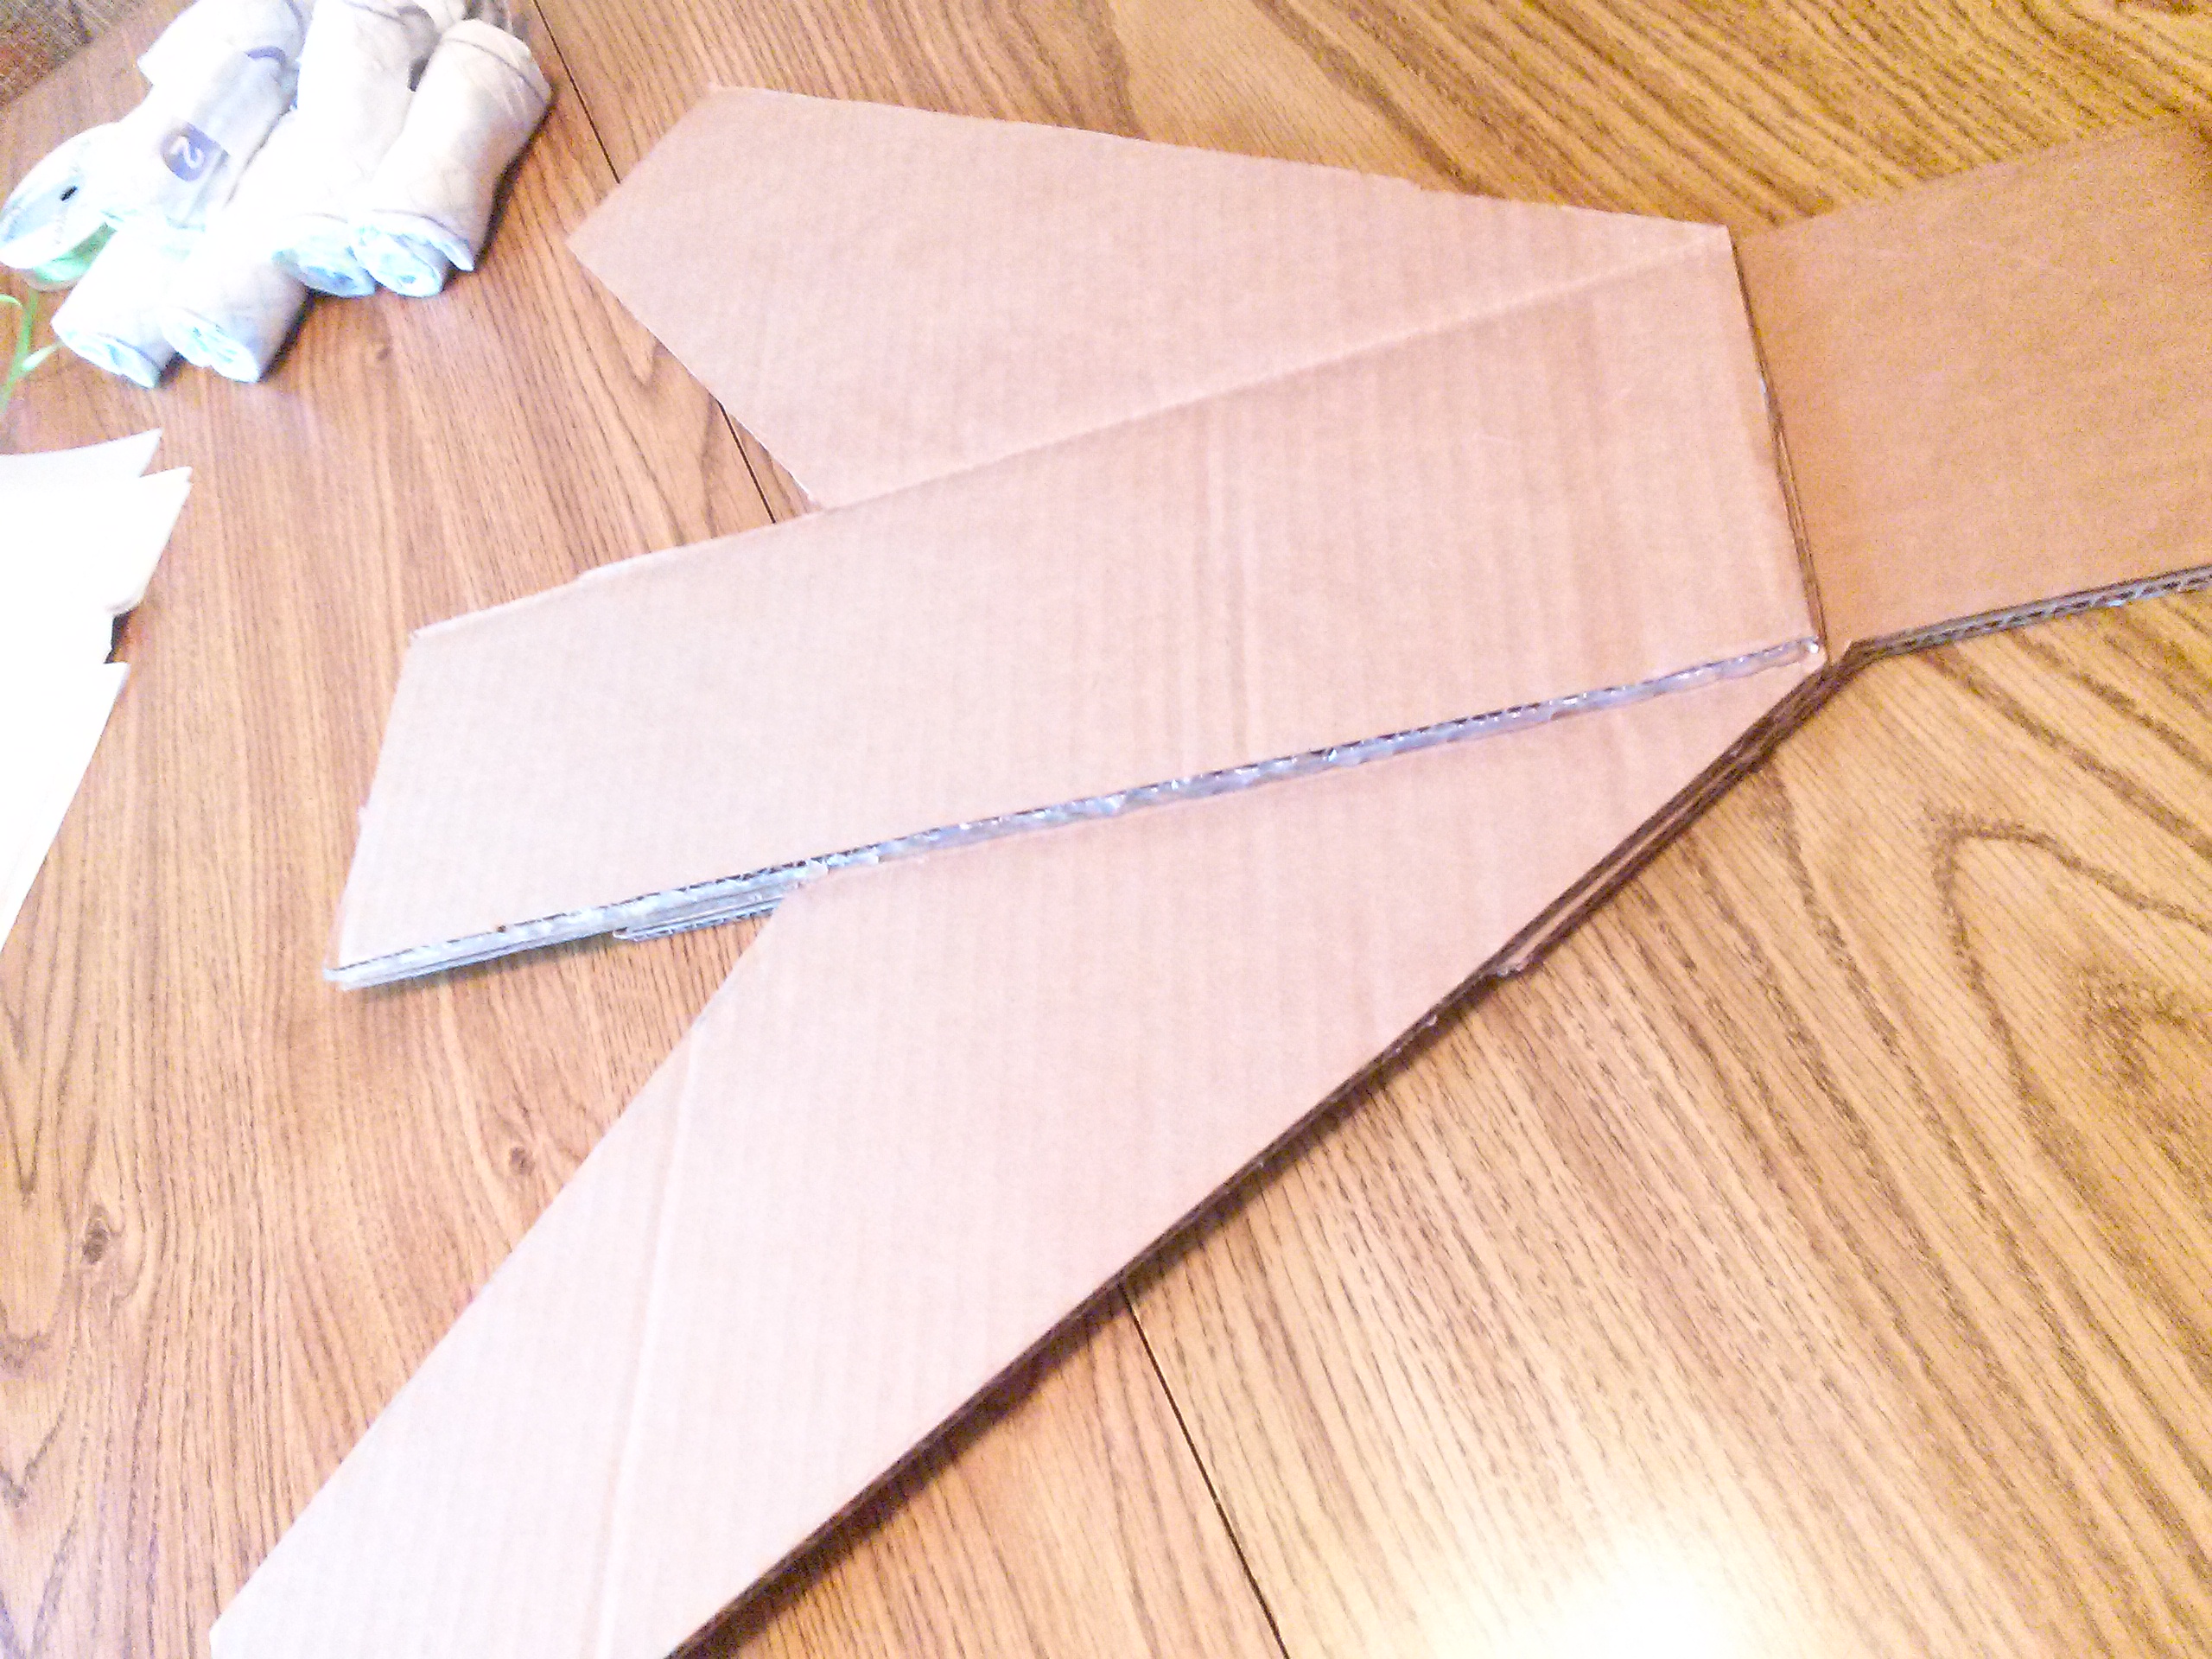
This project is a lot easier with an extra set of hands. I enlisted my sweetheart, Eric, to help. Begin with a box of diapers. You can use any diapers you choose, but keep weight in mind. If you overload your supportive base, your planes wings will bend without extra reinforcement. We used Luvs size 2 diapers, and kept the airplane wings to only one layer of diapers, which did not compromise the proportions of the airplane. Carefully open and remove all the diapers without ripping the box. You'll use this box to create the foundation of your plane.
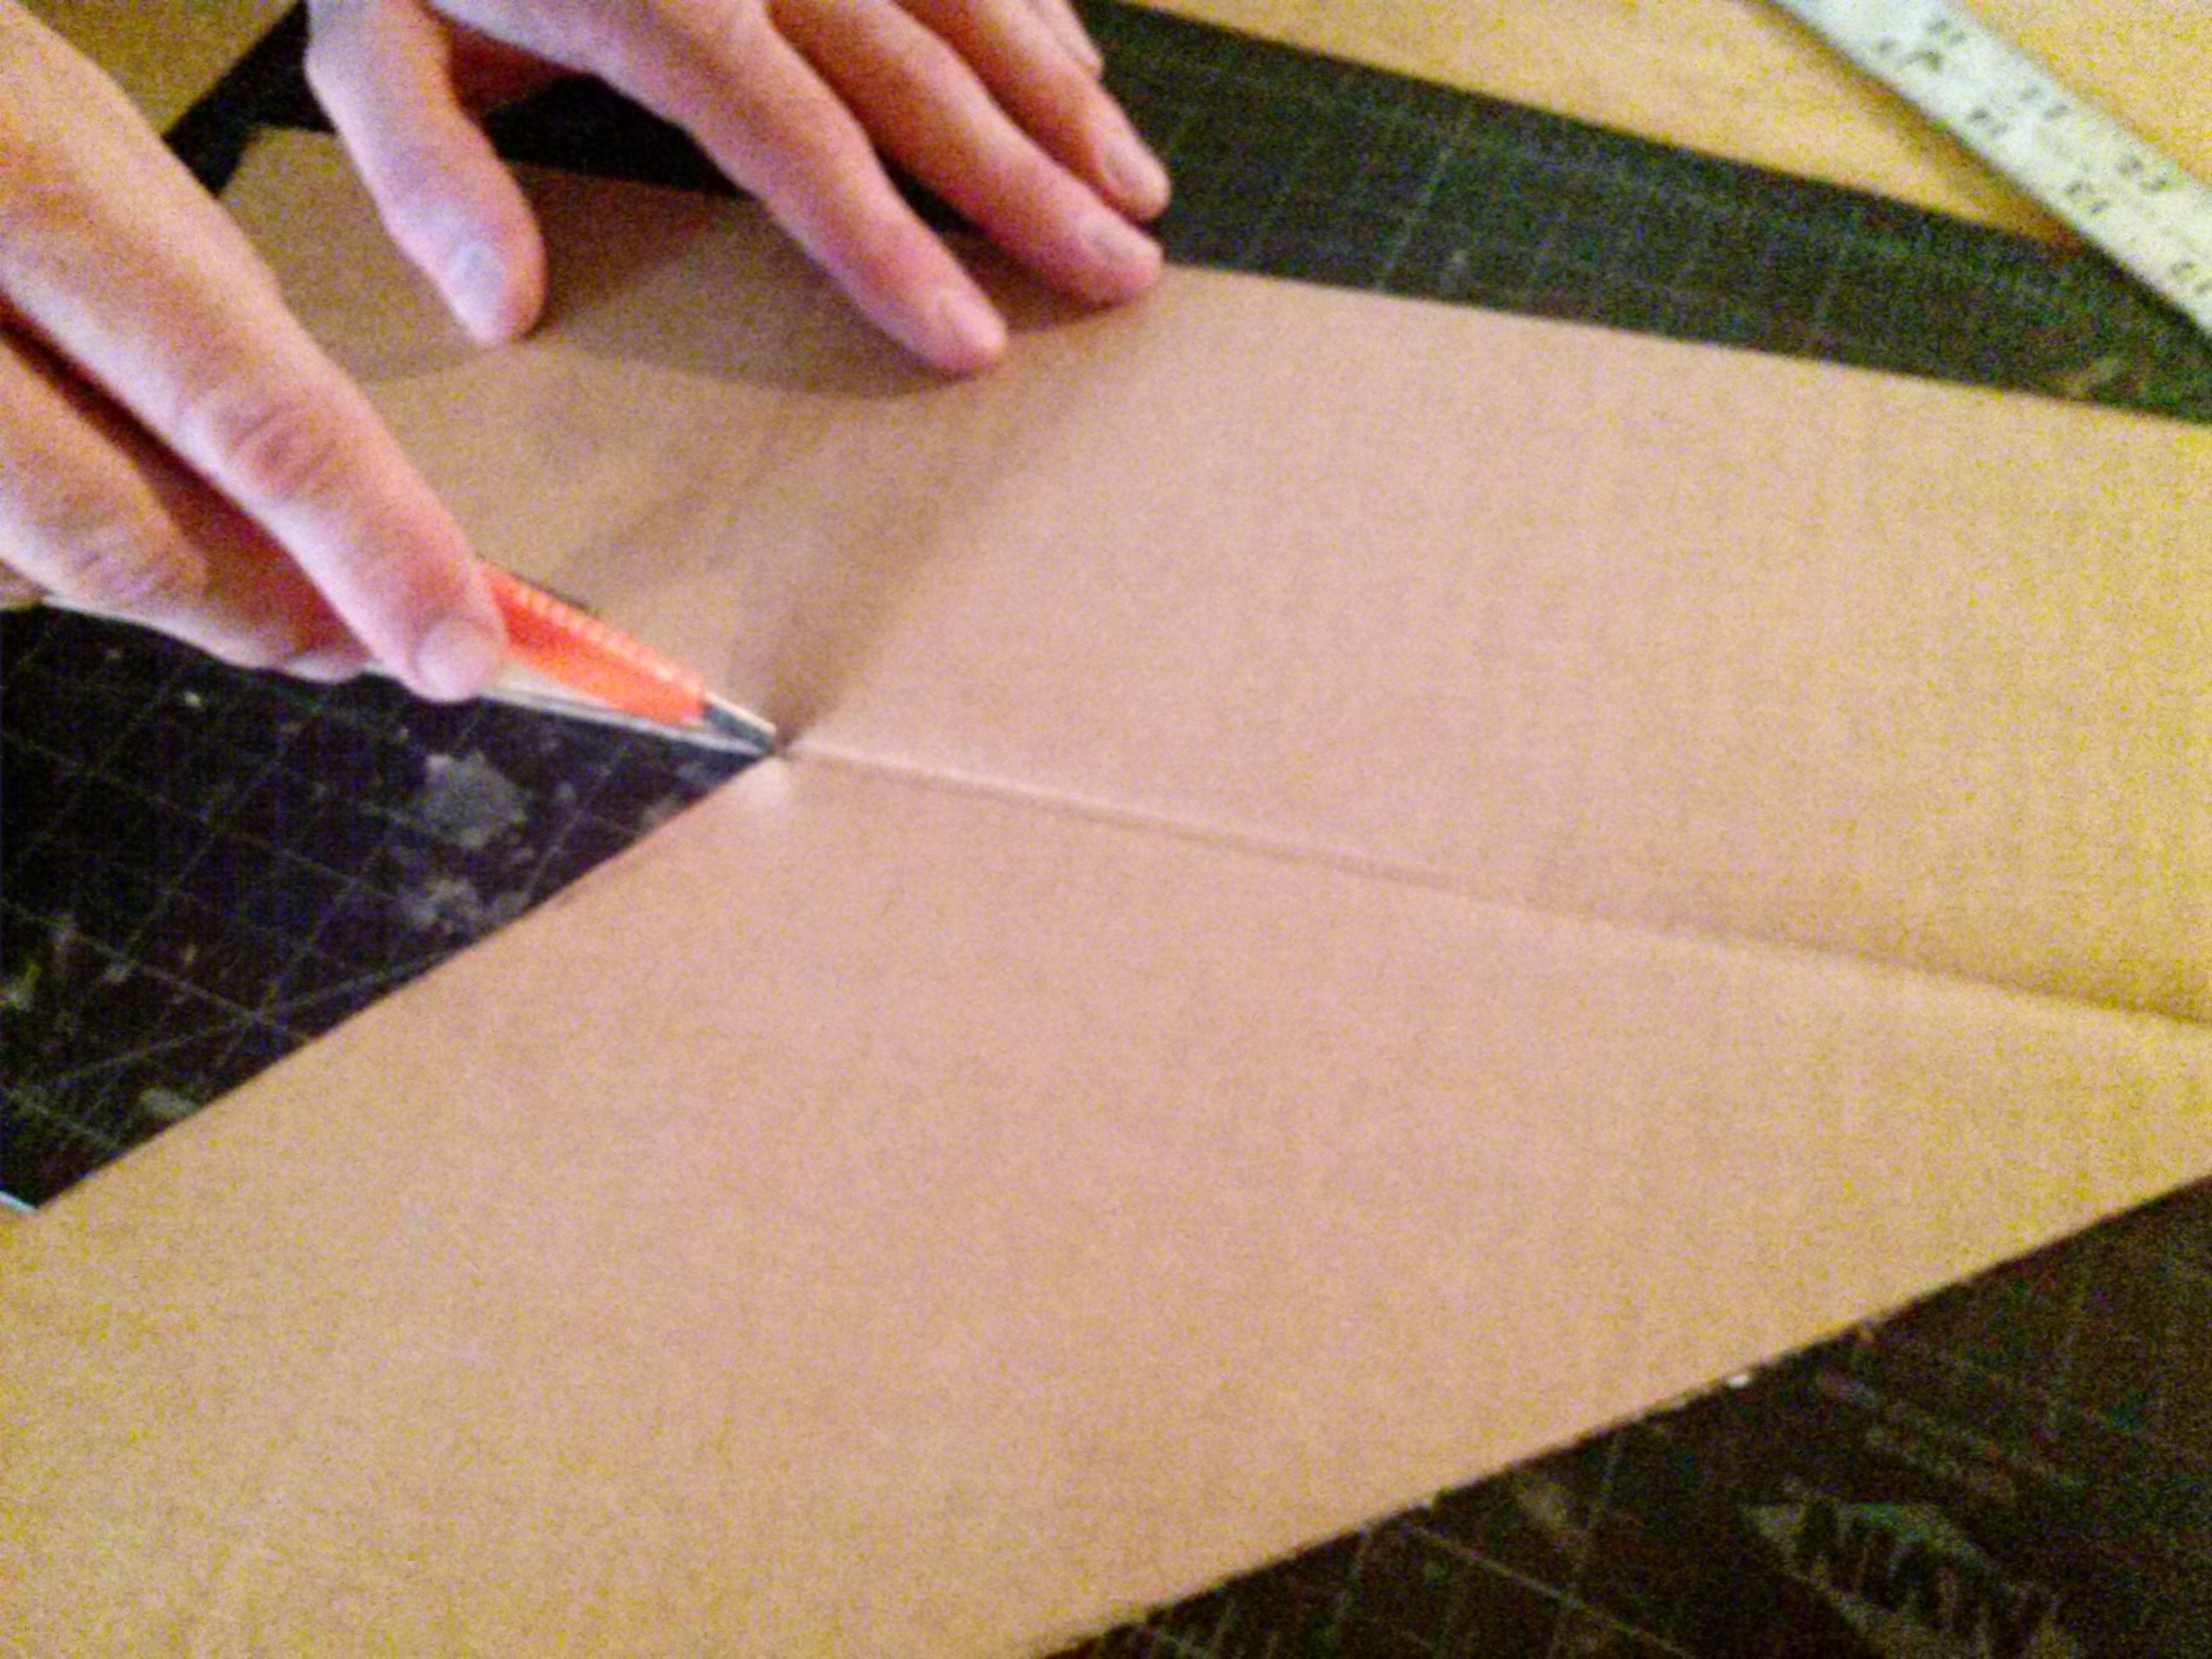
Set the empty box upright, with the opening on top. Very carefully, use a box knife or scissors to cut the four corners that connect the top and bottom, then completely separate the bottom of the box. You will be left with two long and two short sides, each with a top section of the box attached, as well as a separate bottom piece.

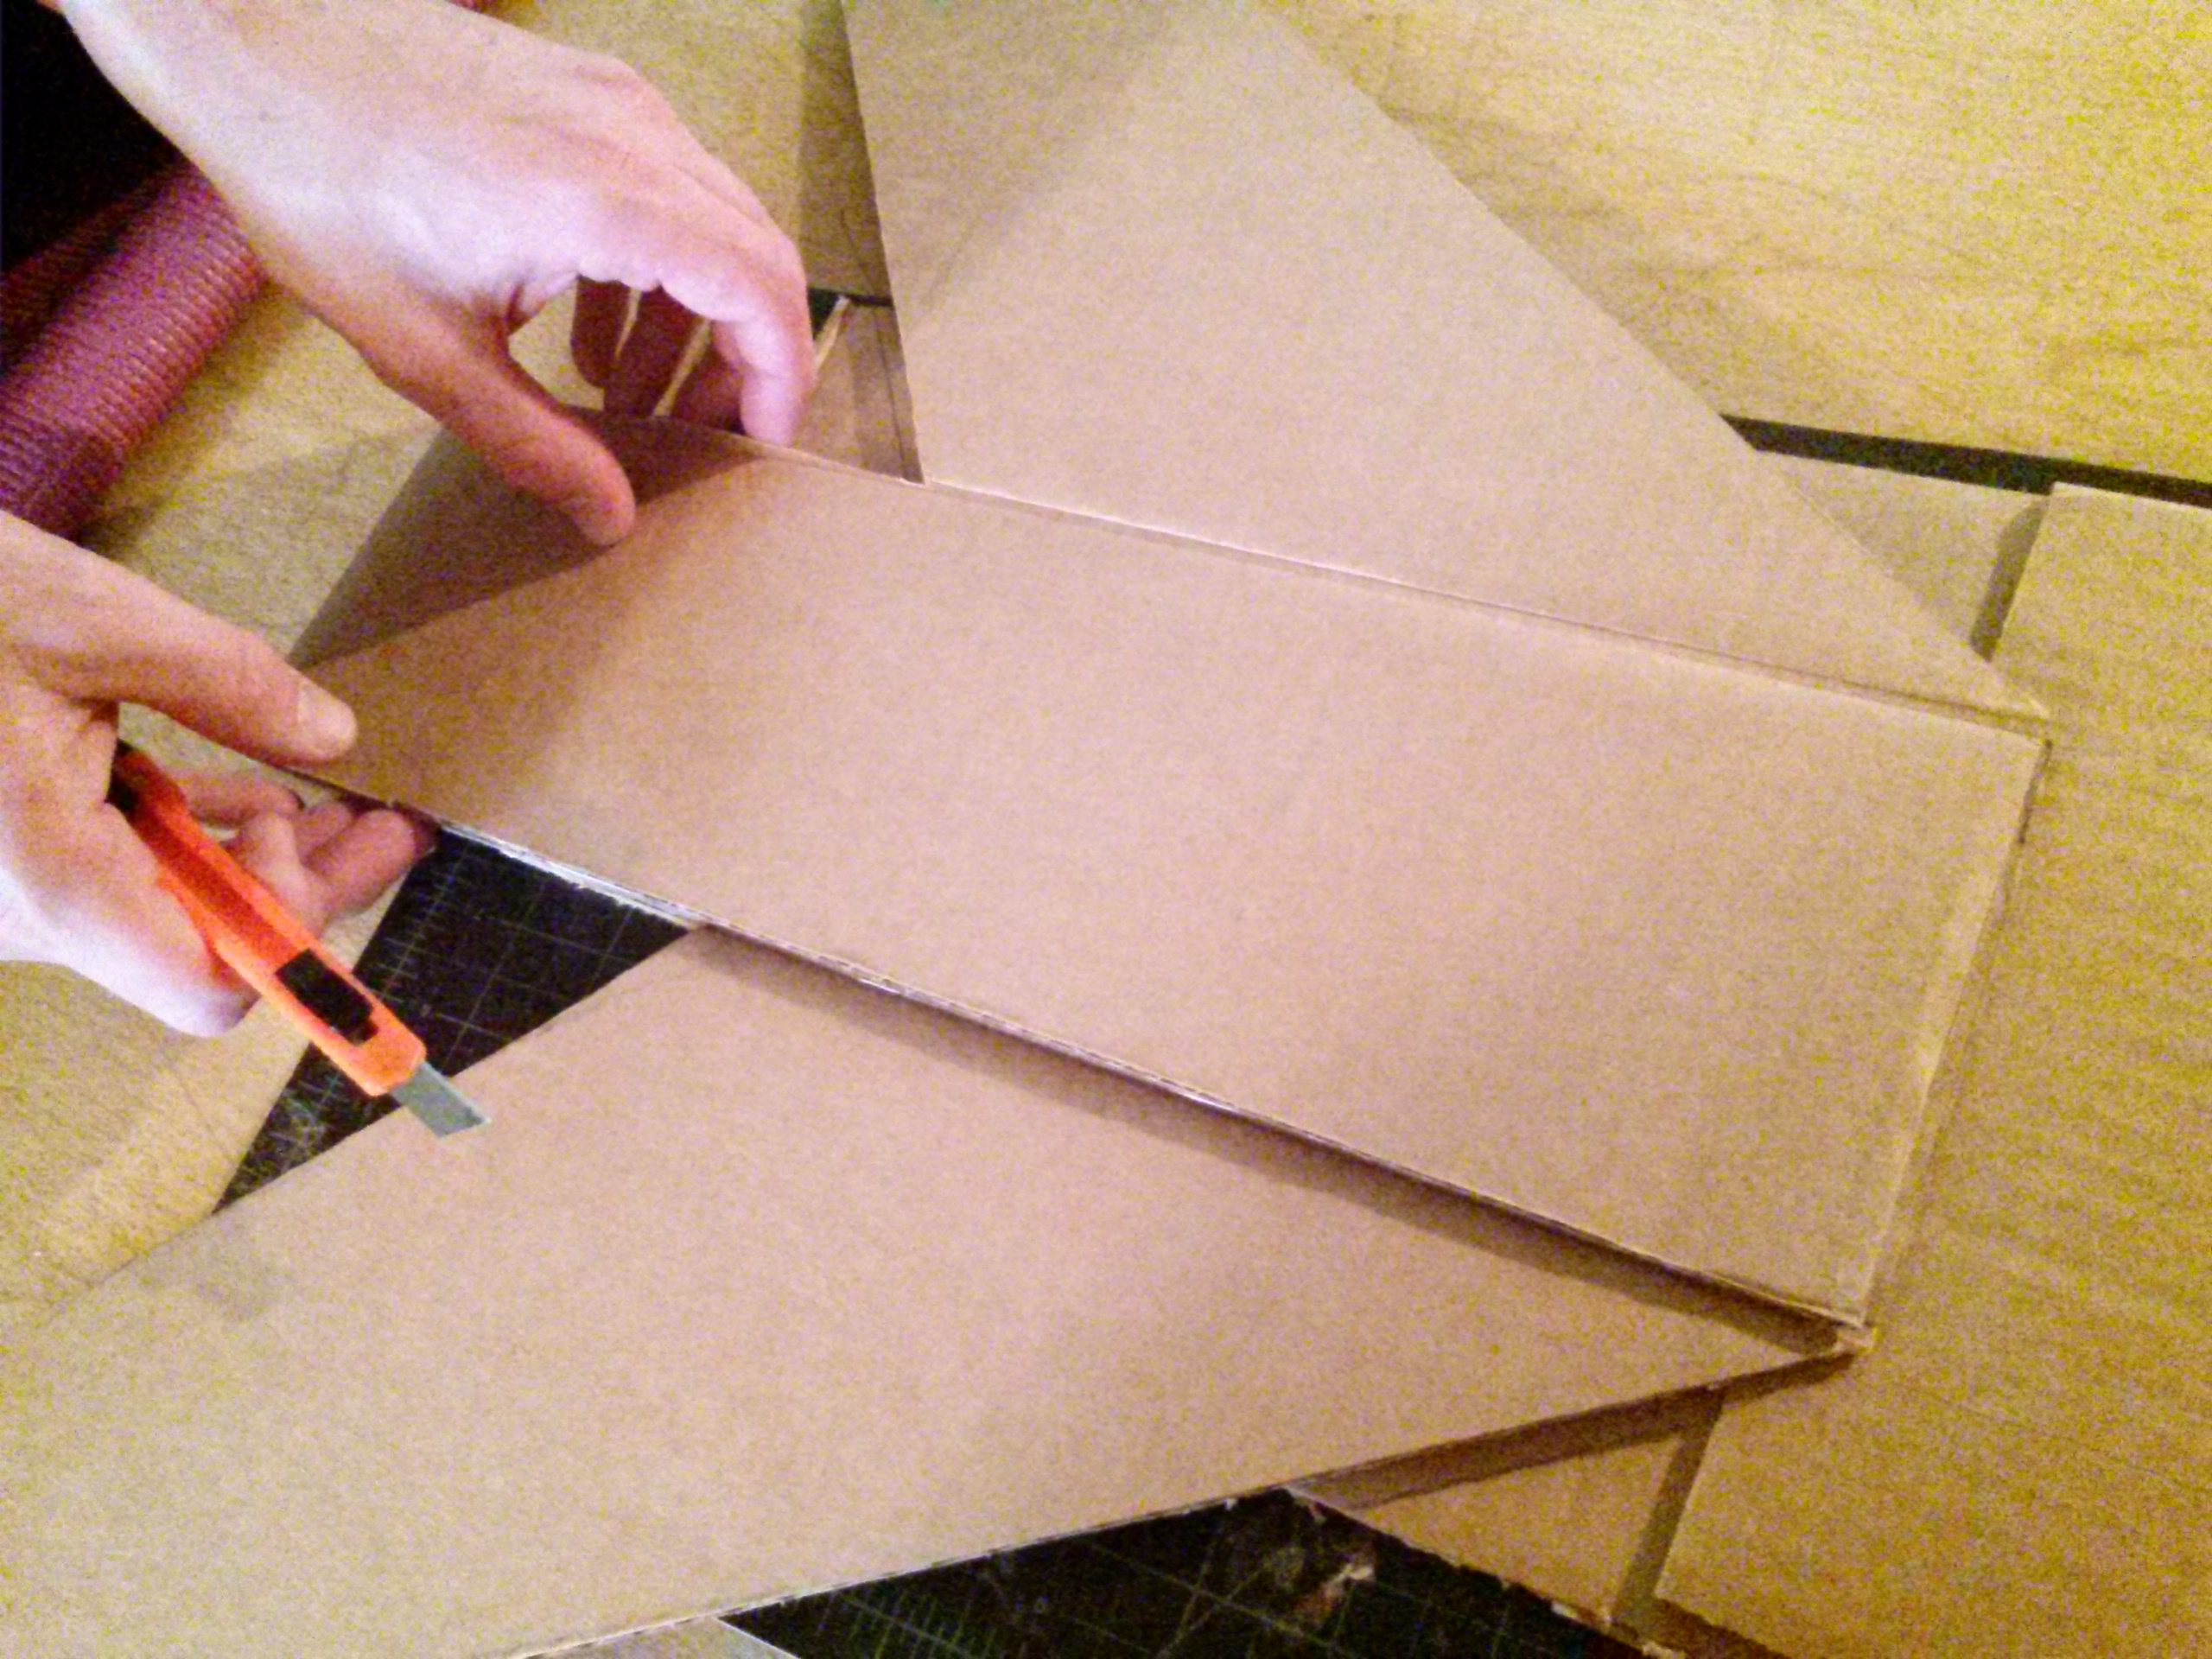
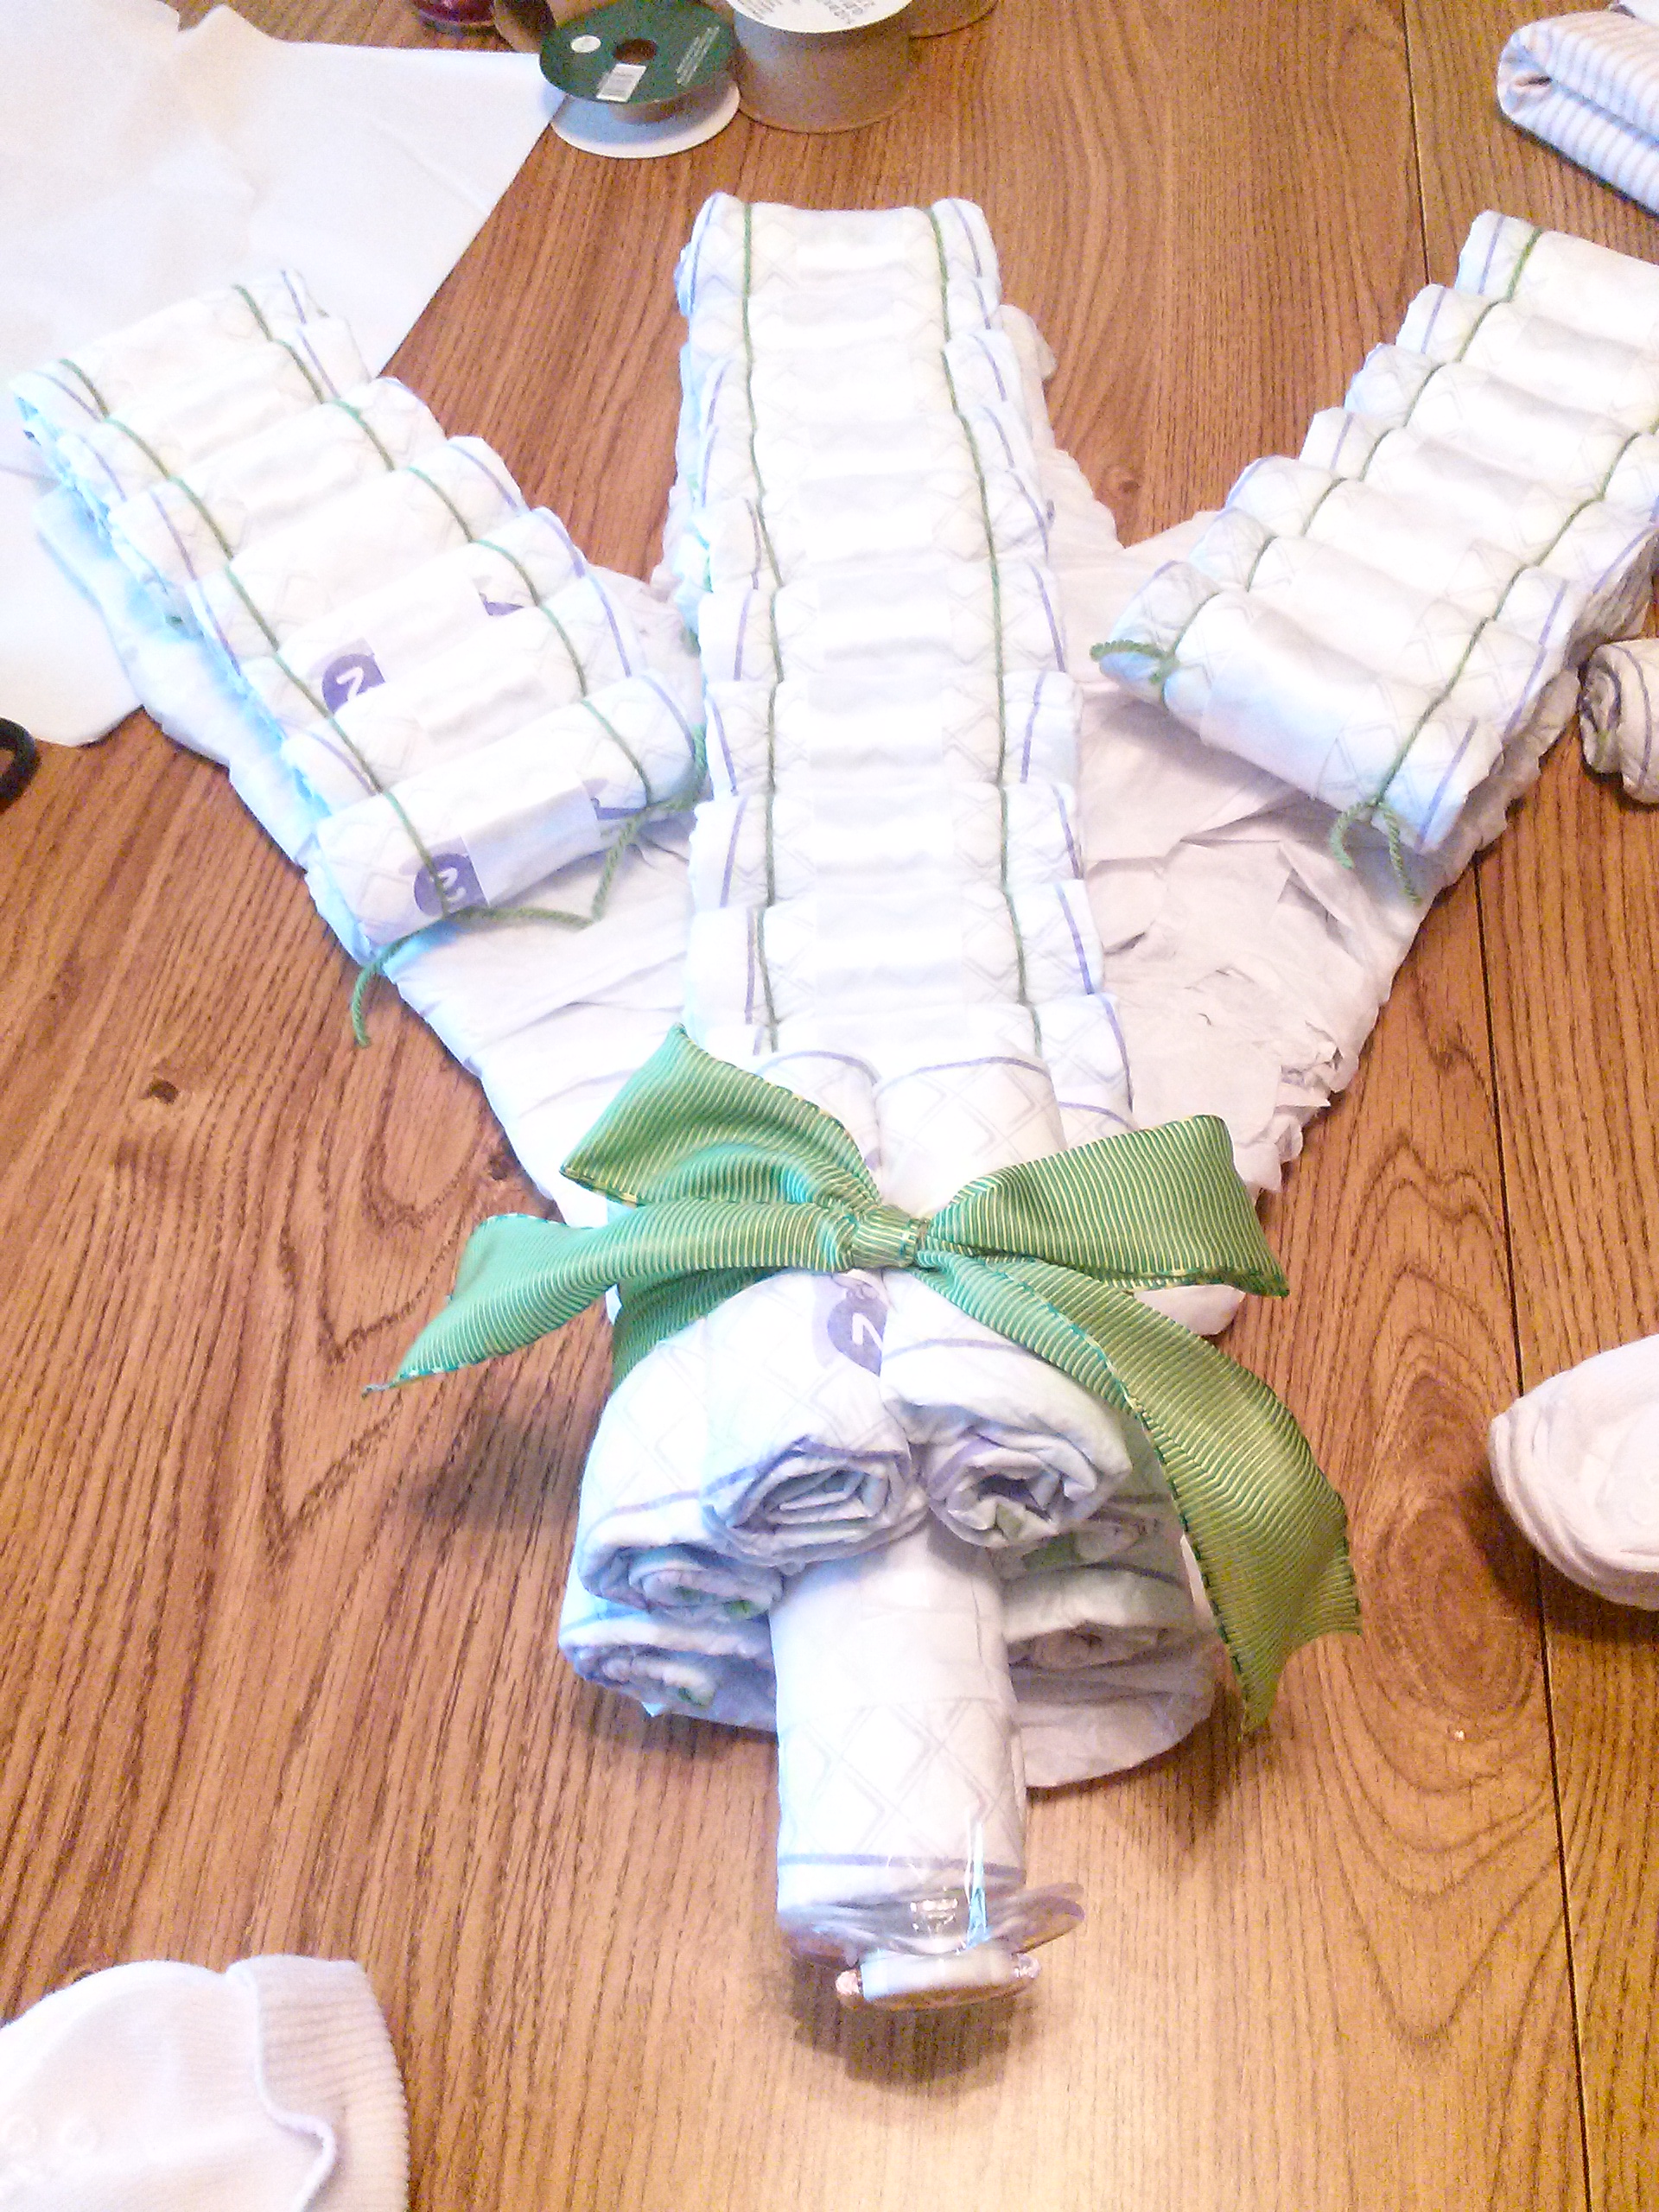
Leaving the top sections of the box attached, use the two longer sides to cut out wings for your plane. Cut out one, then flip it over and use it as a template to cut out the second wing. The top sections on each wing will be part of the fuselage of the airplane and will help give it more strength and stability. Arrange the two wings so the center sections line up, and adhere them together with hot glue or Tacky glue. It is normal for the wings to bend at the crease at this point.
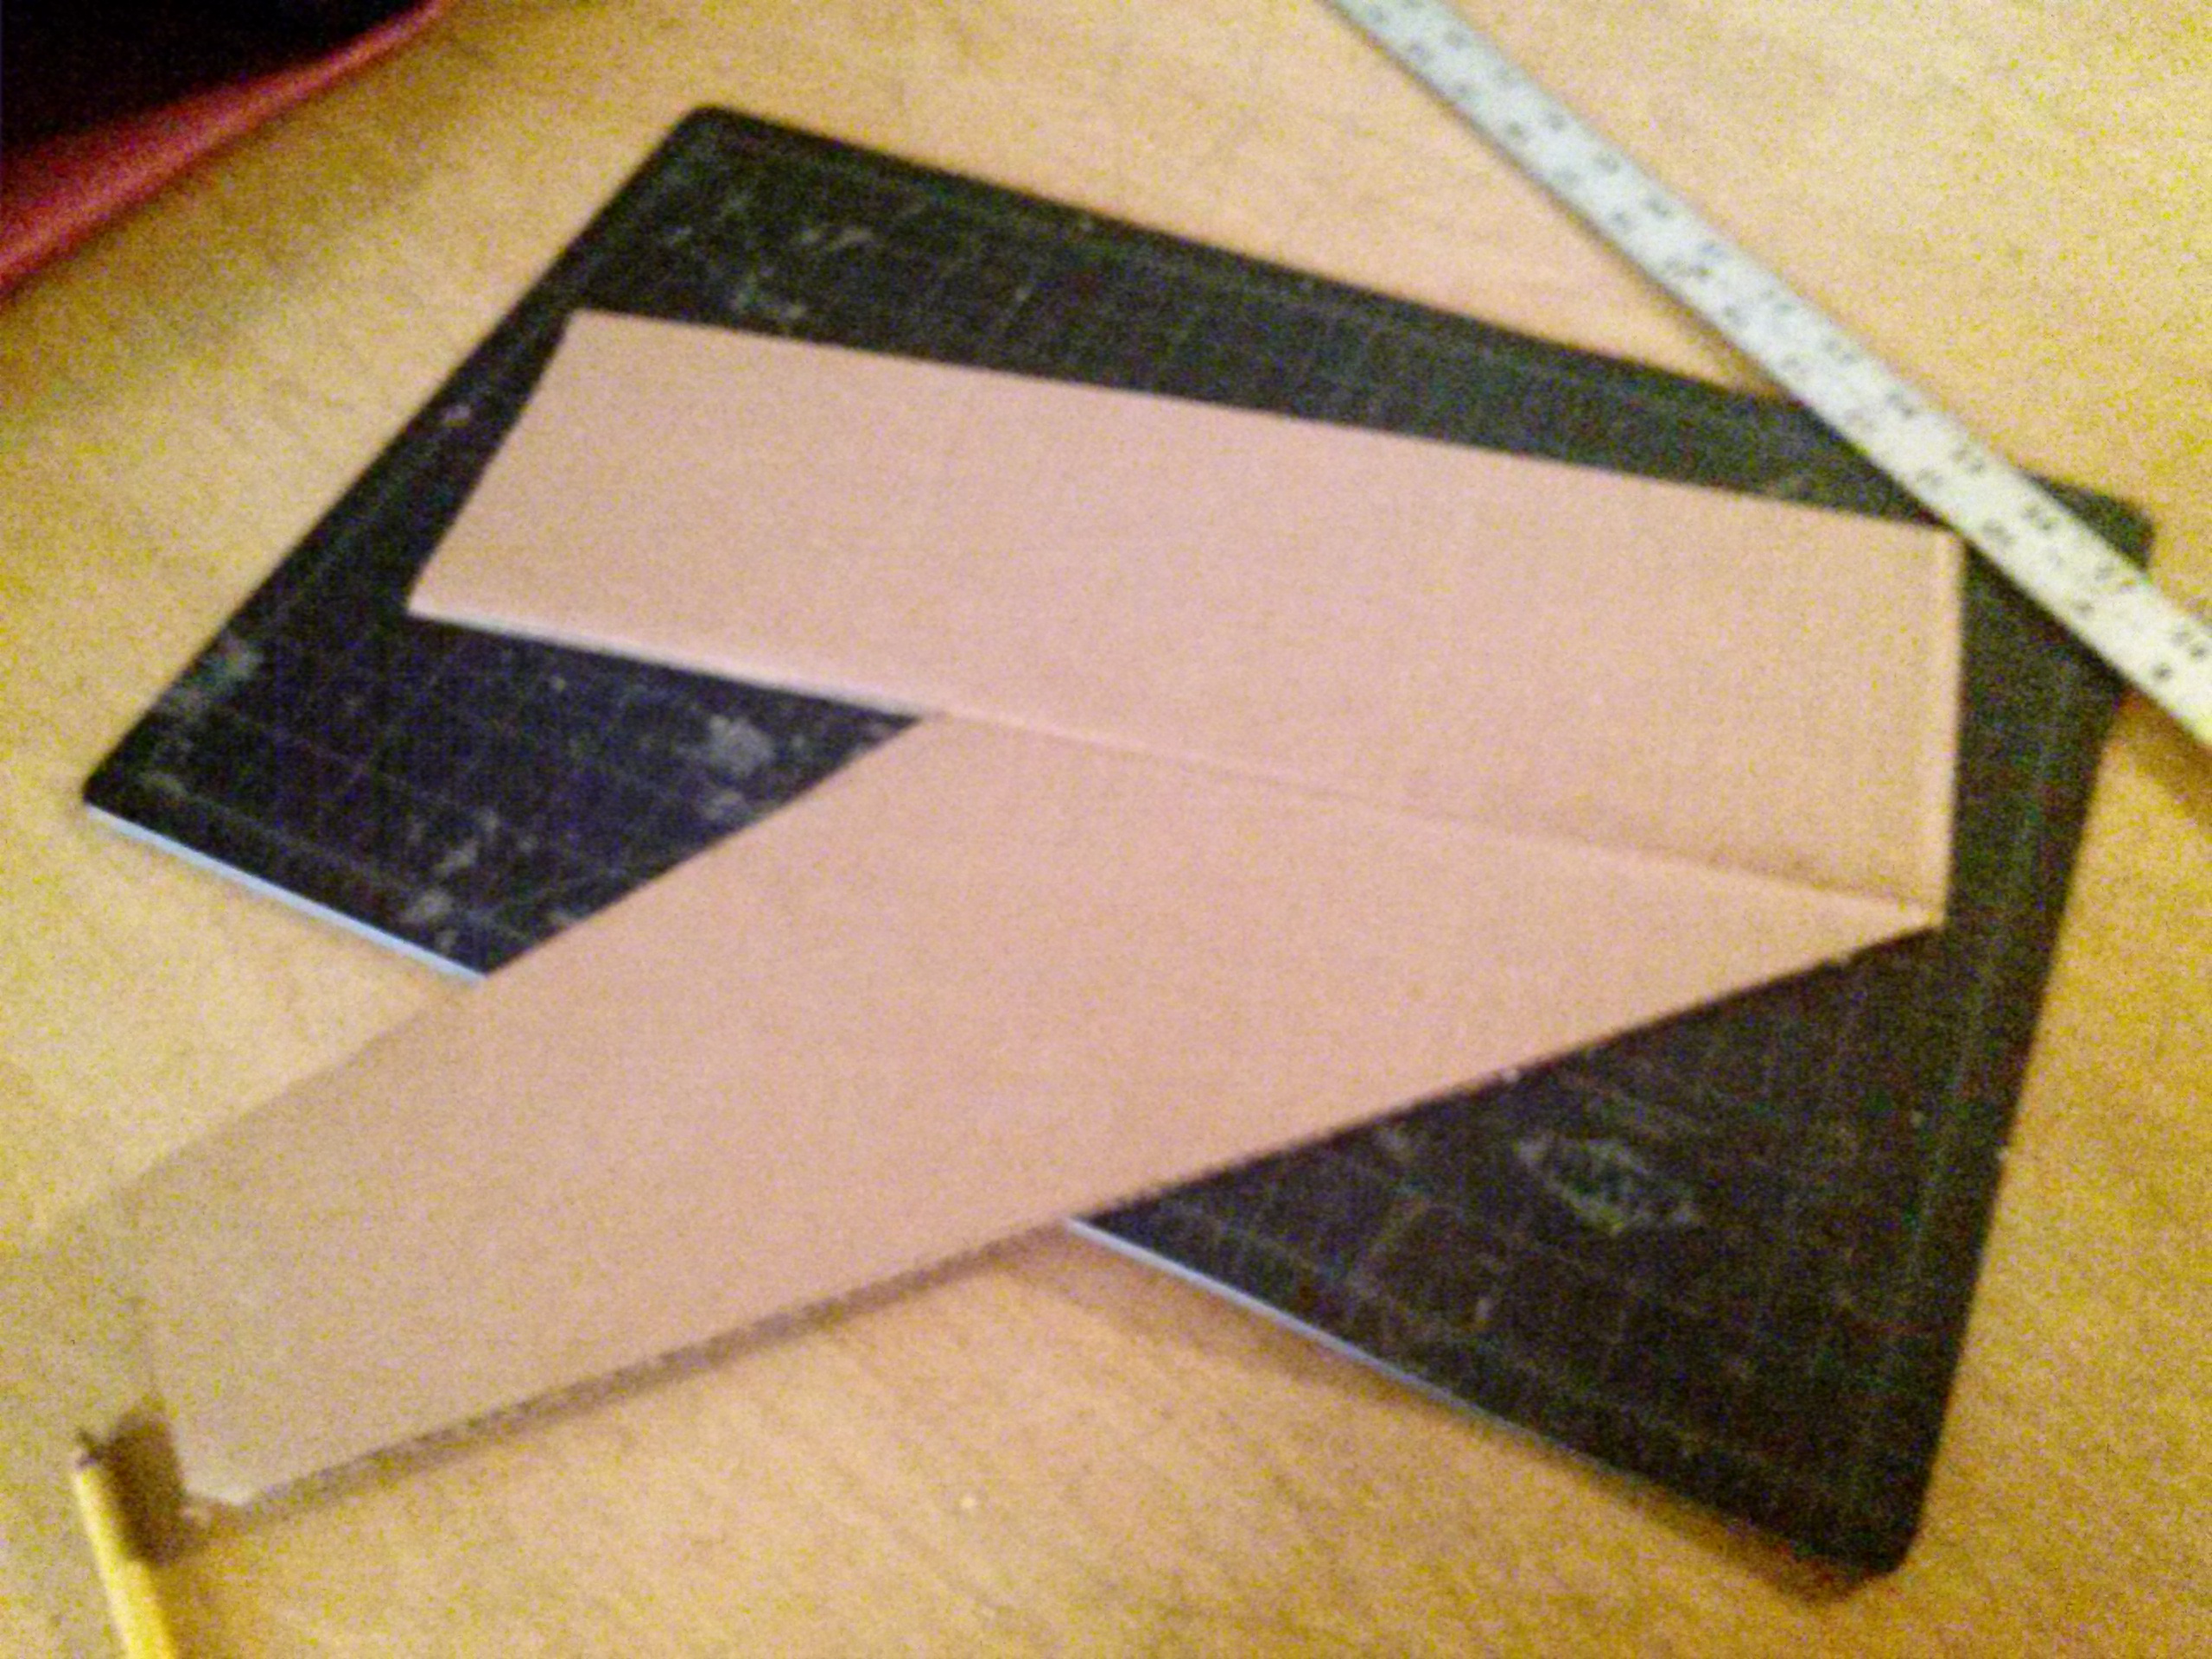
Lay the bottom of the box down on your workspace and center the wing section on top. Slide the wing section down, so that the bottom of the box sticks out about 5" past where the wings start. This will be the front, nose end of the plane. The bottom of the box should stick out past the sides of the "fuselage" a couple of inches on each side. Hold the wing section down, and trace around it with a pencil. Cut along the drawn lines to create a shape similar to the one shown above. Line the wing section up again and adhere it down with the hot glue or Tacky glue. Your wings should now be stable, and strong enough to hold some diapers!
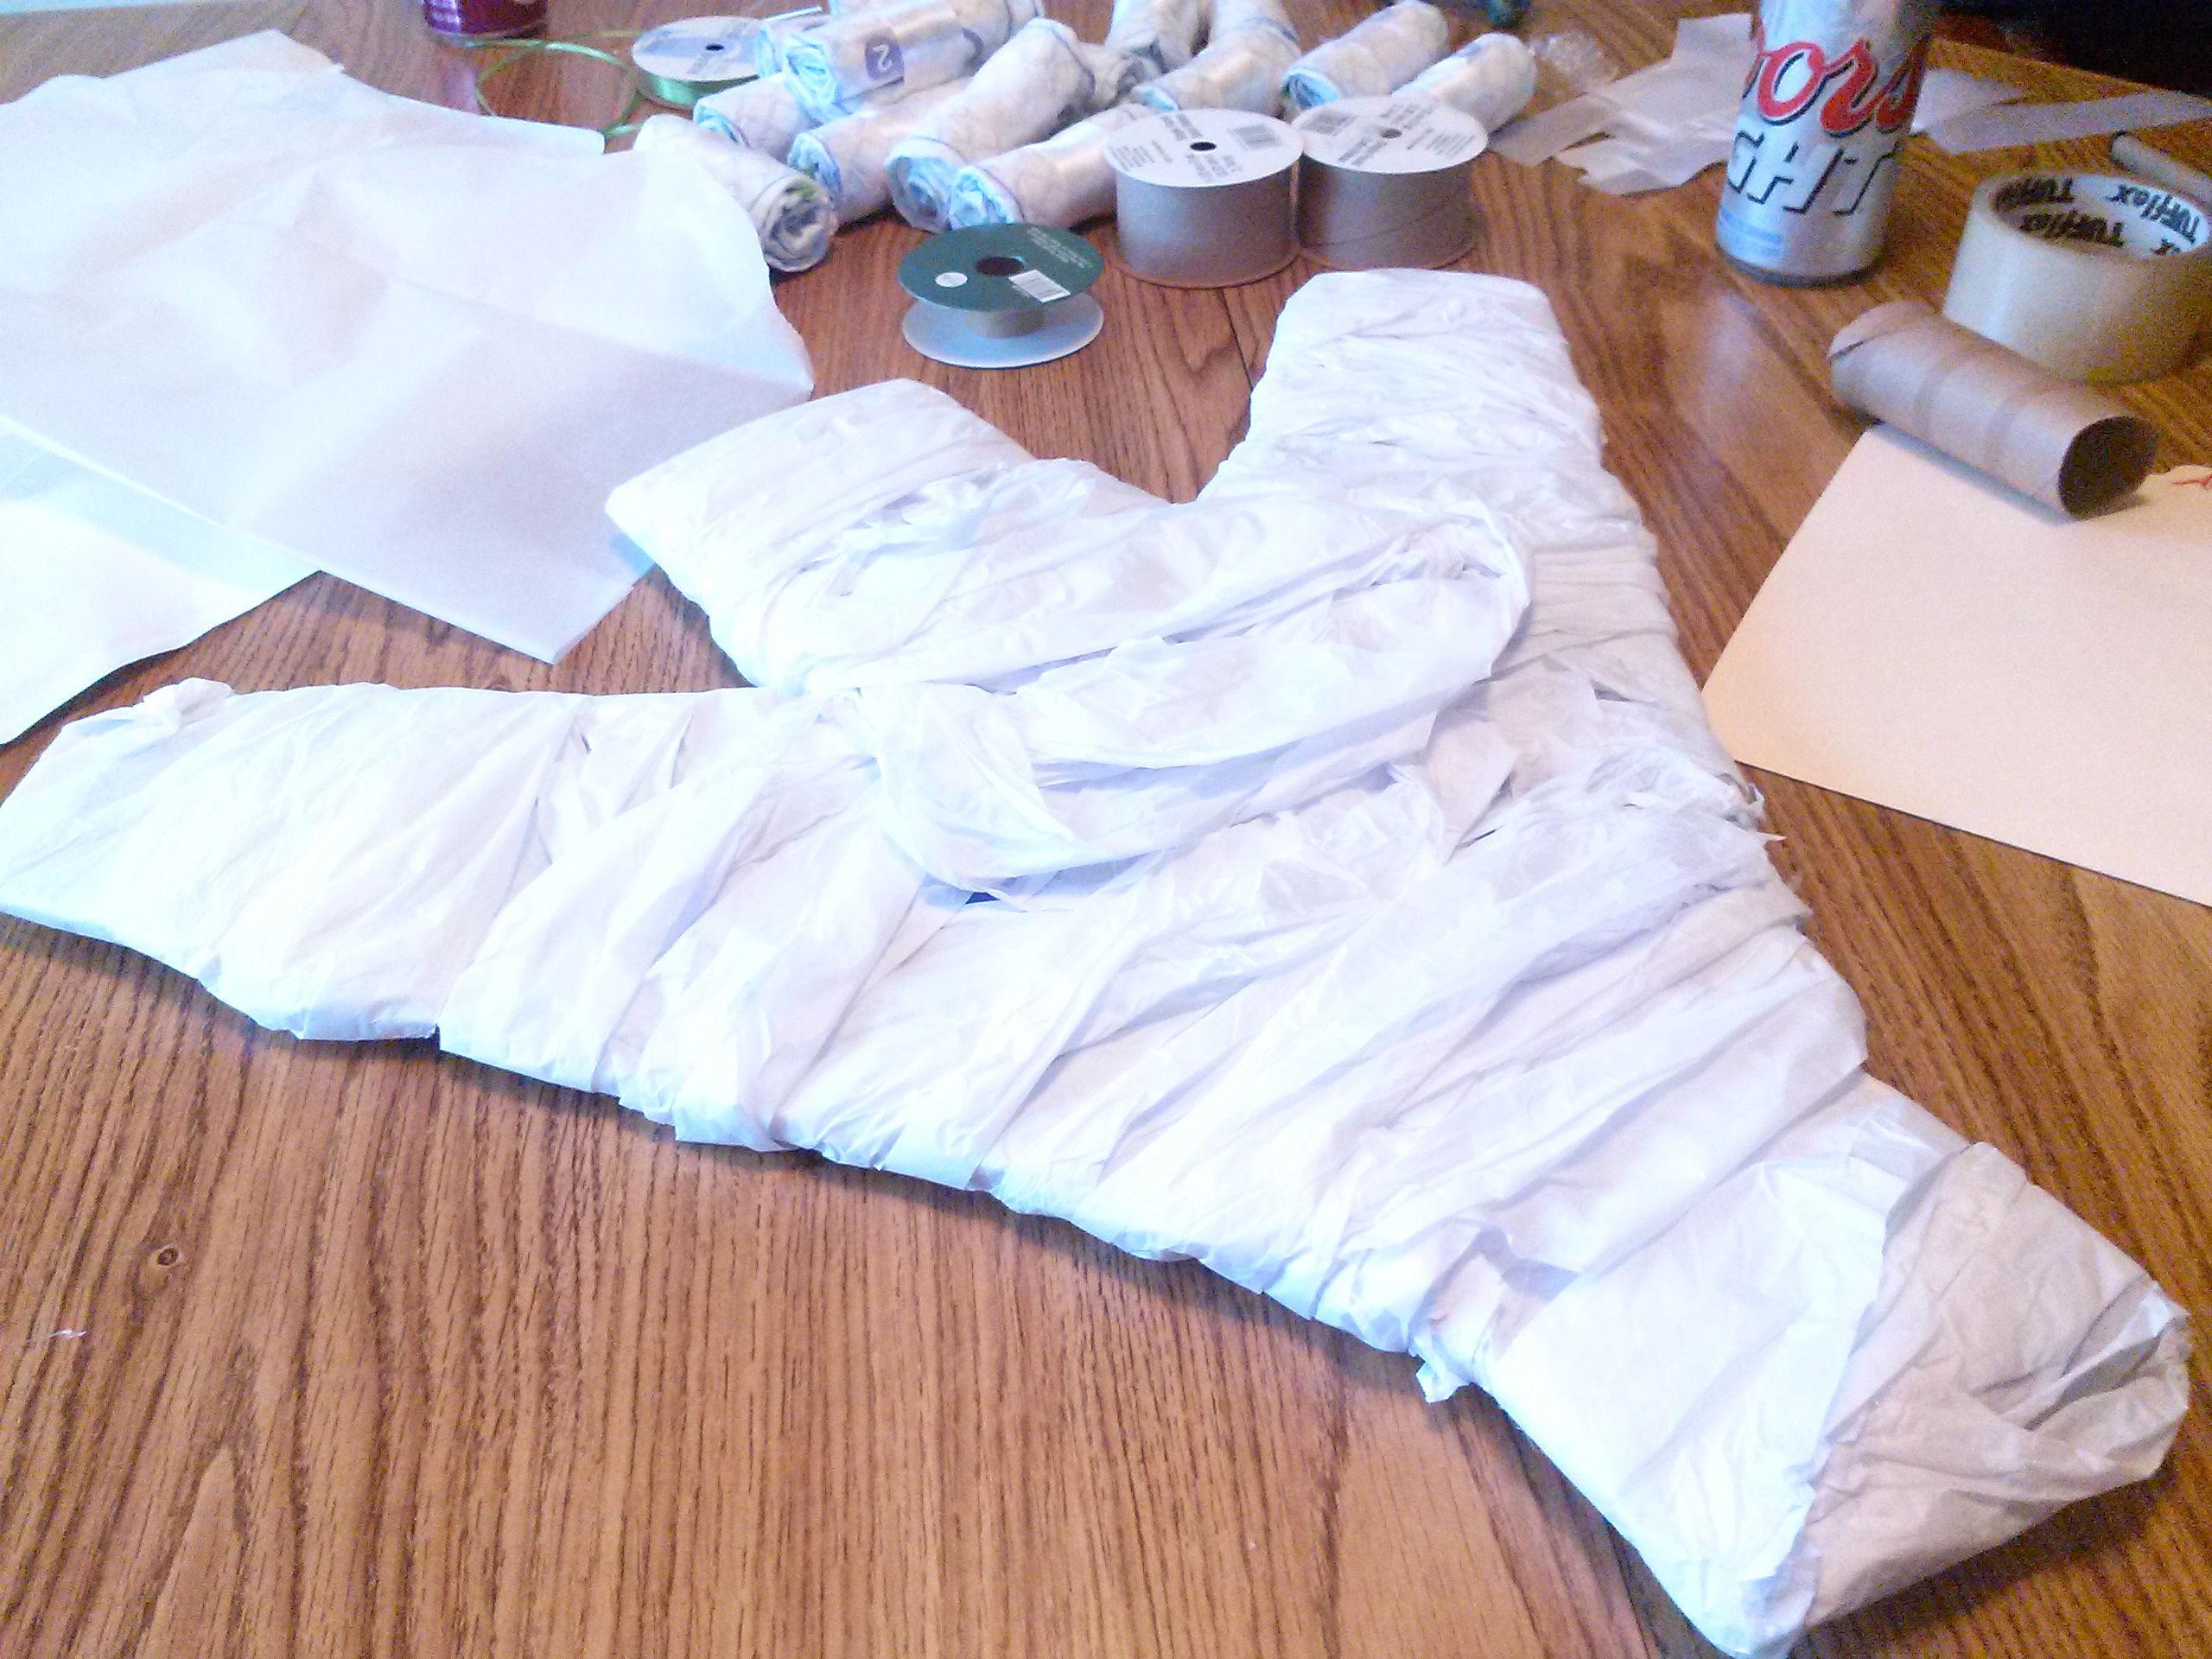
Cover the unsightly frame using tissue paper and hot glue. I used about a dozen large sheets of white, but you may use more or less, depending on your taste. To add some texture to your tissue paper, try twisting or wrinkling it before wrapping your plane.

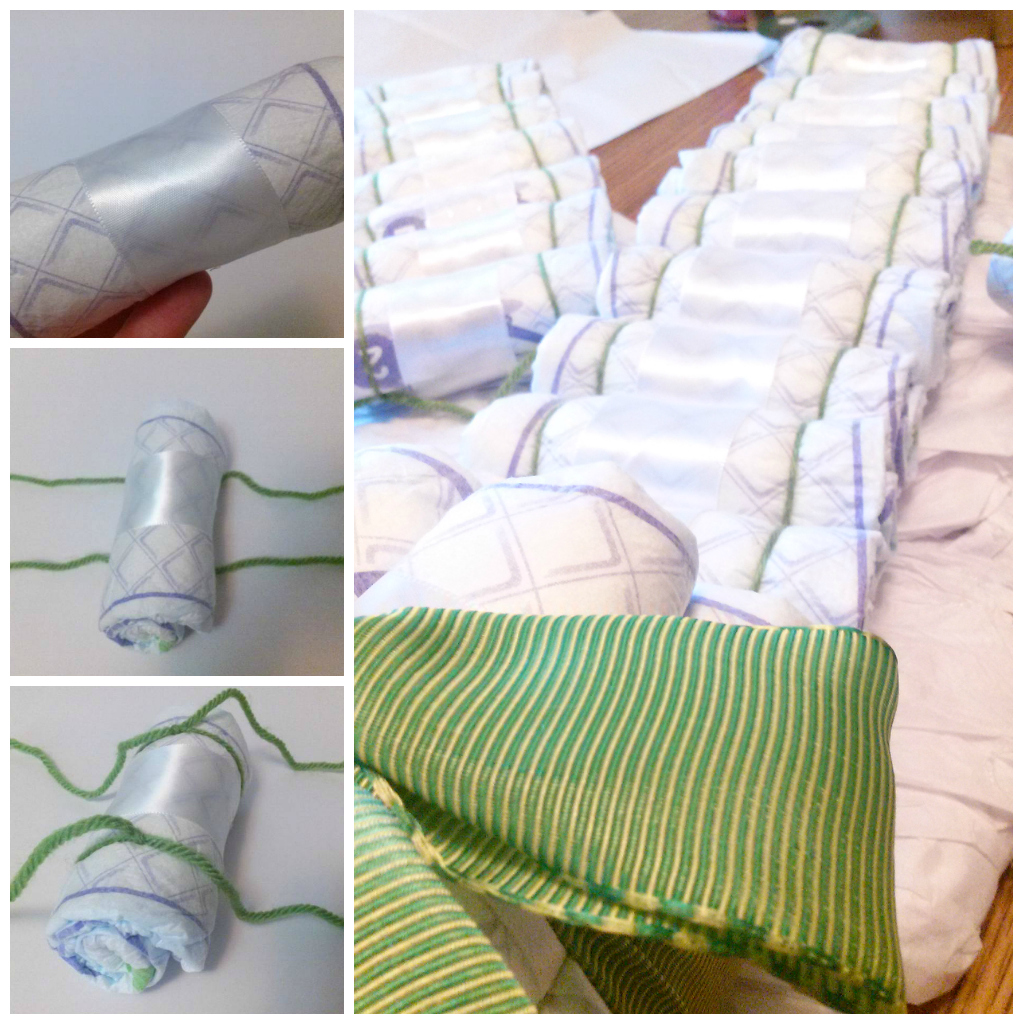
After you have your base created and covered in tissue, it's time to add the diapers! One by one, roll each diaper up. Ours were about the diameter of a paper towel roll. Secure each diaper with a piece of wide, decorative ribbon, held with clear packing tape.
Once you have enough to cover the length of the wing, use the yarn to tie them together. To do this, cut two strands of yarn about 2 1/2 times the length of one wing and lay them parallel to each other, about 2 1/2" apart, on your workspace. Lay one rolled diaper perpendicularly in the center, on top of the yarn. One string of yarn at a time, pick up both ends, and tie a double knot on top of the diaper. (Shown below.) This is where your second set of hands will come in very useful!
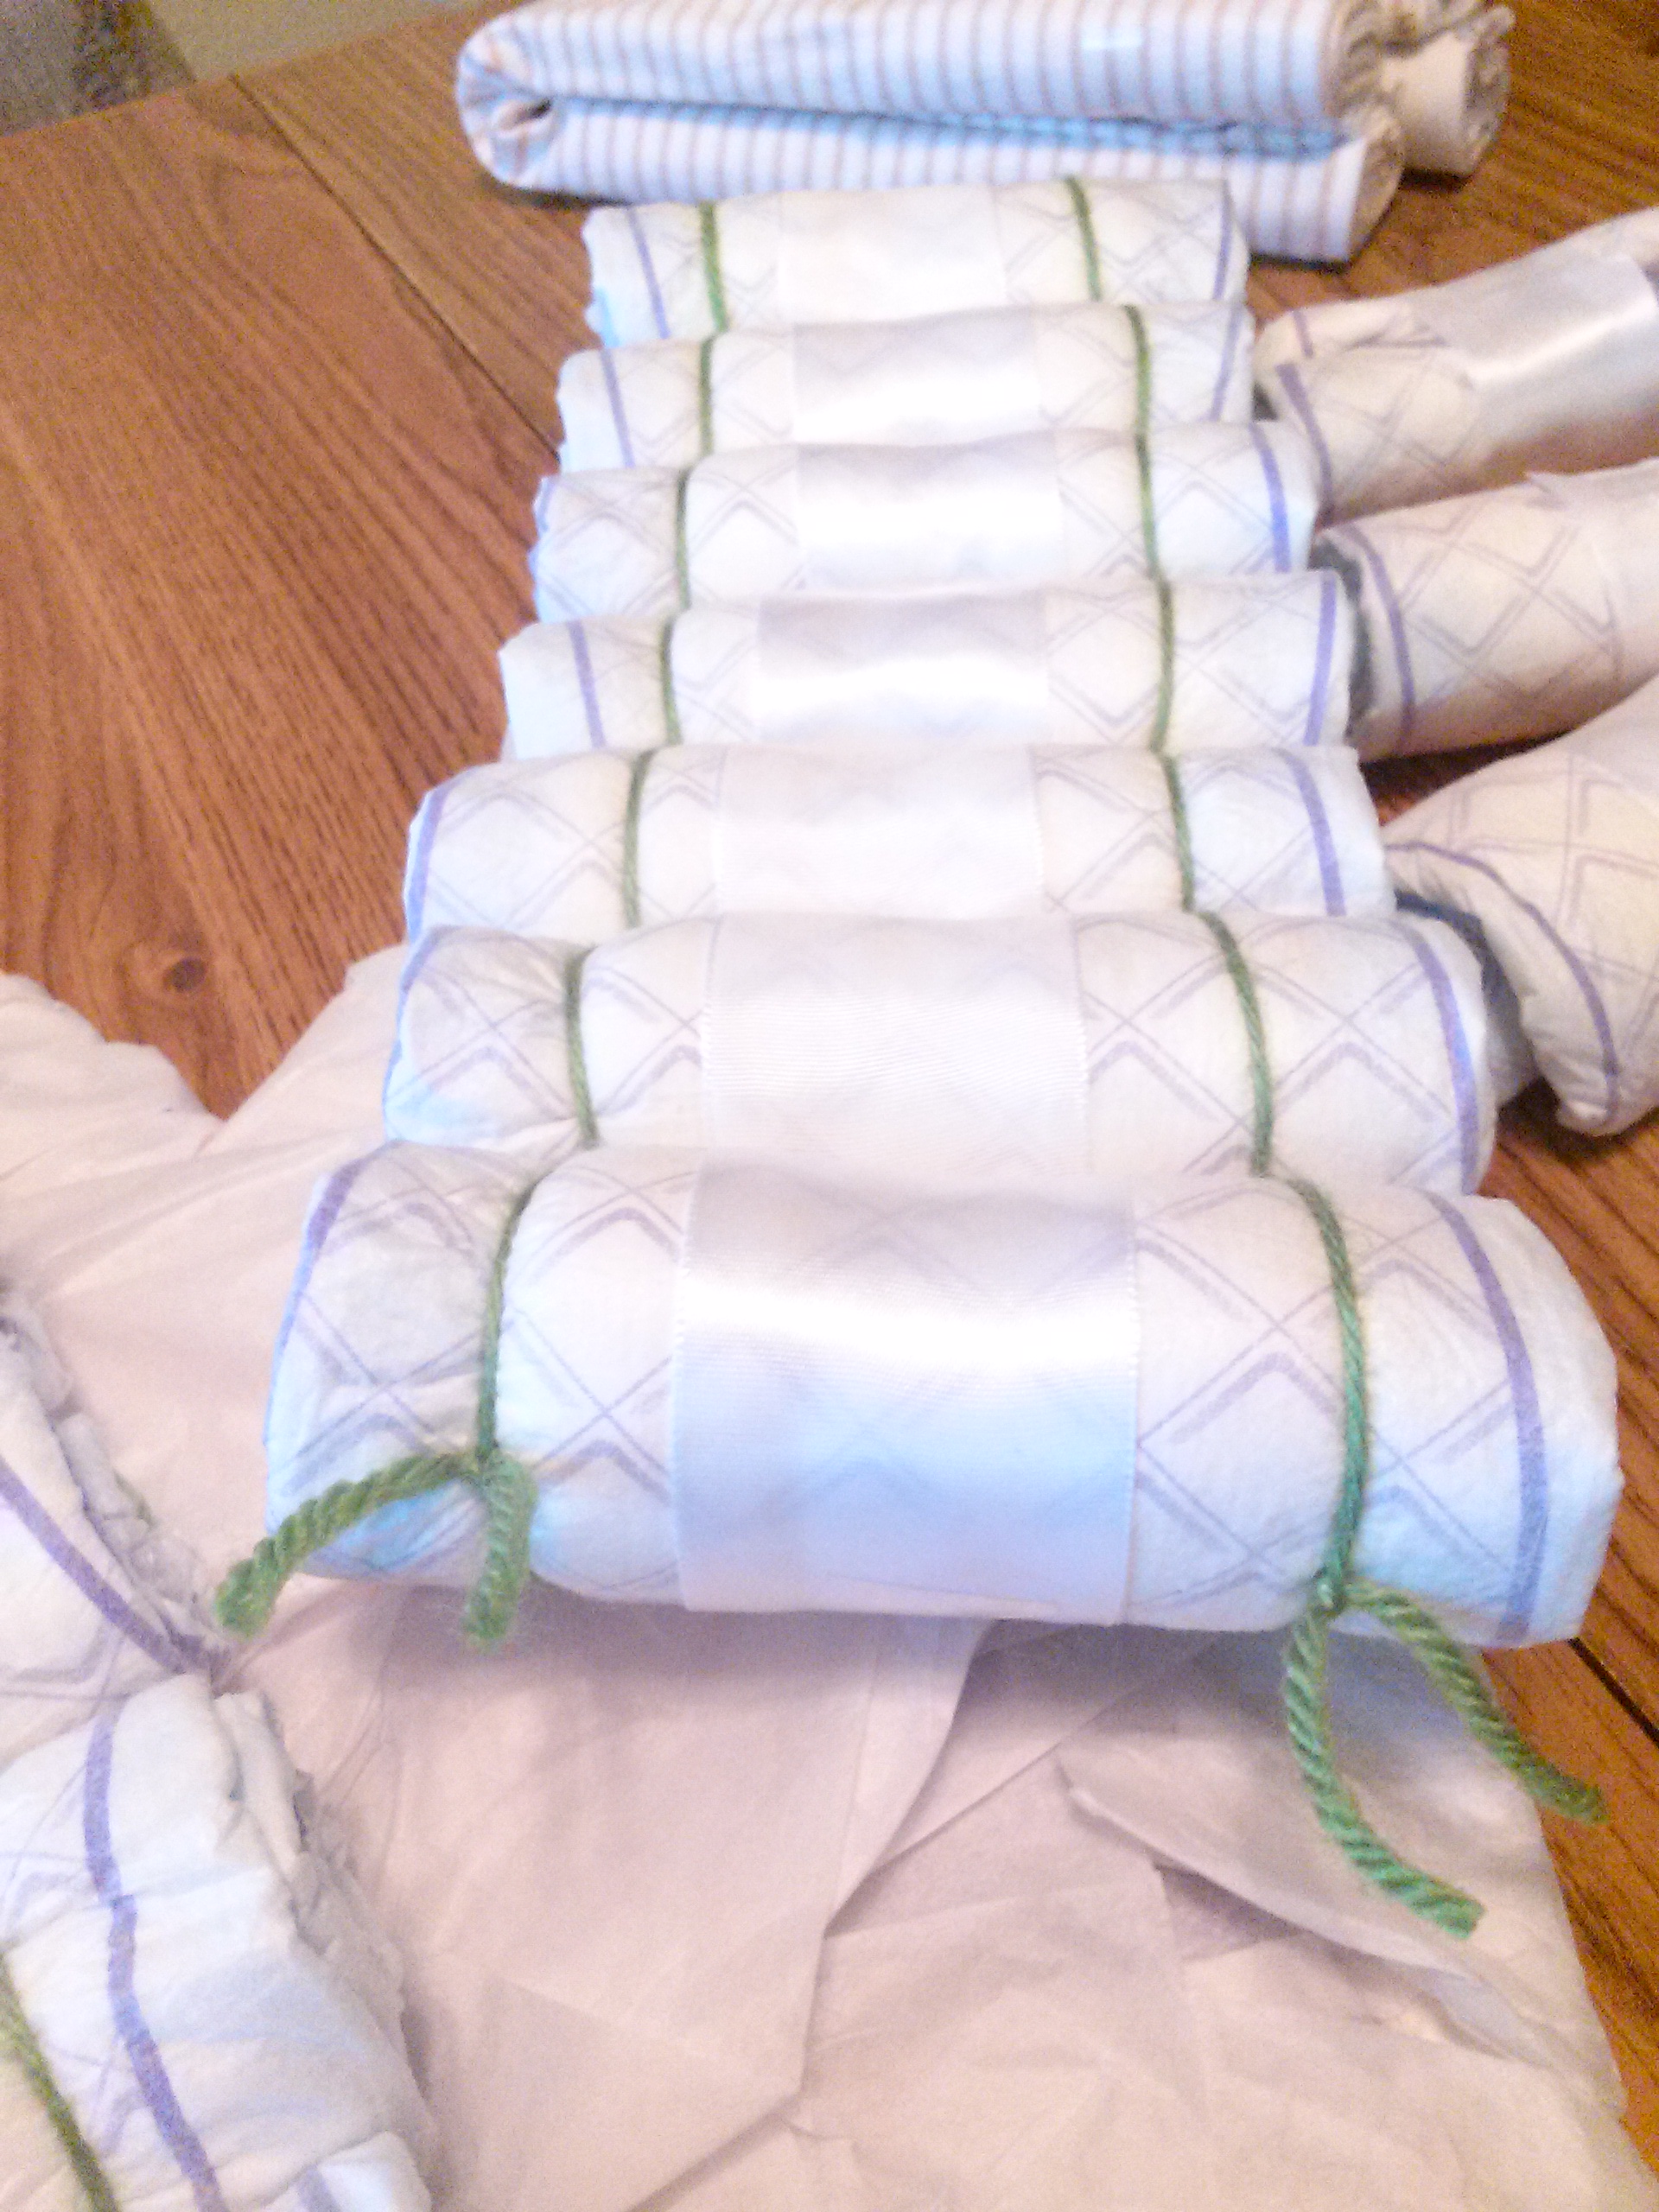
Add more diapers, one at a time, tying knots between each to hold them all together in a chain. If your wings are shaped like ours, you may end up with a small, odd-shaped gap at the base of each. Don't worry. Just make your chain a length that they line up straight, and stop at the body of the plane, leaving enough room for a center row of diapers to run down the fuselage. Repeat this process to create a layer for the other wing, as well as the center section of the plane. (Don't attach them to the cardboard base just yet, we have a few more steps first!)
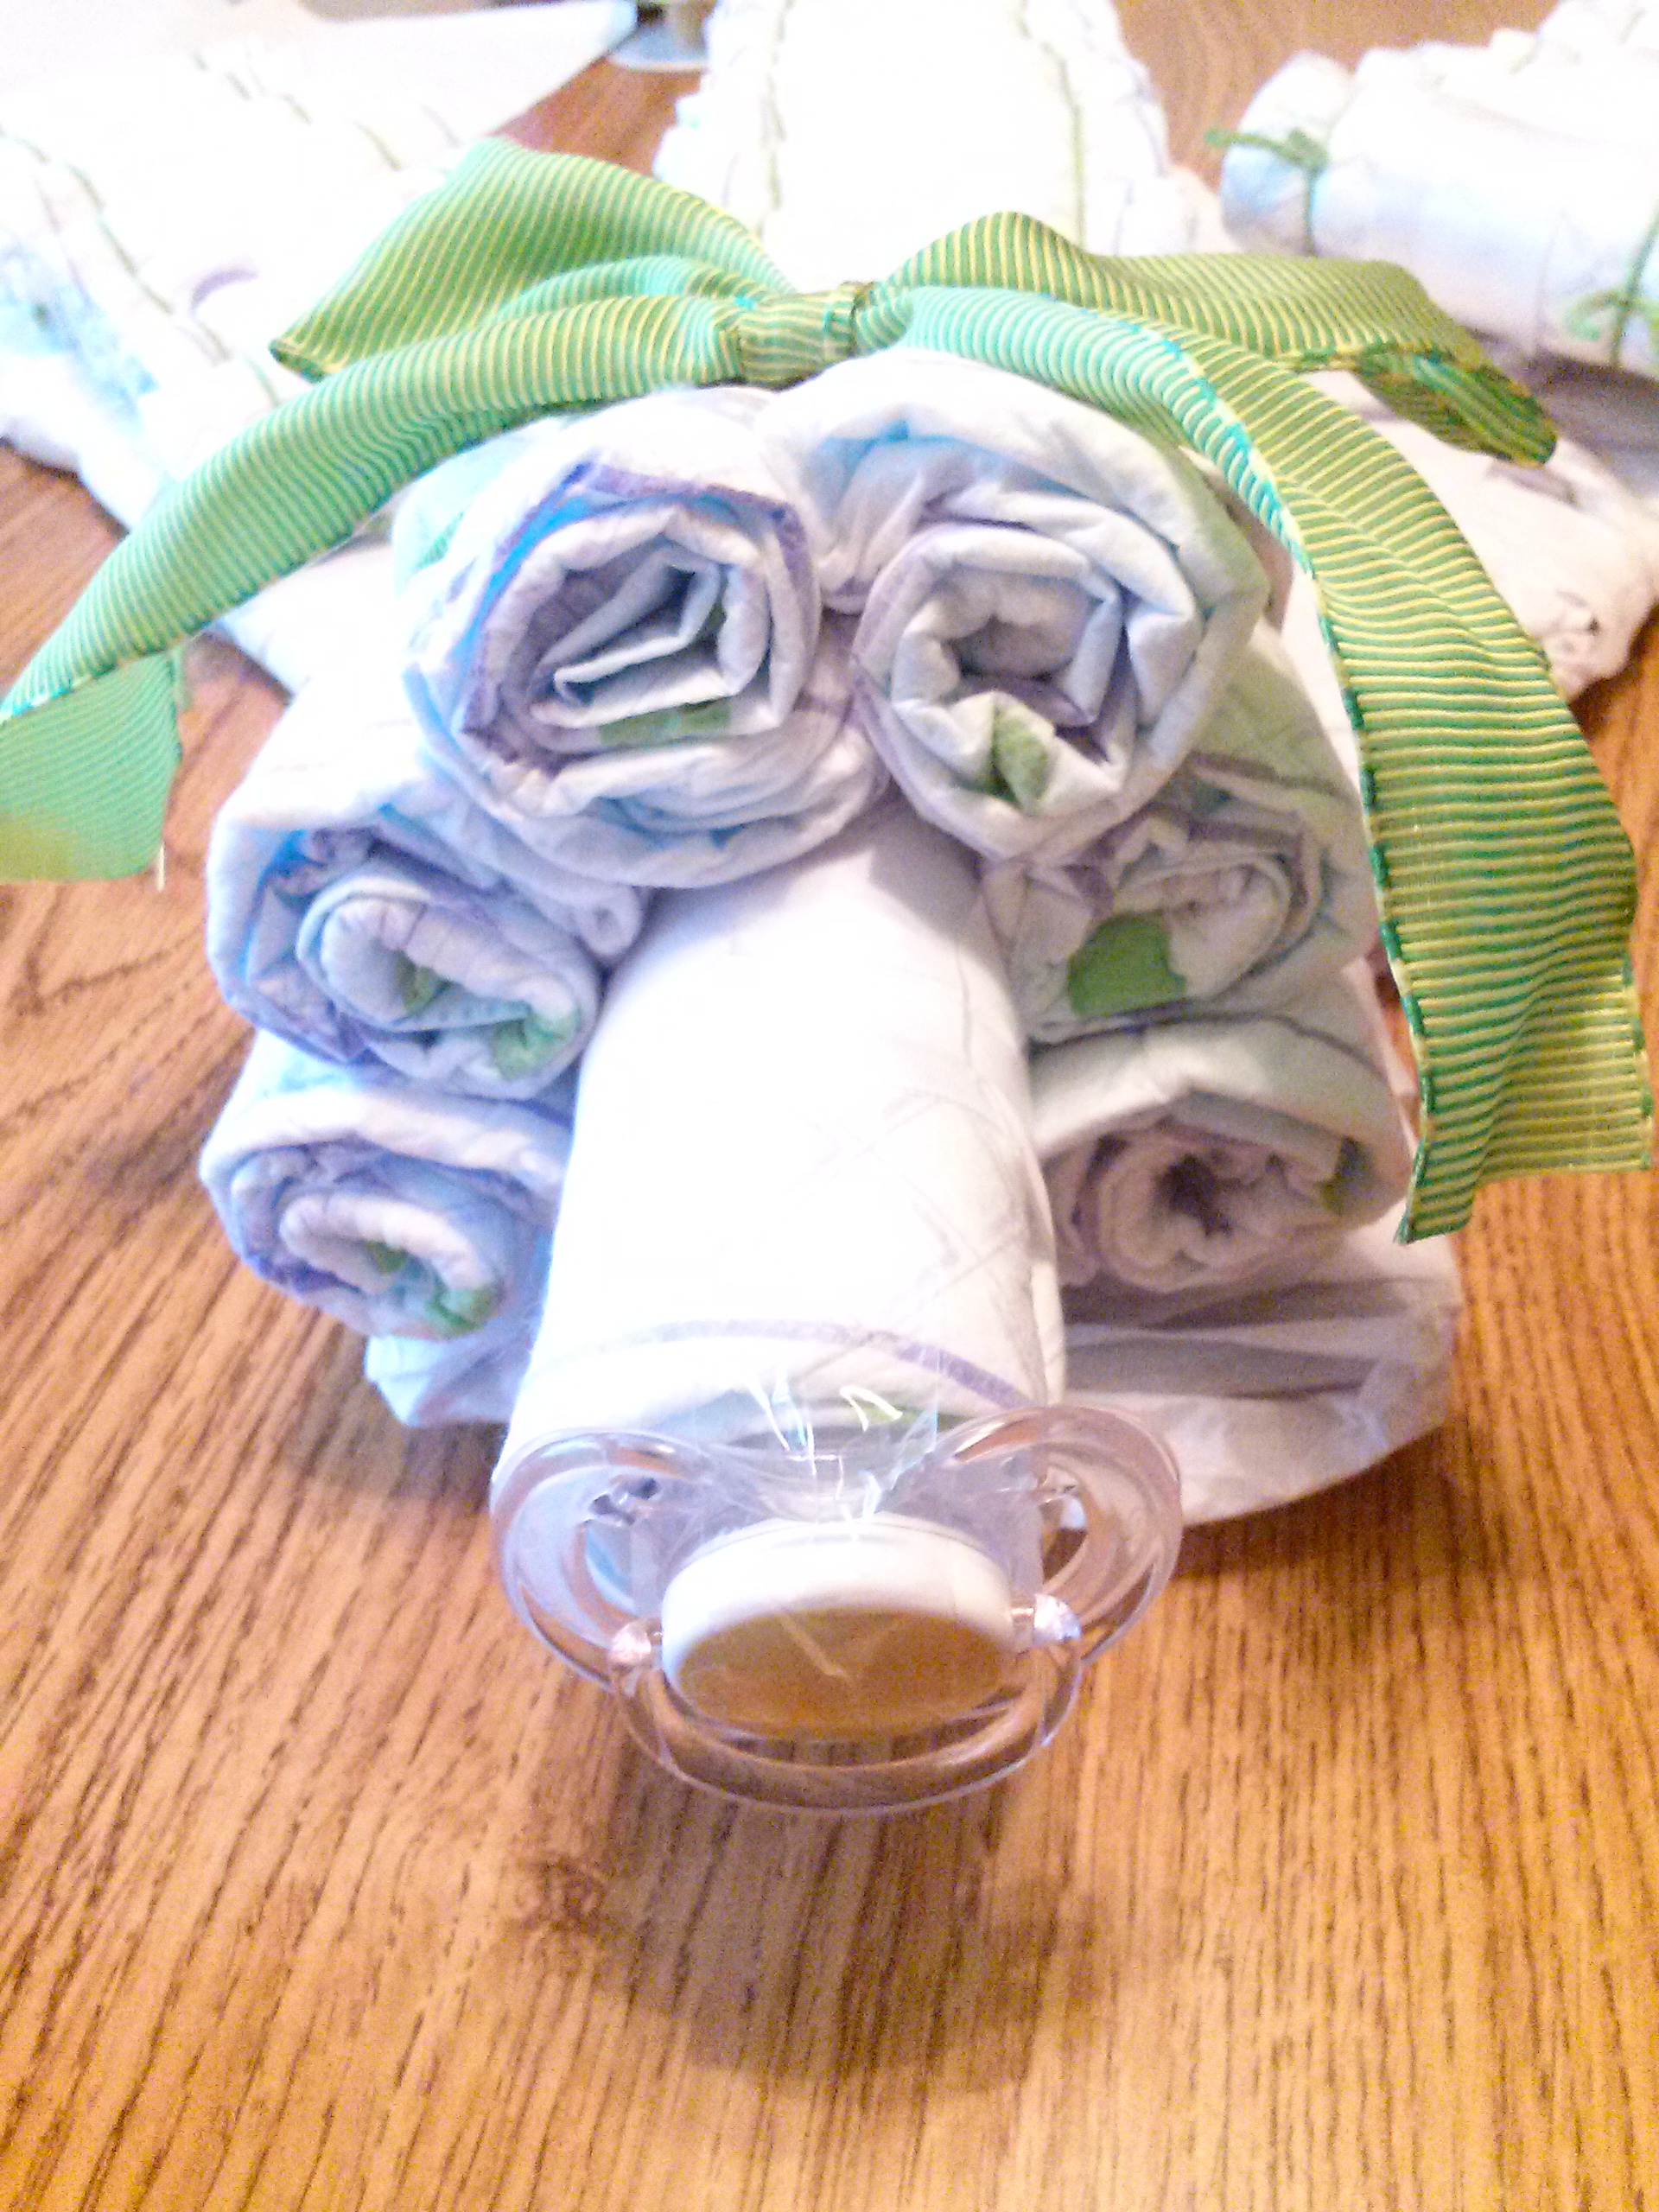
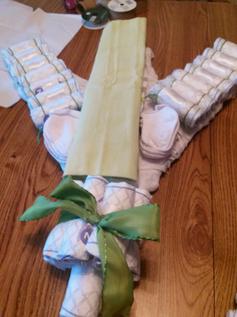
To create the nose of the airplane, create one more chain of diapers that is about 8 diapers long. (Depending on how tightly you roll your diapers it may be more or less.) Wrap the chain around one rolled diaper, allowing about 1/2 of the single diaper to stick out; tie the round with a decorative, wide ribbon. Add a pacifier into the end of the nose, and secure it with a piece of clear tape.

Now that the diapers are ready to go (but still not attached!) it's time to decide where to place your extra items. Some will go on before you attach the diapers, and some after, but it's best to arrange things and have a plan before you tie everything down.
We used a 2 pack of pacifiers, and concealed the extra / non-matching one inside the empty space in the nose of the plane.
The single packaged pairs of socks were perfect for filling in small, odd shaped gaps, like at the base of each wing. Socks with their own headercard / packaging work great, because you can adhere them with a dab hot glue and not damage the actual product. (Important, since this is not just a decoration, but also a beautifully handmade gift!)
With the remaining 2 blankets, fold them to fit the width down the center of your airplane, adding some extra depth and a nice pop of color. If you have extra items, like clothes, pacifiers, etc, you can conceal them into the folds of the blanket.
We incorporated the "Gerber Newborn 3 pk Frog Sleep N' Play" into this diaper plane by dressing the pilot / sock monkey in a layered look and concealing the extra within the blanket folds.
Use some yarn or string to help you attach the wing sections of rolled diapers to the foundation. If you wrapped your rolled diapers with a wide piece of ribbon you can use the hot glue to help you attach them as well. For the main body of the airplane, first position and tie down the tail, it should be the base layer of your fuselage. Tie the nose of the plane down next, then layer the fuselage with the folded blankets and the last chain of rolled diapers. Secure all layers in place with the yarn before seatbelting in (also with yarn) the pilot. Add any remaining embellishments, such as the socks.
The 4 pack of blankets will serve you well in crafting a tail and hiding extra items in the fuselage. For the tail, leave two blankets rolled (as they came in the packaging) and fold them both in half, sliding one into the other as shown below. To build the tail up, place 2-3 rolled diapers on top of where the two blankets overlap and secure with a long piece of matching ribbon or yarn.
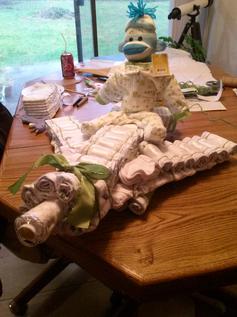
Finish off your diaper airplane by adding "engines". Tie two diapers together just like the larger diaper chains, and attach them underneath one of the wings using the yarn. Repeat for the second set under the other wing.
Decorative diaper cakes can cost a pretty penny, but if you're willing to put in the time and effort, you'll have an amazing, (and useful!) decoration and handmade gift to share!
If you enjoyed our tutorial or found value in it, we'd love it if you'd give us a thumbs up or a share on Facebook or Pinterest!
Share these
pins on
Pinterest!