You might
also enjoy...

Disclaimer: Please note that some of the links in this post are affiliate links. There is no additional cost to you, but The Scrap Room will earn a small commission should you choose to purchase through those links. Thank you for helping support our business!
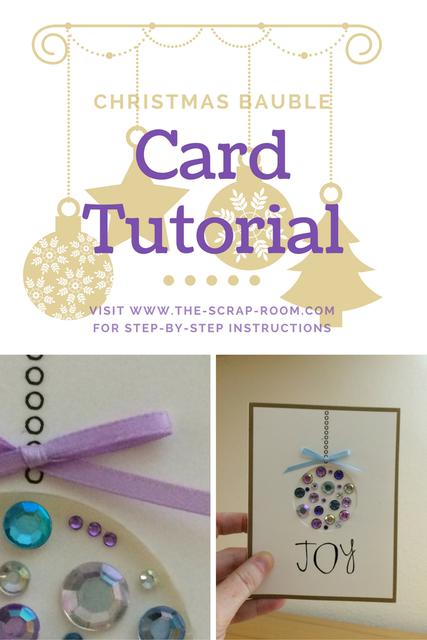
Ornamented Greetings - Handmade Holiday Card
You won't need a tree for this bauble! A simple cut out design, this ornament will add depth and dimension to your handmade holiday greeting cards. Stick with traditional, seasonal hues or branch out in your favorite colors to give your greetings a more personal touch.
Christmas Bauble Greeting Card
Supplies and Materials:
-4.25 x 5.5" card, or piece of card stock cut to size and folded in half
-Circle cutter
-Glue
-Rub-on letters (or letter stamps)
-Adhesive gems in several different sizes
-Ribbon - approximately 6"
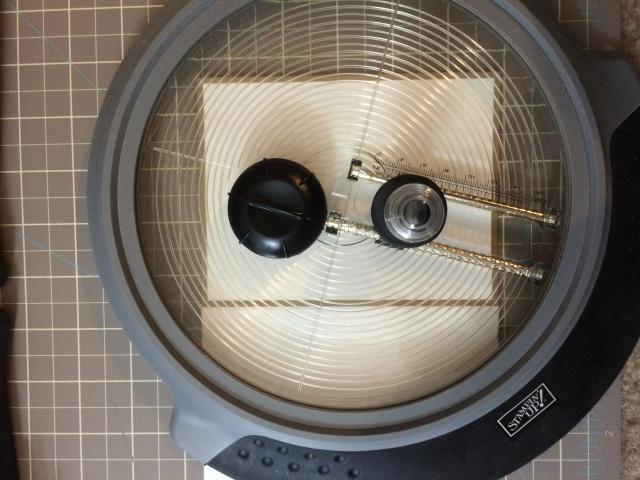
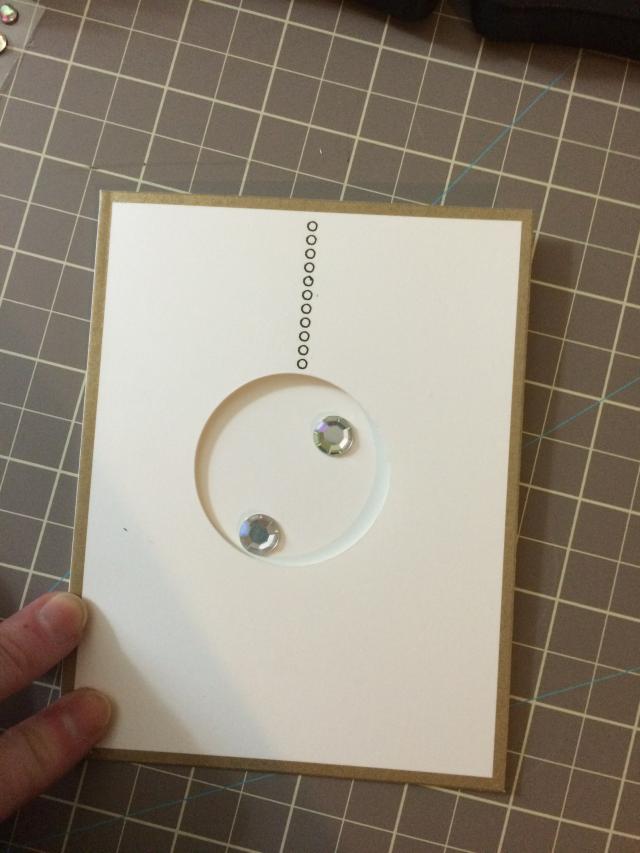

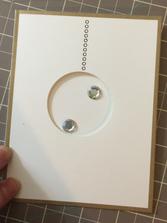
This card has lots of Bling, without being gaudy! Start out using a circle cutter and remove a circle from the front center of your card. Mine is 1.75" in diameter but you can make a smaller or larger hole; this will be your ornament. I used the Circle Scissor Plus by Stampin' Up, which cuts circles from one to six inches. If
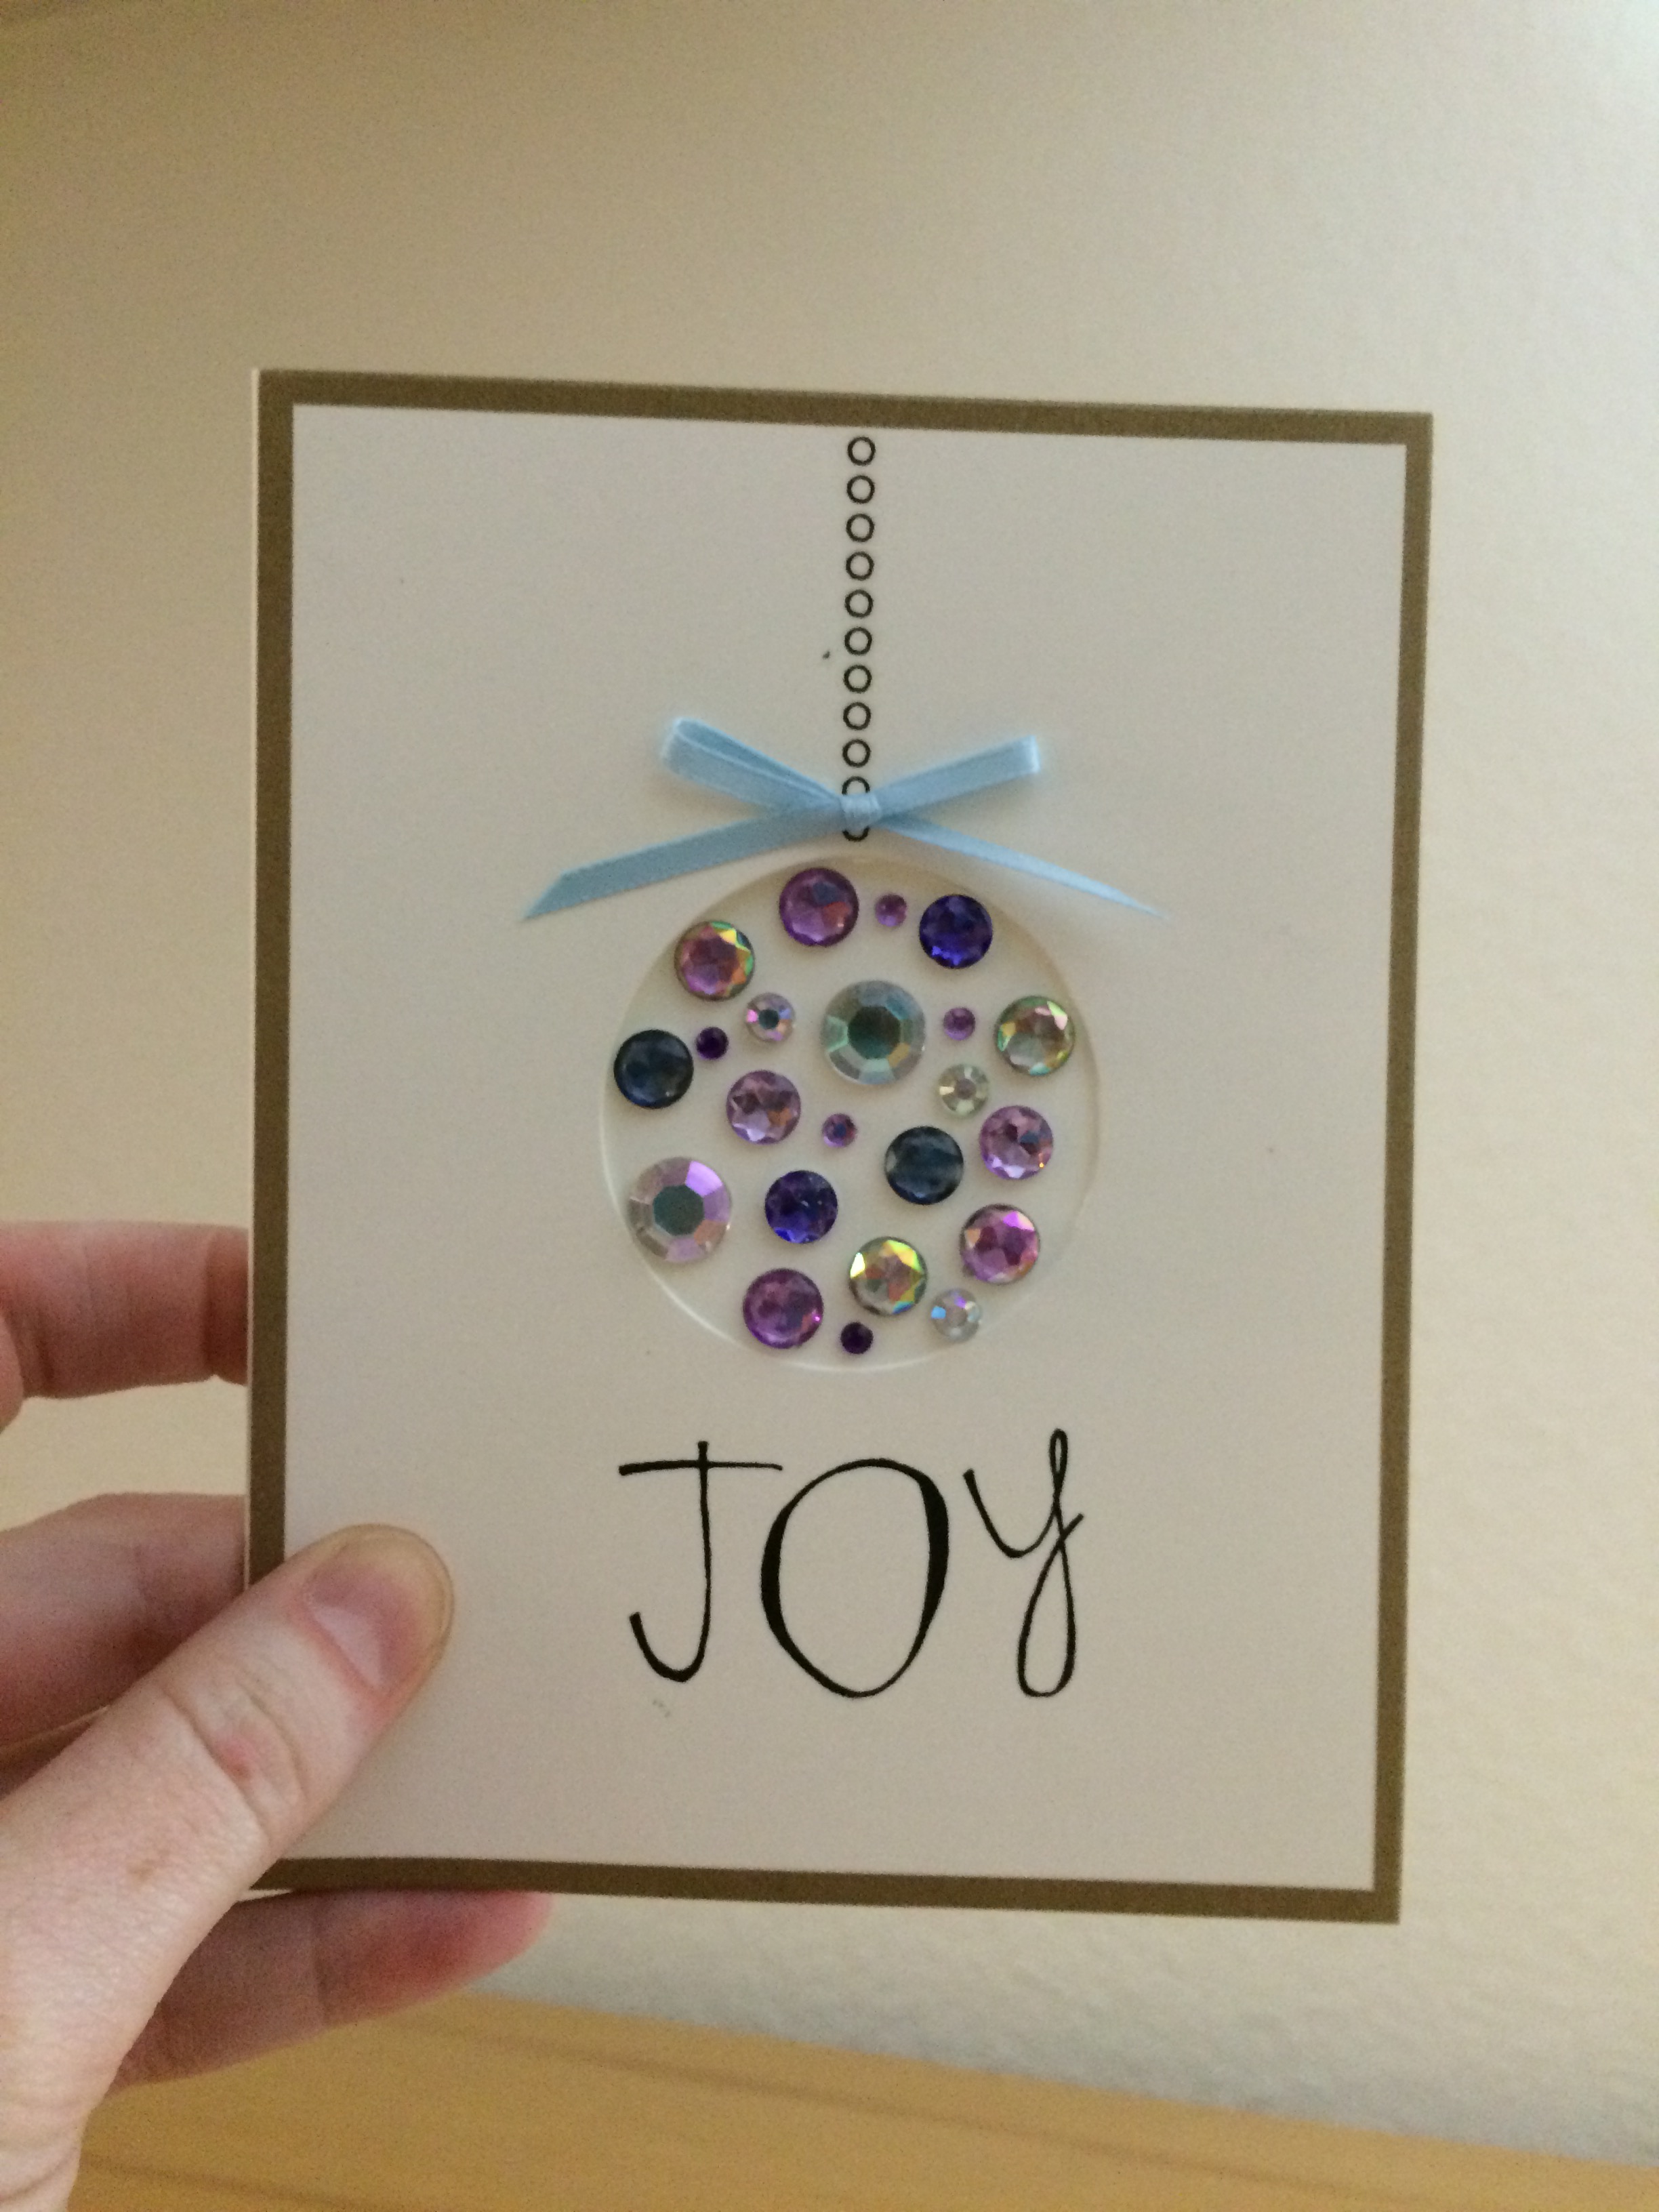
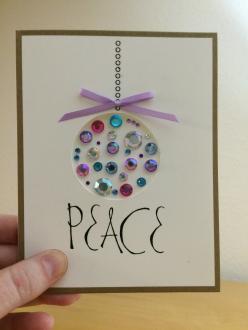
For the finishing touch, use a scrap of ribbon tied in a bow and add it to the top of the ornament. I added a small dab of glue to the ends of the cut ribbon to prevent them from fraying.
I'd love to see what you create! Share a picture with me in our craft community on Facebook here!
Using letter rub-ons, add your word of choice to the bottom third of the card. Some ideas are "merry", "joy", "cheer" and "peace". The font shown on my cards is called "heidi", by making memories.
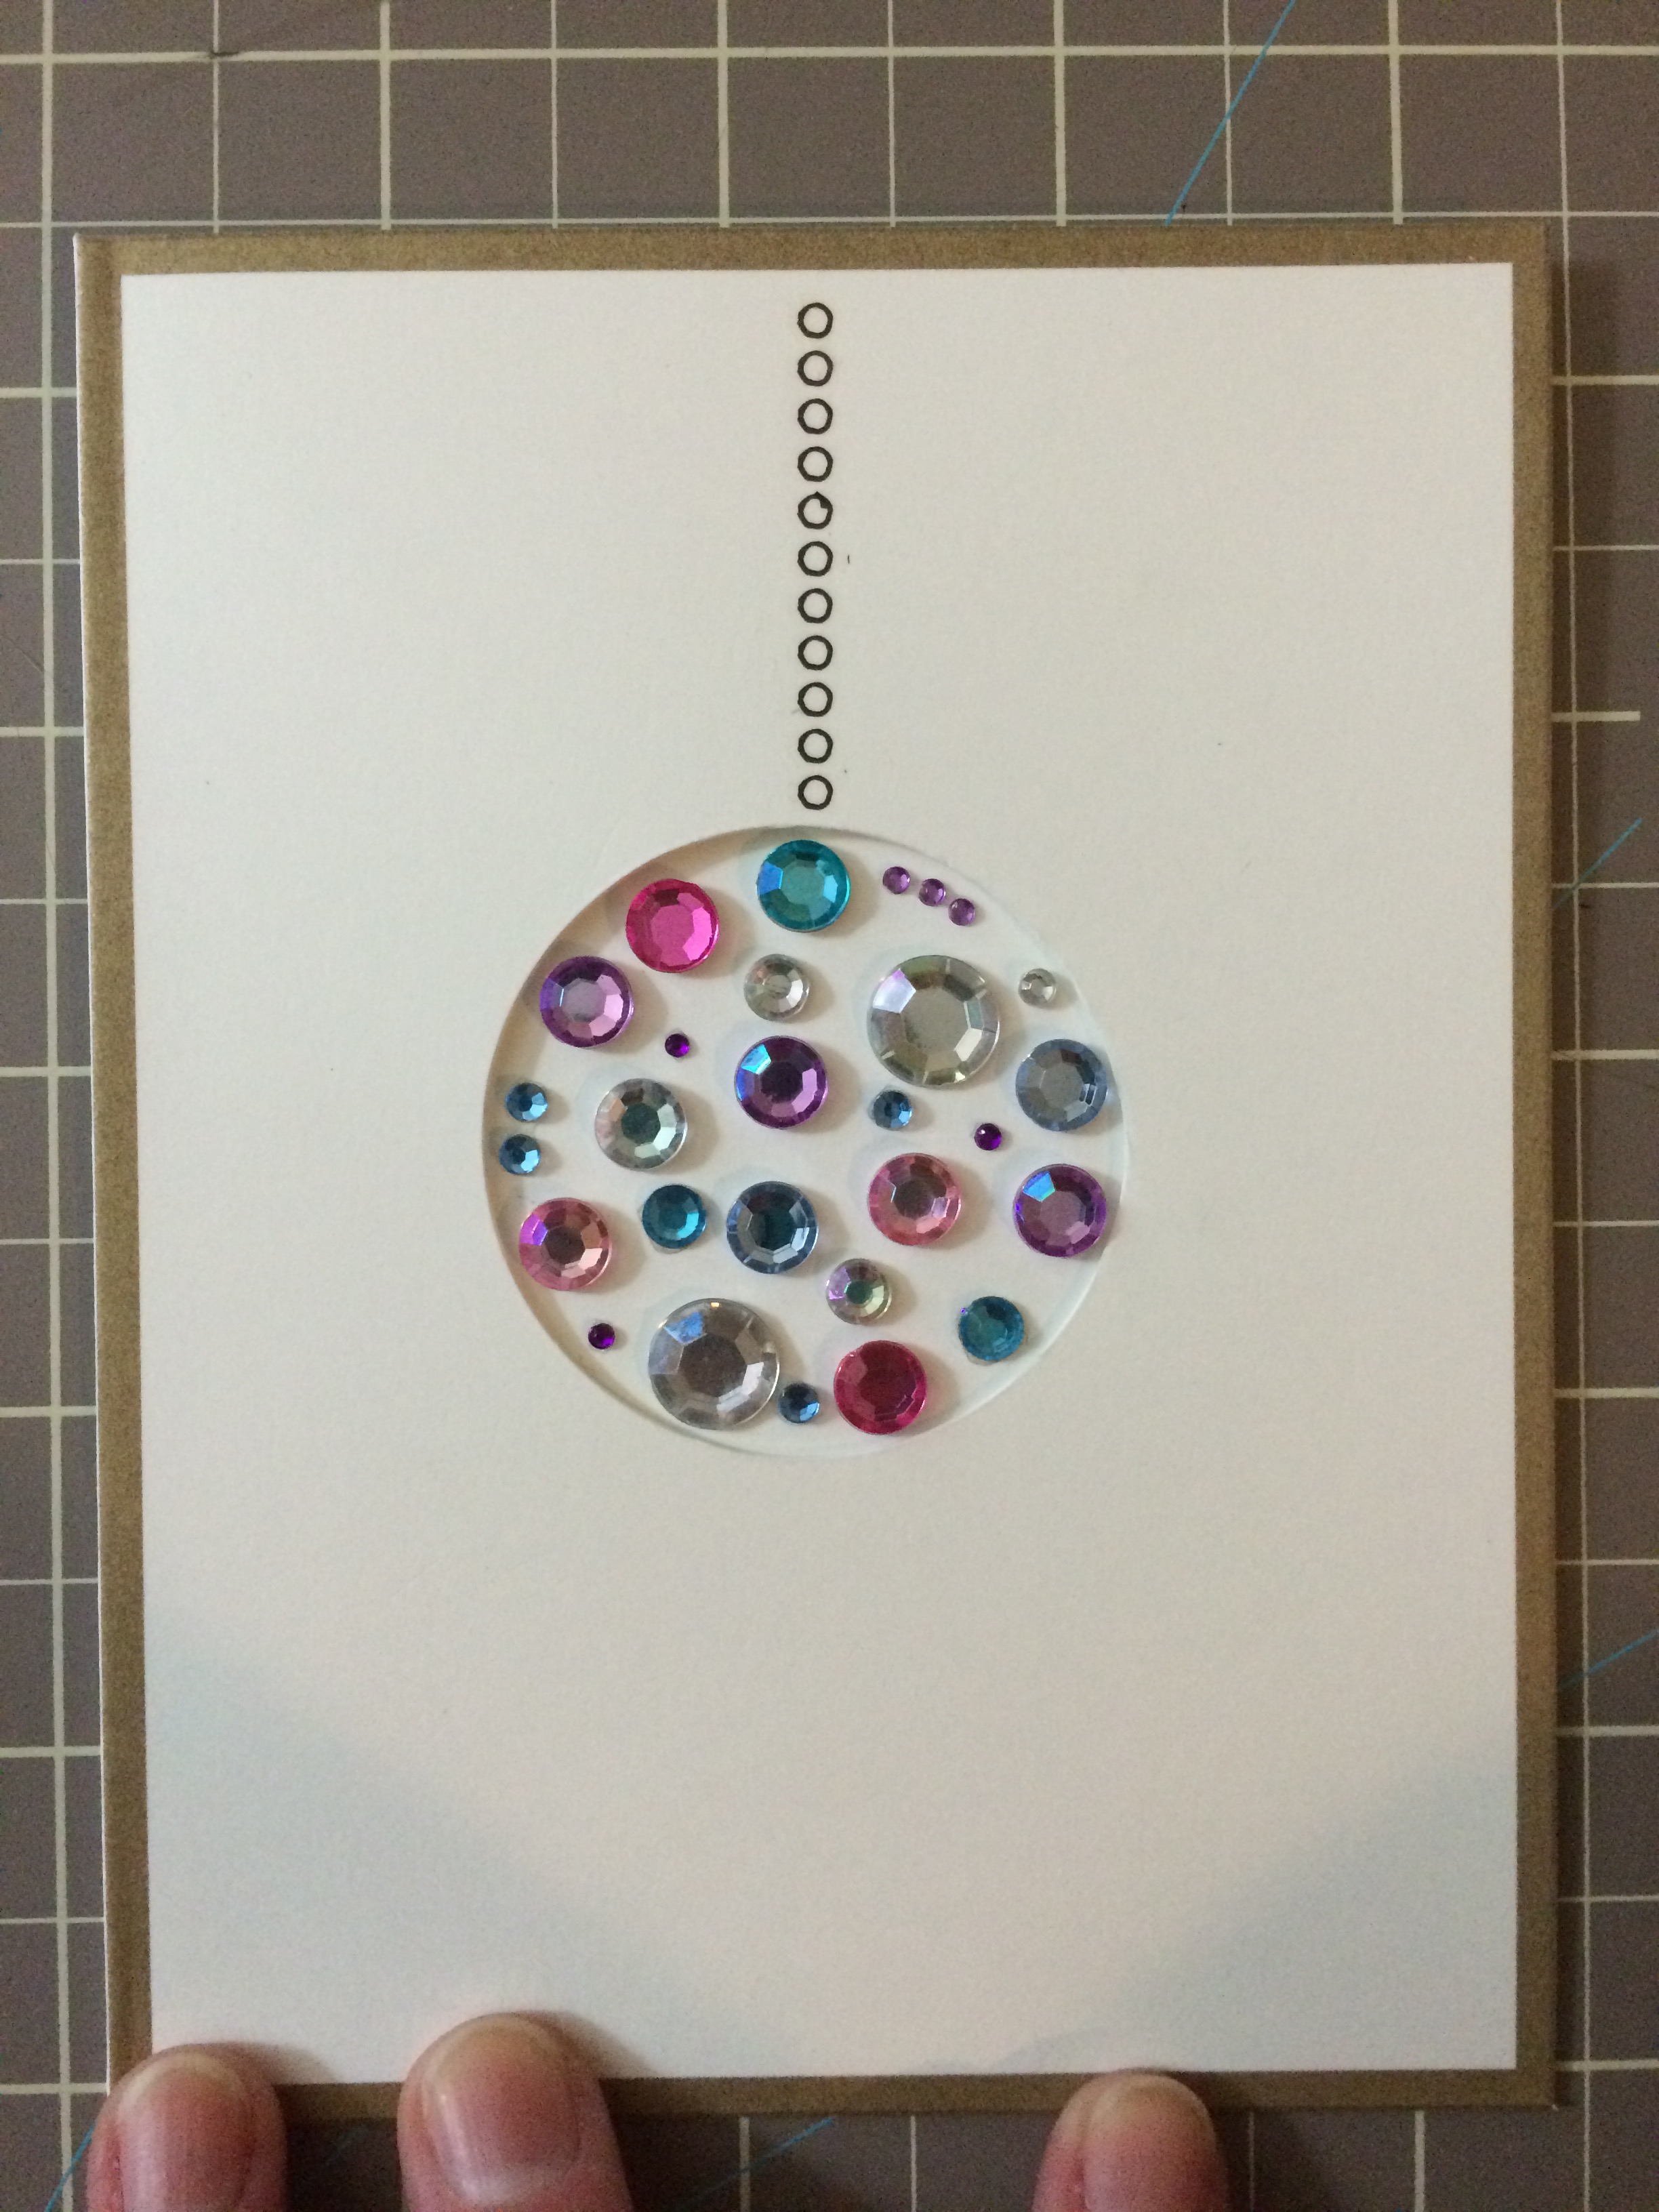
Add an ornament hanger with rub-ons or a marker, between the top of the circle and top of the card. I was able to find some perfect rub-ons to hang my ornaments in the "Loved Ones" collection by Art Warehouse.
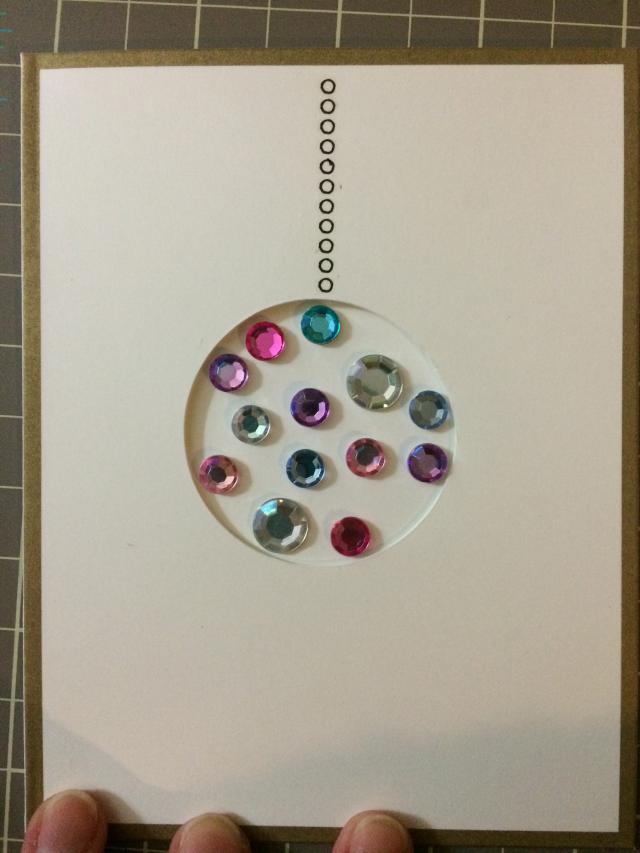
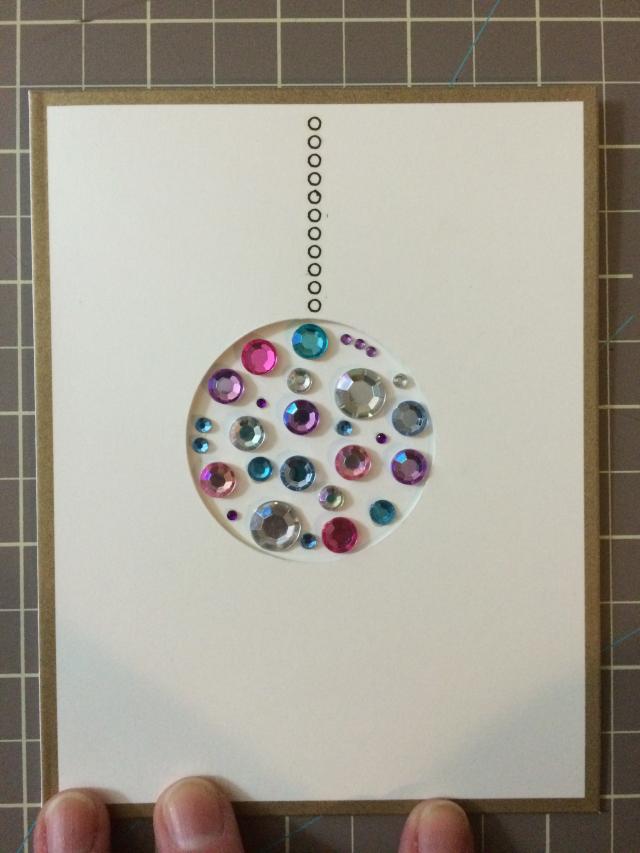
Now comes the fun part. We get to bling out the ornament! Michael's has a great selection of colored gems, and I will admit to buying a sheet of every color. Decide on a color scheme and add 2-3 large gems to the circle, Place them randomly but not right next to one another. Next add medium-sized gems, filling nearly all the remaining space. When the spaces between the gems are too small to accommodate medium gems, add small and extra small gems to the rest of the circle.

Save this tutorial on Pinterest for later!