You might
also enjoy...
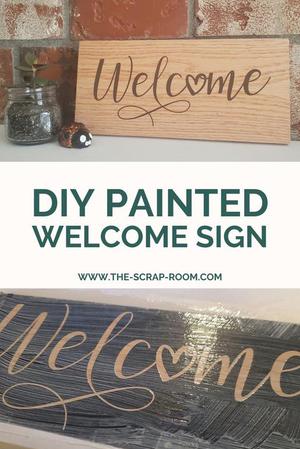
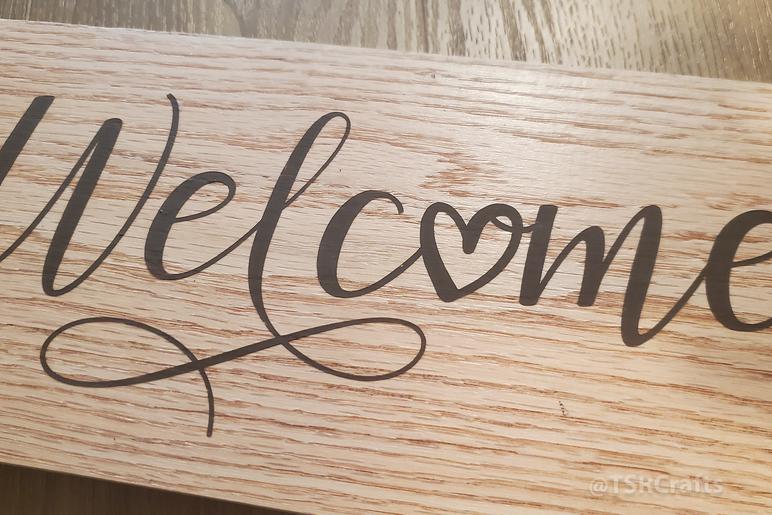
DIY Welcome Sign Tutorial
How to make a Welcome sign for your front porch or home
This budget friendly "Welcome" sign won't take you long to put together! Make one to freshen up your entryway or front porch, or create gifts for friends and family! They especially make great diy housewarming gifts! ;)
This project is quick and easy to do and you can use the same technique to create any painted sign you like, so be sure to bookmark this page for reference -- you may be using it a lot!
For this project, you will need:
-Blank wood or a blank sign
-Mod Podge and foam brush
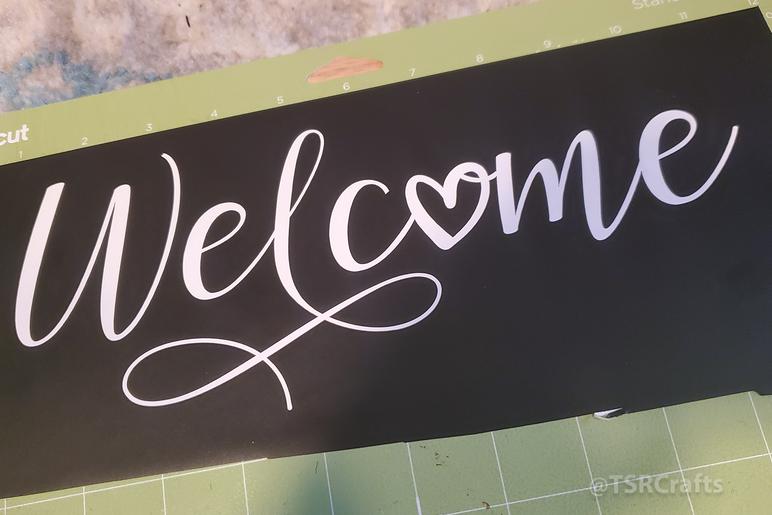
-Welcome sign cut file design with compatible craft cutting machine
-Acrylic Paint and paint brush/applicator, or spray paint
-Transfer paper for the vinyl
-Sign hanger (optional)
If you enjoyed my tutorial or found value in it, I'd appreciate it if you gave it a little love on social media!
Disclaimer: Please note that some of the links in this post may be affiliate links or ads. There is no additional cost to you, but The Scrap Room will earn a small commission should you choose to purchase through those links. Click here for my full disclaimer. Thank you for your support.


This project is super simple to do - but you will need an electronic cutting machine, because cutting out things like this with a craft knife can sure be a challenge!
You could just slap a vinyl decal on your wood to make a sign, but honestly, your sign probably won't last very long. Below, I'll show you how to use the vinyl to make a stencil and paint the design on, making it much more permanent so it will last for years to come.
I'll also show you how to get crisp clean lines, and professional results every time.
I've actually had people ask me if my signs are made with vinyl that will peel off because the edges are so clean. Nope. These signs are made using paint and are permanent!
But to get those clean edges, there's a few tricks so be sure to read this "how to" through to the end before starting.
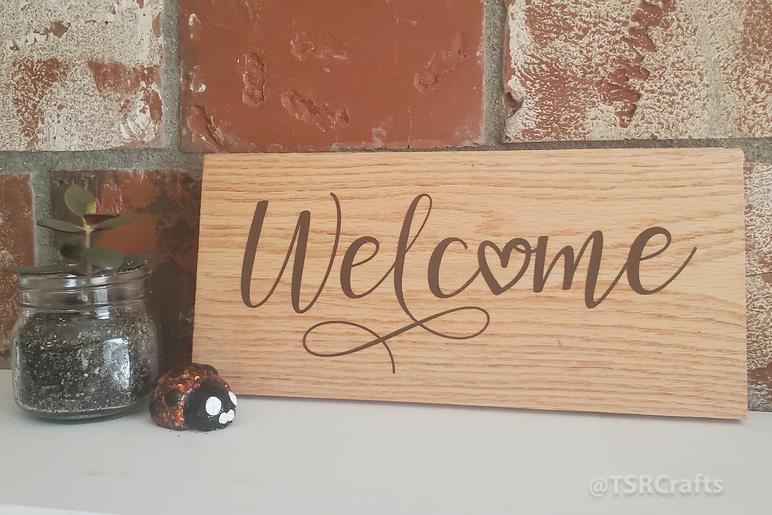
We keep a "scrap pile" of wood just for projects like this (waste not, want not), and I had all of the other supplies on hand too, so I didn't have to go shopping or spend anything to make it this welcome sign. I even designed my own "Welcome" design for it. You can make your own welcome design, or purchase one online that you like. If you'd like to use the "Welcome" design that I created, you can find it in my shop, here.
Make sure you pick out a relatively flat piece of wood for this project. You can also buy blank signs that are ready to go with built in means to hang them. Either way, make sure you start out with a piece of wood that doesn't have tons of texture. We'll be adding the vinyl stencil, then sealing all the gaps between the vinyl and wood with a couple layers of Mod Podge, and if you pick wood that is heavily textured, you'll need a LOT of Mod Podge, and you still might get bleeding from not having a good seal. So start out with a piece of wood for your sign that isn't full of bumps and grooves where the "Welcome" design will be.
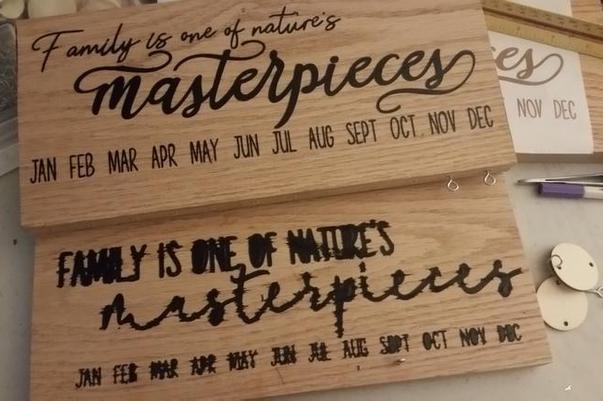
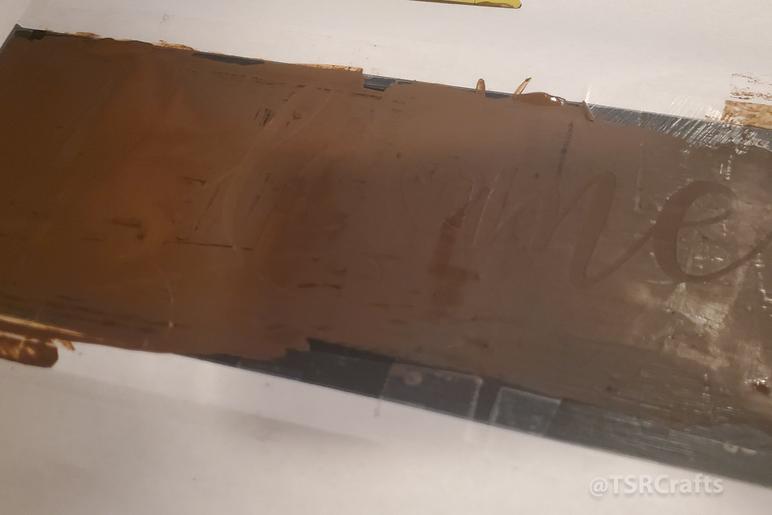
Even if you use wood that looks and feels pretty smooth, you'll still need to cover the vinyl stencil with Mod Podge. Do not skip this step, no matter what. If you don't seal the area properly, your paint, no matter what kind you use - spray or brush on - will bleed into all the tiny lines in the wood. Below is a picture of what can happen to a wooden sign without sealing it with the Mod Podge first. The sign on top was sealed with Mod Podge before adding paint. The bottom one wasn't.
(Btw, this "Family is one of nature's masterpieces" Important Dates Reminder sign is another project you might want to check out. It's one of my most popular tutorials, and it's also one of my personal favorite decor projects of all time! What a great way to keep track of all your important, recurring dates like birthdays and anniversaries, and they make amazing gifts too!) ;)
Once you've got your wood picked out for the sign and your other supplies ready, cut out your digital "Welcome" design from the permanent vinyl to fit your sign, and weed out the actual design, leaving only the negative on the backing.
Use some transfer paper to help you carefully transfer the negative design onto your blank wooden sign.
As long are you're careful with the vinyl when you're transferring it, you can get away with only using the transfer paper over the area where the actual design is. There's no need to waste a huge sheet of transfer paper.
WASTE & TIME SAVING TIP:
I transfer things ALL THE TIME, so I usually keep 2 medium sized pieces of used transfer paper actually stuck to the back of my Cricut machine. (Each are smaller than my hand.) They seem to stay sticky for ages! I hate waste, so I just keep reusing them, and sticking them back onto my Cricut when I'm done. I used only these 2 little pieces over the design on my welcome sign to lift and transfer the design.
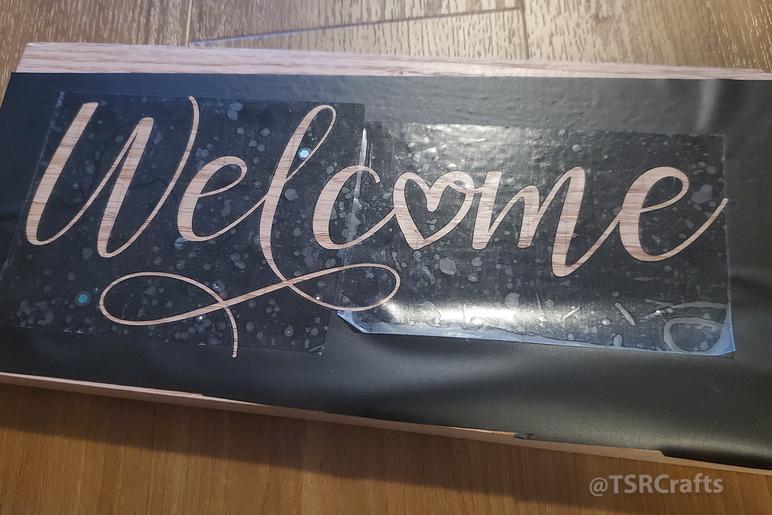
When you have your vinyl stencil positioned on your wood where you want it, carefully press it onto your piece of wood, smoothing it out, and making sure there is a good connection between the vinyl and wood, especially around the design itself. You don't need to use a huge piece of vinyl, just big enough for your design. Cover the excess area of your wood sign with scrap paper using some tape to keep your sign clean from excess paint.
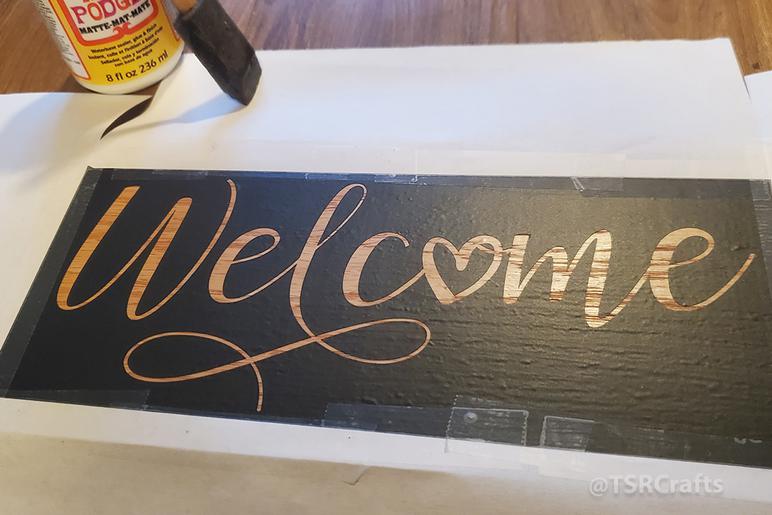
Use the Mod Podge and foam brush to apply a thin layer of sealer over the entire design. Make sure that you brush the Mod Podge onto the design from every angle to ensure there are absolutely no gaps between the wood and vinyl.
Then do it again, for good measure. Add a 2nd thin coat of Mod Podge, and let it dry completely. Remember, If you have any bleeding at all, you may ruin your sign beyond repair. (Once it gets in those little grooves, you'll have to do a LOT of sanding to get it out, and that might not even be possible without ruining your painted design or the wooden sign itself.)
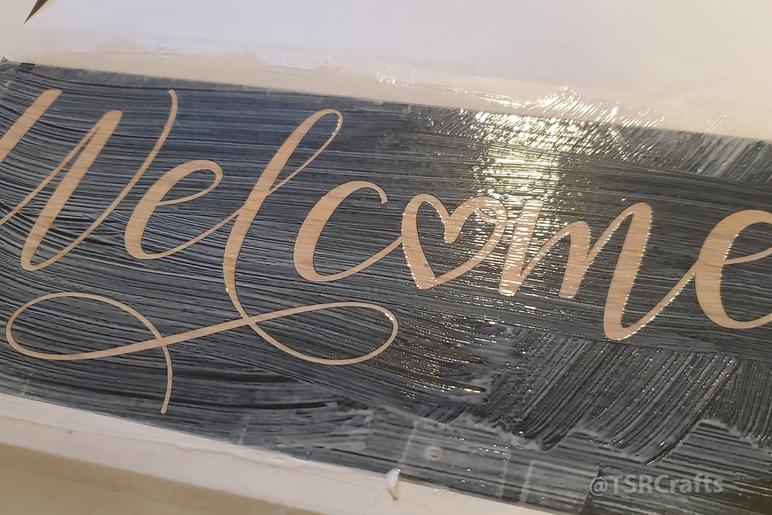
When your Mod Podge layers have completely dried, it's time to add the paint! You can brush or spray the paint on, either will work fine. I actually used a scraper to gently swipe the paint onto this sign in about 60 seconds, it was really easy!
Once your paint has fully dried, carefully peel the vinyl stencil off. I find it works best to pull the vinyl off by pulling it close and parallel to the sign, opposed to lifting it up and off. It won't pull at the paint so much, and will help give you those nice, crisp, clean lines.
Use your sign as-is, or add a hanger to the back to be able to hang it up. You can also use some Aleene's Acrylic Sealing Spray to give it an added layer of protection if you're going to use it outside.
This project is so easy, and once you've mastered it, you'll be able to use the same process over and over for all kinds of painted signs! Bookmark this page to reference to later, or hit one of the share buttons below to share or save it to Facebook or Pinterest.


