You might
also enjoy...
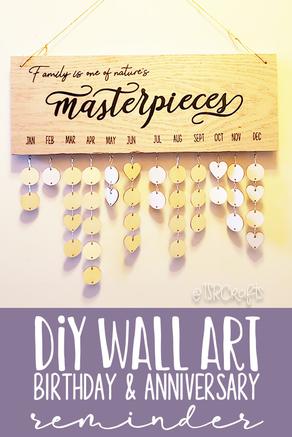
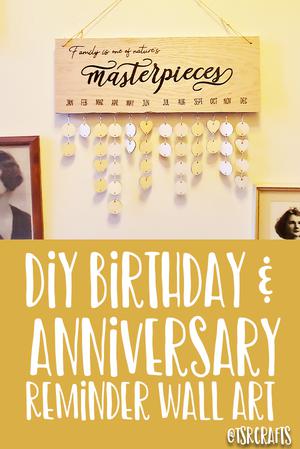
Birthdays & Anniversaries Reminder Wall Art
DIY wall art that's a by the month glance at all the birthdays and anniversaries of those you love
This is one of those projects that EVERYONE needs in their home. Including you. If you've got someone on your list who's tricky, and already "has everything"...they *probably* don't have one of these.
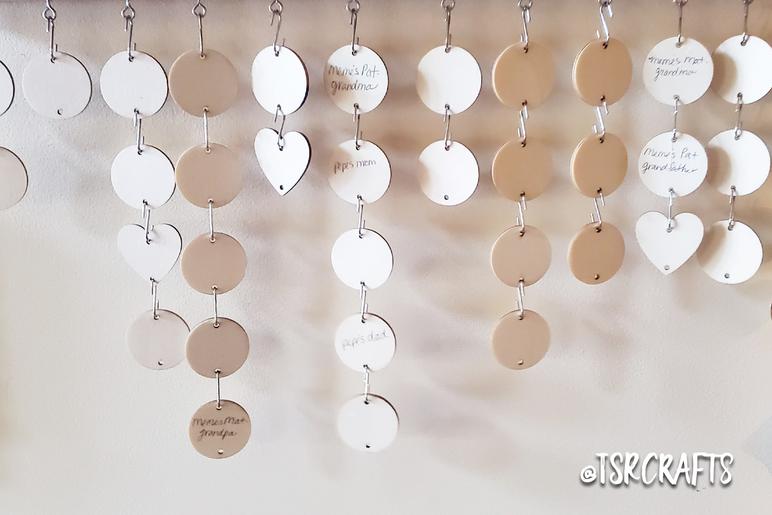
This DIY wall art is more than just a "birthdays and anniversaries" reminder chart for those still with us. It's also a reminder to celebrate the lives of those we've lost, or our ancestors who came before us!
If you make one of these for yourself or a family member, do a little research on your family tree and add some of the people who came before you!
If you enjoyed my tutorial or found value in it, I'd appreciate it if you gave it a little love on social media!
Disclaimer: Please note that some of the links in this post may be affiliate links or ads. There is no additional cost to you, but The Scrap Room will earn a small commission should you choose to purchase through those links. Click here for my full disclaimer. Thank you for your support.

Thinking of making a few of these? They are really easy to make in bulk! So set up a mini assembly line for yourself and churn out several as gifts and don't forget to make one for yourself! If you're giving them as gifts, it's okay to not fill out the wood chips! Just wrap them up and give them with your completed sign, so all they have to do is add names and dates and hang!
**If you don't have an electronic cutting machine, don't worry! You can still print this design out and use it for an ink transfer craft, or modify the whole project, and create a framed design with an extra piece of wood below for the eyelets and hanging chains of wooden chips!**
Let's get started!
For this project, you're going to need a digital design that you can cut out on your electronic cutting machine. You can either design your own or find one ready made. I've made 2 different versions for this project. The one you'll see in this tutorial, plus a newer more modern design. I've bundled them both together and you can find the set in my shop here.
You can enlarge the designs if you want to, but shrinking them smaller can make the wooden chips not fit as well, so I don't recommend cutting this design smaller.
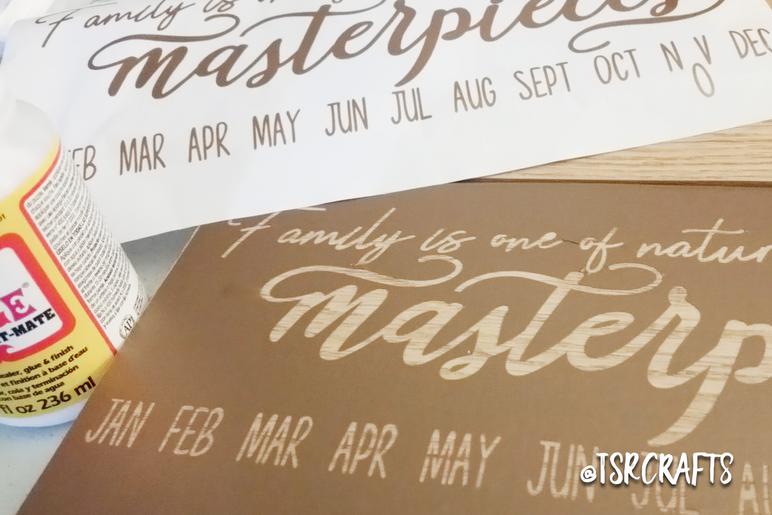
Begin by cutting the digital design out of vinyl, and adhere the NEGATIVE of the cut out onto your wood board so you can use it as a stencil. Since this is a big design, make sure that you have some transfer paper on hand to help you keep the design flat and together when you move it! It can curl up on you quickly if you try to do it without.
Make sure that it is pressed firmly onto your board how you want it to go.
Once your layers of glue are dry, make sure that all of your board that you DON'T want paint on is covered (I just taped on a couple pieces of painters tape and paper to hide the bits still showing) and spray on a solid layer of the spray paint. You'll want to add a few coats of this as well, letting each one dry completely before adding another.
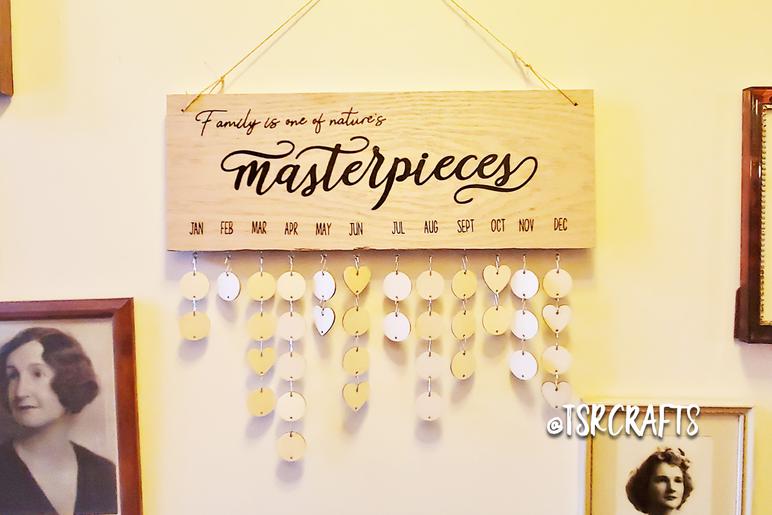
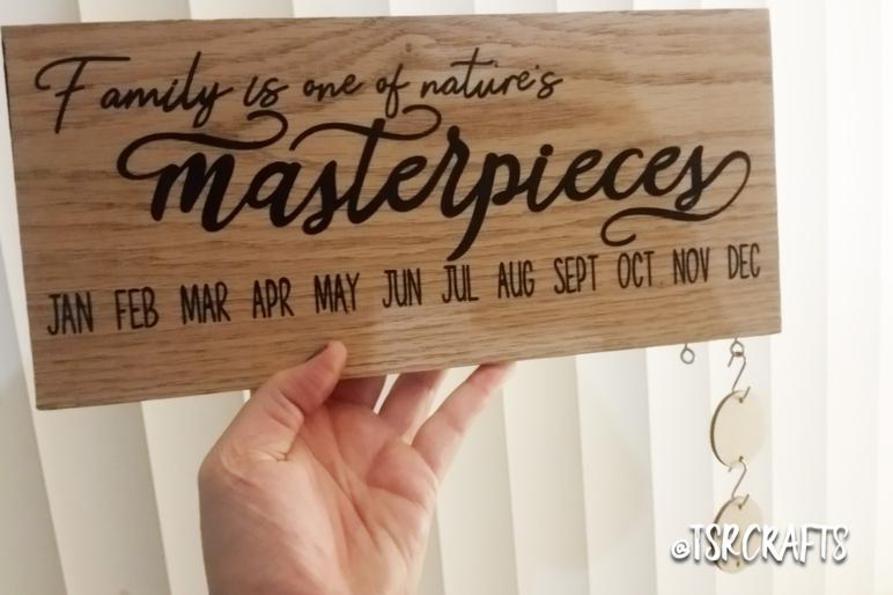
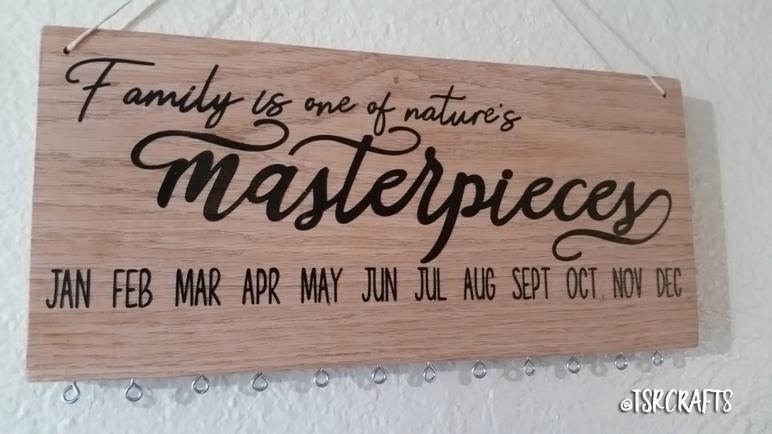
You can add all kinds of holidays and special days to your wall art! It makes such a lovely piece of decor, and it's so easy to just add a new chip on with the "s" hook design. If you haven't already, definitely add this one to your MAKE list!
Share your DIY projects in our Facebook group DIY Projects and Craft Chat, here, and checkout what everyone else has been making!
SUPPLIES FOR THIS PROJECT:
-A nice piece of wood that measures approximately 7" x 16" x 1/2"
-small eyelet screws (I like this assortment pack, it's great to have on hand for a variety of projects)
-Drill
-twine (or string -- for hanging the sign)
-**Electronic cutting machine that uses EPS, SVG or PNG files
-Families are Masterpieces Digital design
-1 sheet of 12" x 12" vinyl
-1 sheet of transfer paper (optional)
-Mod Podge & a foam brush
-Black Acrylic spray paint
-Aleene's Acrylic Paint Sealer (optional)
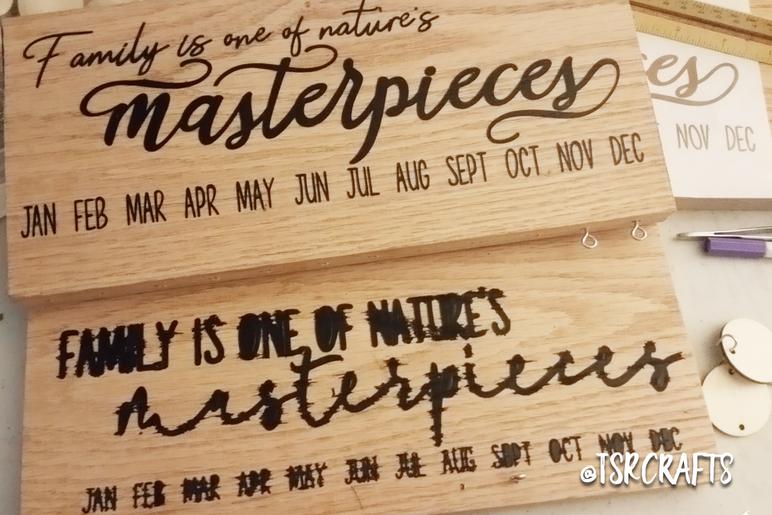
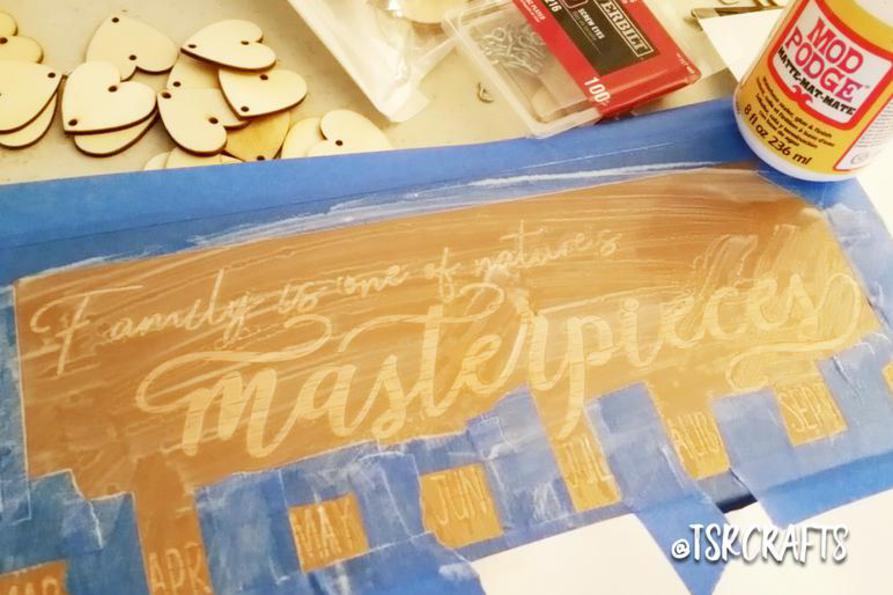
ONCE YOUR VINYL STENCIL IS IN PLACE, USE YOUR FOAM BRUSH TO APPLY A COUPLE OF THIN LAYERS OF MOD PODGE. (Let the first layer of glue dry completely before applying the 2nd.)
>>DO NOT SKIP THIS STEP.<<
If you do not do this, your paint will get into the grooves of the wood and bleed. You will have a mess, and either have to sand it down and start over, or grab a new board and start over. Either way, it's bad news, so DON'T forget the Mod Podge! #IKnowFromExperience
When your paint is dry, very *very* carefully, peal off your vinyl stencil. Doesn't it look great so far? Okay! Let's add some HARDWARE!
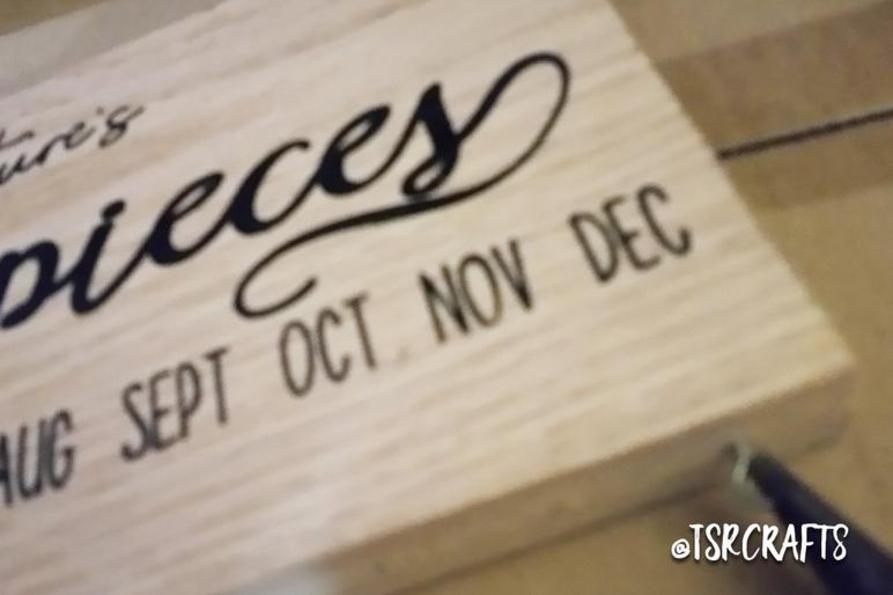
Use a drill and small drill bit to create small pilot holes along the bottom of your sign, centered under each of the months. Twist in the eyelet screws. I used some needle-nosed pliers to help me get a better grip.
You'll also need the drill to make a small hole in each upper corner so you can feed some twine or string through to hang it. To help you get the holes placed in exactly the same part of the corner, simply use a scrap of paper as a guide! Cut a small scrap square and line it up in the corner, then drill your hole. Flip the paper over in the other top corner to make a hole that matches exact!
This is where you'll probably stop if you're making this project as a gift for someone. Include a package of the wooden chips and "s" hooks, and they'll be all set! They can use a regular pen or permanent marker to add their family and friends' special dates.
If you're making this for yourself, you've still got a little ways to go! You'll need to do a little research to find all the names and dates. I use Ancestry.com for my research, but there are lots of great ways to search online nowadays!
I made FOUR of these signs, but here it is on display at my Mom's, below. I added some notes on the backs of some of the wooden chips about some of our ancestors for her.