For this project you will need:
-White twinkle lights -- you'll probably want either a 35 or 50 count strand. I recommend shopping locals sales with coupons if you can. I scored my light sets for a couple bucks a piece at a local drug store, but you can find good deals online too, especially when it's not peak season:
(Make sure you use this kind of light so they can "Stick out" the front of your canvas. Don't use the led lights that are embedded within the strand itself! If you buy these peak season you'll likely pay more -- try to stock up after Christmas and stash them for later.)
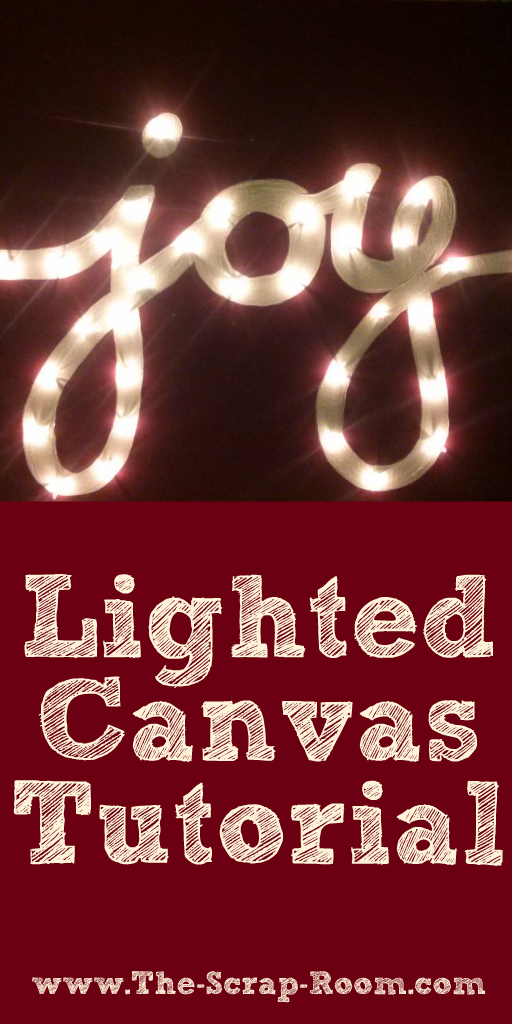
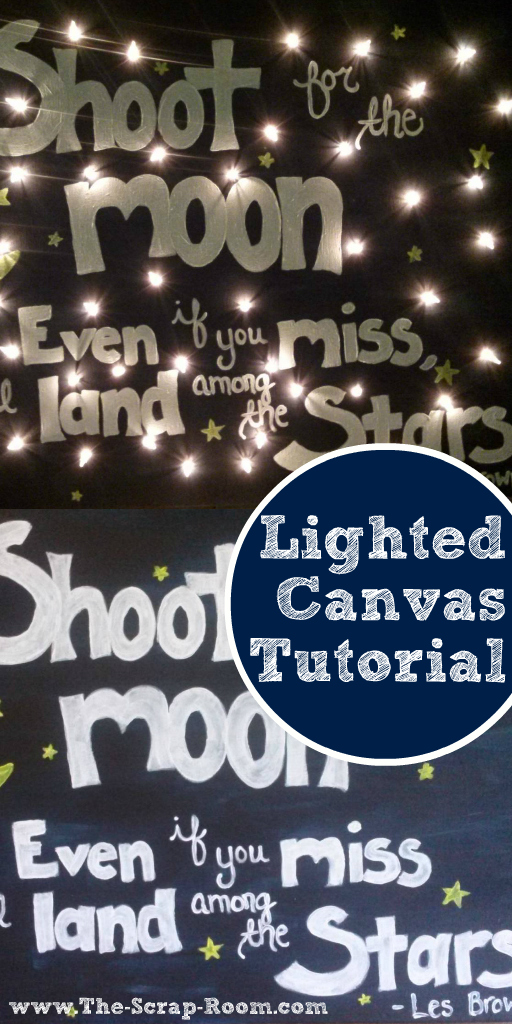
Lighted Canvas Home Decor
Create your own light-up display to brighten up your home, decorate a special party or wedding, or give as customized, handmade a gift!
You can make a 18"x 24" display using the same supplies as I did for about $10 when you make 4 at a time!
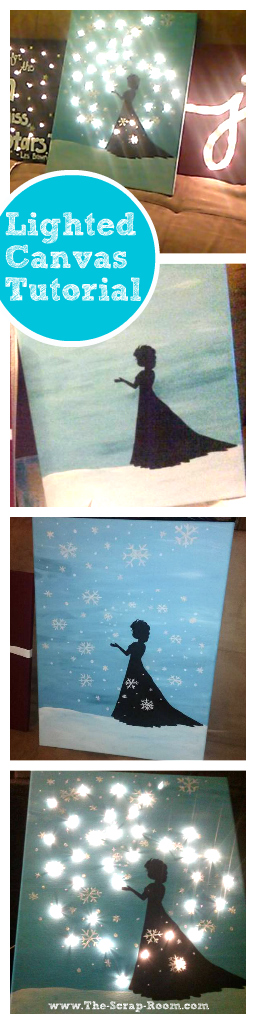
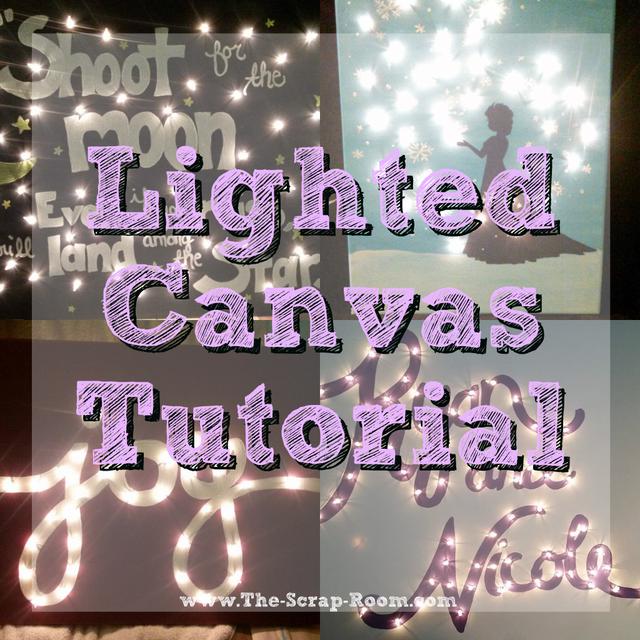
Believe it or not the hardest part of this tutorial (for me anyway) was the paintings themselves. I’m not very skilled at drawing and am only now, in my mid-thirties, even trying my hand at it. These are some very basic canvases I designed for my nieces and my boyfriend’s mother, as well as one I made as décor for a friend’s wedding.
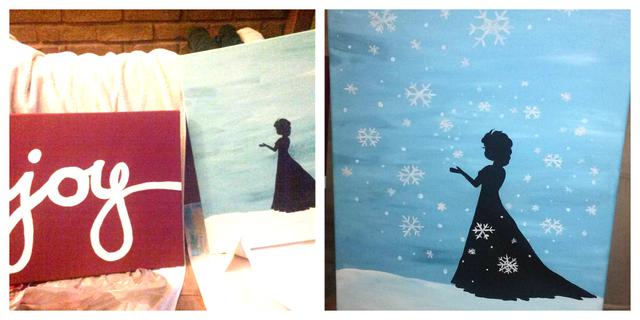
Start out with a basic 2D design. If you have the skill, build on it, if not, don’t be afraid to leave it a little more plain. Once you add the lights, it will change the whole look! You can also use chalk to sketch out your design before painting the canvas. (Since my drawing skills are atrocious, I opted for a roughly drawn silhouette outline of one of the characters in my youngest niece’s favorite movie with simple snowflakes.) Make sure you arrange your strand of lights so that the switch (if they are battery powered) or the plug end (if they need access to an electrical outlet) is at the bottom frame of the canvas so it’s easier to power on and off. Unless you know right where you’ll display it, you run the risk of the cord sticking out the wrong side if you guess and have it hang out anywhere else. Don’t forget that you’ll need a little length of cord sticking out if your art needs to reach an outlet or even an extension cord.
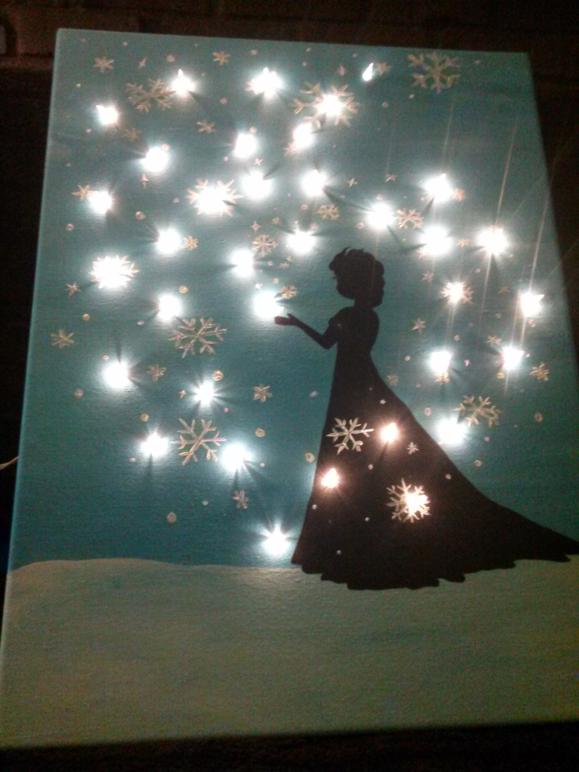
For my wintery scene, the very bottom light is the light bulb closest to the plug on the end of the strand. I curved the lights up and to the right and spiraled them around to the center before reversing my path and spiraling clockwise around the entire painting, finally ending this 35 strand light set at the top of the canvas.
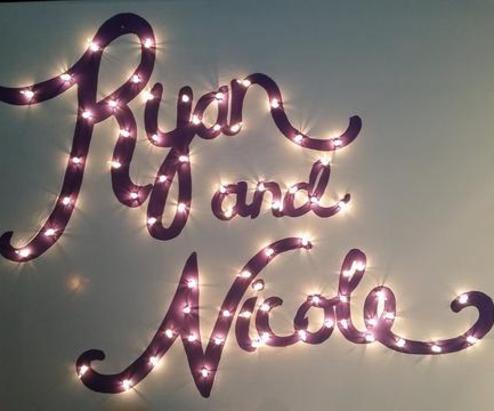
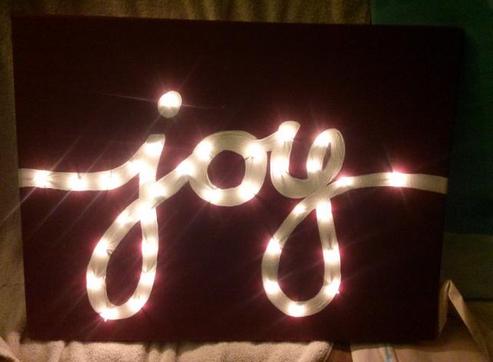
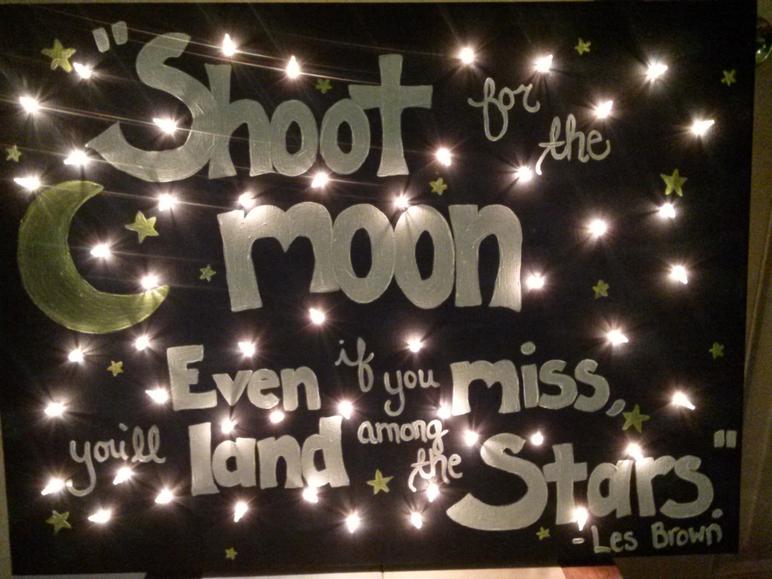
If you’re going to try your hand at lettering here’s a few things to keep in mind. First of all, you’ll have to take careful consideration of where each light will come through. If you don’t place them in a way that they flow well, and light up the letters clearly, it will be a little hard to read when it’s illuminated. Second, you may need to skip around to letters out of order to make your light strand work. I essentially went in a large wobbly circle around the back of my “Ryan & Nicole” painting, and was able to keep a tight line for the cursive “joy” decoration. Lastly, if you need to make a far reach between two lights that show through on the front, just skip a light, leaving it not poked through. Don’t try to pull your light strand too tight to make a light reach where you want it to go. This will only cause an almost puckering like effect, and the lights will be more likely to pop out! Leaving them on the backside you can cover them with black electrical tape when you’re done so they don’t shine through.
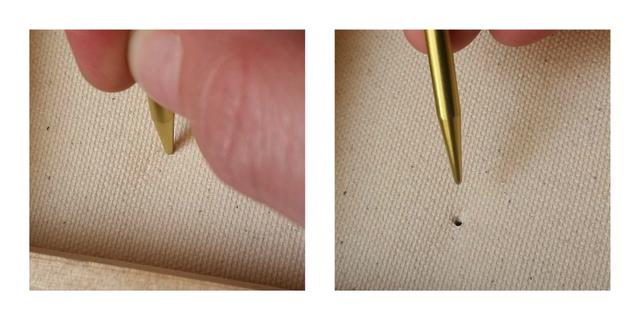
To poke the lights through, make a small hole first using a size 5 or 6 knitting needle or other similarly shaped tool. Poke from the back to the front of the canvas, carefully holding the surrounding canvas in place to keep from stretching. You want the hole to be big enough so that when you push each bulb through it’s hole, it holds the bulb tightly, and doesn’t slip right out. This will make it easier to secure each one in place with a small dab of hot glue (from the back).
There really is no “set way” to arrange the lights, it will be different for each painting, so be sure to take your time and plan it out before you go and poke a bunch of holes in your artwork. I like to try to visualize how my strand of lights will go, where it will start, where it will end, and how much of it will need to hang out the bottom. Then I punch each hole as I go, as I hold up the next bit of the strand, physically trying it out to make sure it will work. Depending on the size and intricacy of your display you may need a larger or shorter strand then the ones I’ve used for these painting, but I have found that either a 35 or 50 light strand tend to work great on the 18”x24” canvases. Too many and your art will just look like a big bright bunch of lights and too few, it will be hard to see the design. If you can, lay out your lights on the top of your canvas for a practice run before you make any permanent changes to it.
You might
also enjoy...
Disclaimer: Please note that some of the links in this post may be affiliate links or ads. There is no additional cost to you, but The Scrap Room will earn a small commission should you choose to purchase through those links. Click here for my full disclaimer. Thank you for your support.