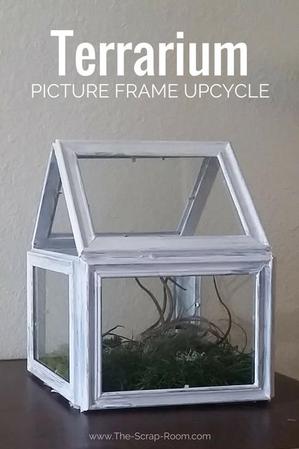
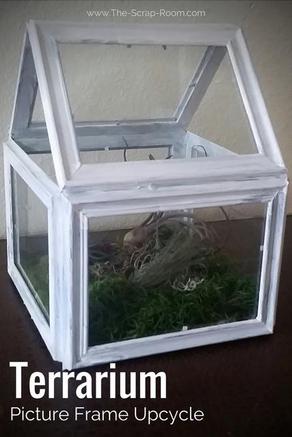
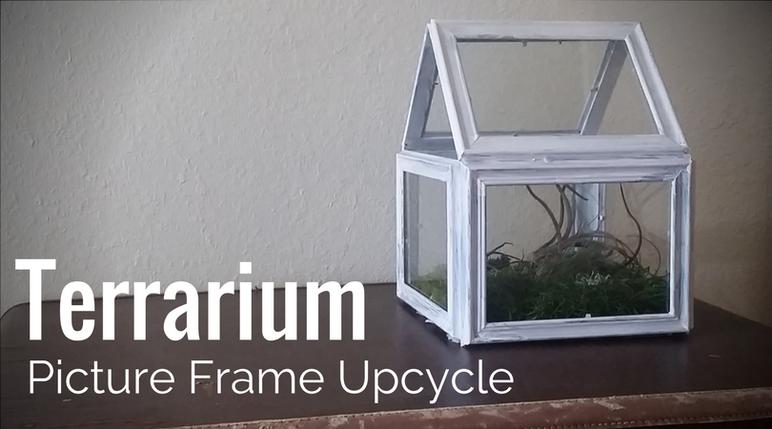
Terrarium
Picture Frame Upcycle
Budget friendly and eco friendly, this air plant terrarium is super easy to make and even easier to maintain
Air plants are all the rage these days -- They are low maintenance, don't need dirt, and can be displayed in all sorts of fun ways!
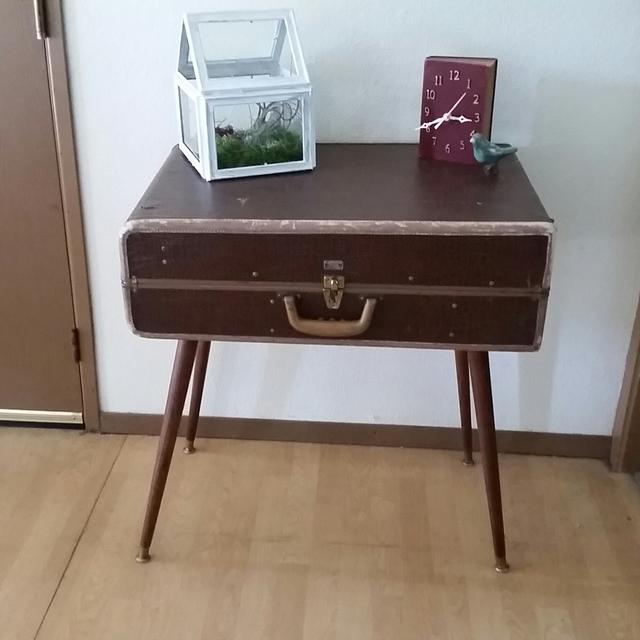
I put this terrarium together using some picture frames and a few other supplies plus an afternoon of my time. I absolutely loved how it turned out and wanted to share! Other than the moss and plants, it only cost me a few dollars to make, so it's super budget friendly and would make a wonderful gift or addition to your own homes decor.
For this project, you will need:
-6 picture frames that are the same size -- You'll only need the actual FRAME and the glass. (I got mine in bulk from a bride off loading supplies after her DIY wedding and paid practically pennies for these! Definitely keep your eye out at garage sales and second hand shops, they just need to be the same size, not the same color; you're going to paint them.)
-A SQUARE piece of plywood that is the same length as the width of the picture frames you're using. (I used 5" x 7" frames for this project, so my plywood measures 7" x 7".)
-Hot Glue
-Acrylic Paint (Your choice of color -- I went with white.)
-Air Plants (I bought this 6 plant set thru Amazon.com's 3rd party seller "Aquatic Arts - Live Fish, Inverts, and Aquarium Plants To Your Door". Not only was I totally stoked about the size and quality of the plants I received, I love the efforts that they are making to help support shelter pets. I really recommend buying through this Amazon seller.)
-Twist ties / pipe cleaners (to help hold things together while the adhesive dries.)
This little terrarium is great for people with, or without, a green thumb, and it doesn't take too long to put together. I made this one out of 5" x 7" picture frames, but you could easily do this project with any size you like. Just make sure that the square plywood for the bottom is the same length as the width of your frames.
You'll need to dismantle the picture frames before you start assembling your decorative greenhouse. Remove the backing and glass from the frames, setting them aside for now. You'll eventually add the glass back in, but not until later. To begin with, you'll just be working with the 6 frames, plywood, and some adhesive.
Arrange the frames and make sure that everything fits together well. Tiny gaps aren't a big deal -- they're pretty easy to conceal, but you don't want any big gaps between where the frames intersect with each other or the plywood base.
If you enjoyed my tutorial or found value in it, I'd appreciate it if you gave it a little love on social media!
Disclaimer: Please note that some of the links in this post are affiliate links. There is no additional cost to you, but The Scrap Room will earn a small commission should you choose to purchase through those links. Click here for my full disclaimer. Thank you for your support.
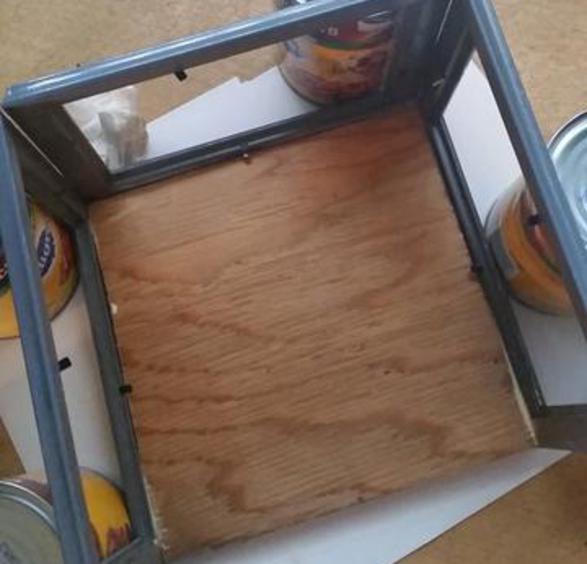
Place your plywood base on your work space, and grab a couple heavy cans from the kitchen cupboard. (If you're using large or heavy picture frames, you may need to use clamps or something heavier than canned goods to hold your "walls" in place while the glue dries, but cans works great for me, with these 5" x 7" frames.)
Start with any of the four sides, and run a thin line of wood glue along the edge of the plywood. Grab a frame, line it up carefully, and butt it up against the edge of the plywood. Hold it in place with the cans, while you add another side. You'll also want to run a bead of glue along the short sides of your frames, where they meet at each corner.
Once you have more than one "wall" up, you can add more support while the glue dries by using some twist ties or pipe cleaners. Continue this around the terrarium, until you have all four of the main walls in place so you basically have an open topped box. Carefully wipe away any extra glue that may have spilled out.

Once you have the four walls in place, let the wood glue DRY COMPLETELY before moving on. This is super important, because if you move on before everything is secure, your walls will likely shift and your miniature greenhouse won't be plumb.
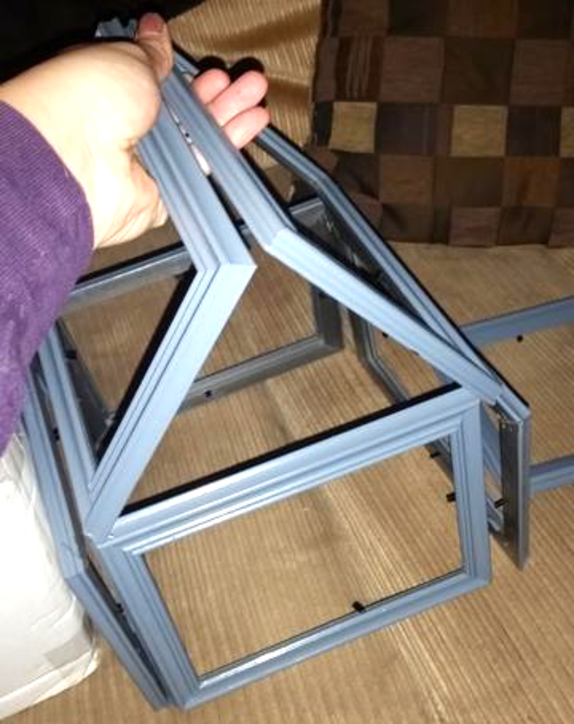
You should still have 2 of the 6 picture frames left. These are going to angle together to form the roof of your little terrarium. You're definitely going to need the twist ties / pipe cleaners for this step! (Unless you're a skilled house of cards builder!) ;)
Physically hold the two frames in place, make sure everything lines up, and note where exactly the two "roof" frames make contact with the walls. Ready a pipe cleaner (you're going to need it in a few seconds and want it easily accessible), add the glue to the walls, not the roof, and carefully set the two roof frames in place. (Don't let go yet or they may fall!)
An extra person will come in handy here. I made this by myself though so it can totally be done solo!
Grab a pipe cleaner and wrap it snugly around the junction of the wall and roof on both sides where you added the glue. The tops of the two frames should touch at the peak of the roof. The peak of the roof should be the last connection you tie and glue.

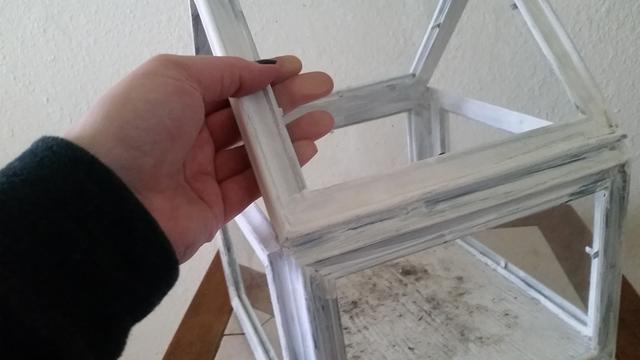
After all the glue is completely dry, it's ready to paint! I decided to go with a shabby chic whitewashed look for this one, but you can obviously paint yours whatever color you want!
Once your terrarium is assembled, painted, and fully dry (seriously, the overall "drying time" for this terrarium is a majority of the time for the entire project! You'd have this bad-boy put together in about 5 minutes if you didn't have to wait!) spray it with a coat of the sealer, and ... you guessed it! Wait! Let it dry, and give it at least one more coat. (And let it dry some more.) Make sure that you spray all visible surfaces. It's important that the frames and the plywood are all protected.
It's finally time to add the glass back into the picture frame! Most picture frames hold the glass in by a small metal bracket that you bend into place. Hopefully your frames have these, as they make the "adding the glass" step super easy!
Heat up your hot glue gun, and dab a small dot onto each of these little metal tabs. Usually, when they're used as intended,as a picture frame, there's a photo layer and usually a chipboard or other layer protecting the glass from the metal. Since we've removed all of that, the hot glue will add some cushion (and grip!) to the glass and hold the panels in place without them rattling, or worse yet, Breaking!
If your frames do not have this metal bracket you're going to have to hold them in place differently. **I would recommend E6000, as it holds securely to both wood and glass. You can use a couple small pieces of painters tape to help hold the glass panels in place while the glue dries -- just don't glue the tape to the terrarium.
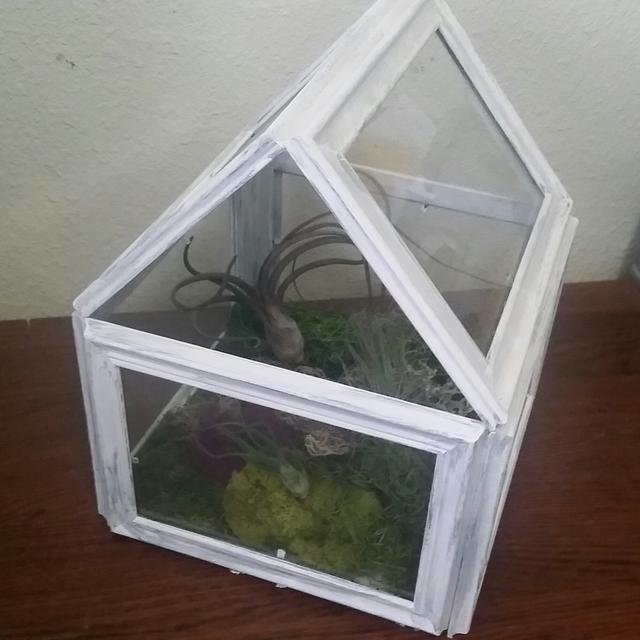
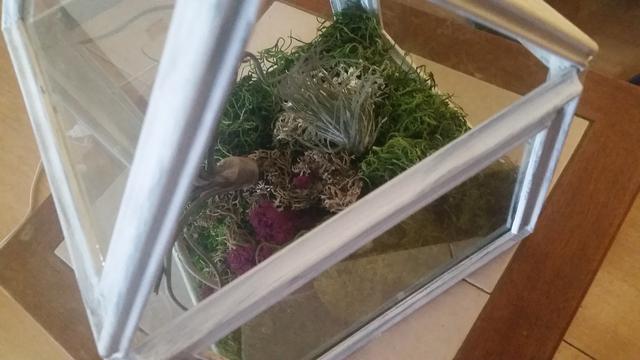
You'll notice that once all the glass panels are in place, there are still 2 triangular openings, one on each side of your terrarium. These are meant to stay open and will make sure your air plants get plenty of air -- and that you can still access them to give them water.
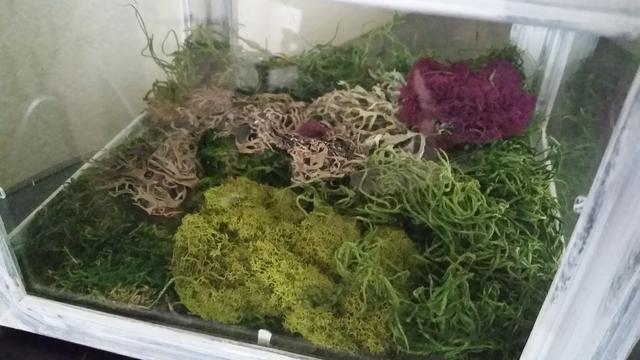
If you're making yours to house air plants like I did mine, you're ready to add some greenery! Break apart your moss mix and carefully arrange the pieces in your new display.
(Please note: if you're planning on using succulent plants in your terrarium, remember that they need dirt, and are a little more messy. You may want to line the inside of your plywood bottom with something that's going to provide more protection so your wood doesn't rot, or plant the succulents in other smaller containers that you can just set inside. I highly recommend using air-plants for this project.)
The final touch is obviously the air plants -- and that's easy! Literally just set them inside on top of the moss and you're done! I found my air plants on Amazon and would highly recommend the third party seller, Aquatic Arts - Live Fish, Inverts, and Aquarium Plants To Your Door, who I bought them through. Click here to see the variety pack I picked up for this project (I used 3 in the terrarium, and 3 in other areas of my house).
You'll need to give them a little water from time to time. Make sure you look up the specific care instructions for the plants you pick out, but most only need a spritz with water a couple times a week or a quick dunk about once a week. These plants are really easy to care for (trust me, I'm a serial plant killer!)
I'd love to hear your thoughts on this project in the comments below! If you give it a try yourself, remember to take pictures and tag @TSRCrafts when you share it on social media -- I'd love to see what you create!

You might
also enjoy...