From Photo to Stamp
Carving Tutorial
Learn how to make your own one-of-a-kind, hand-carved stamps with this step-by step tutorial. See the whole process from beginning to end as we take a digital photograph (you can use almost any digital graphic too!) and turn it into a carve-able image, print and transfer it onto a carving block, and of course, carve it!
Stamp Carving Tutorial
For this project you will need:
-Image to draw or transfer
-Printer or copier
-Photo Transfer Page
-Photo editing software
There are a couple different options for printing and transferring your image. For this particular tutorial we are going to use a Cannon Pixma printer. (If you're using a laser printer or a copier, with toner, you'll want to do an acetone transfer. I don't recommend or use this method, as it's a little messy and I prefer to not deal with chemicals that I don't have to.)
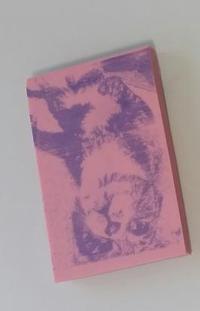
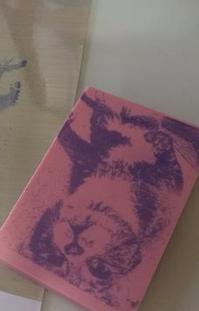
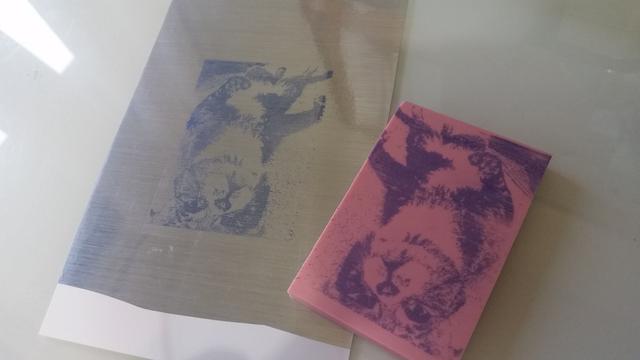
Open your printer settings, and change your print quality to low or medium. (I usually use low, but for this picture of Milo, I printed on medium. There's a lot of thin lines, and I wanted to make sure they showed up well.) Above are the examples of Milo printed on both a low and a medium quality.
Print your image out onto one of our Reusable Photo Transfer Sheets. These sheets can be used a over a dozen times -- just carefully wipe them clean with a moist paper towel after you've transferred your image. (Mine has completed 19 transfers so far and still looks brand new! A great investment that will save you loads of time if you plan to carve more than a couple stamps.) You can also use some wax or parchment paper, but you'll need to adhere it to something more sturdy first. Use some tape around the edges, or lightly coat the back with a spray adhesive and adhere it to a piece of cardstock. This method can be a little tricky -- be sure to watch for air bubbles, which will transfer to your image.
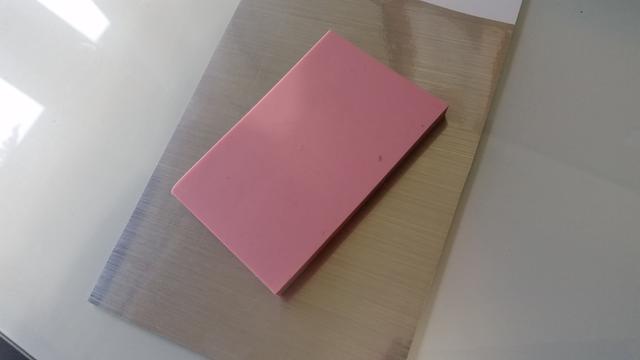
Make sure you set your printer to print your image out the size you need. Milo stretches out about 3 inches long and 2 inches wide for this carve.
Lay the printed image on a flat surface and very carefully place the carving block on top of it, without smudging. Holding the block in place, gently and evenly, press all over the surface, transferring the image onto the block. If you press too hard, your lines will blur. (If you're using our Reusable Photo Transfer Sheets, just wipe it, and the carving block, clean and re-print if this happens. No harm, no foul!) Once you've transferred your image, wipe your Reusable Transfer Sheet clean and put it away for next time.
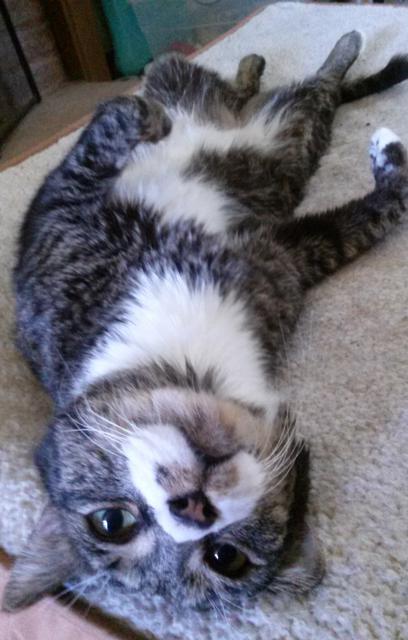
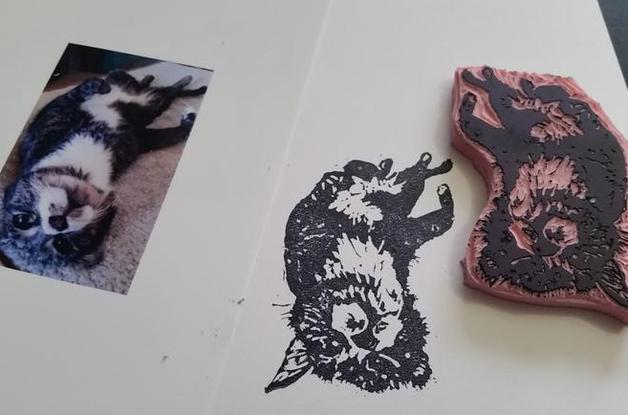
We asked fans on our Facebook page which digital photograph they would like to see carved into a stamp. It was a tie between Milo and the Dragonfly, so I decided I'd start with the harder of the two. Here's my carve of "Milo's Lazy Day" from start to finish!
Low or draft print quality.
Medium print quality.
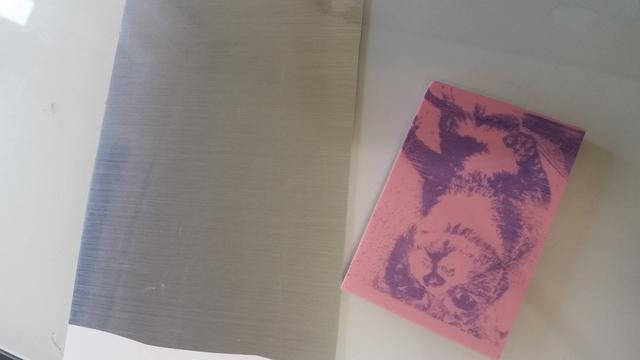
Let your image DRY COMPLETELY. I cannot stress this enough. Give your image plenty of time to dry -- at least a couple hours, or overnight if you can.
Even after it appears dry the ink can still be smudged, so you'll want to be very careful with how you hold your carving block. Keep your fingers around the edge of the block at all times, turning the block so that the area you are working on is most comfortable for your dominant, carving hand.
Remember to look at your image as positive and negative space, or as light and shadows. Ideally you don't want to carve any of the inked area away. Instead, try to focus your eyes on the non-inked space. Use a craft knife of a carving gouge to carefully scoop away all the non-inked surface. Go slowly and carefully around your piece until all that remains raised is the inked design. For tight lines, try bending the carving block away from your carving tool. This will stretch the rubber out a little and let you carve away an even smaller line. Use whatever tool is most comfortable to you. I use both a gouge and a knife, but mostly I prefer to use the gouge.
Watch the time-lapse video below of my entire carve of "Milo's Lazy Day" from beginning to end. Once you think you're done carving yours, give it a good inking and try it out. You'll see right away, on the pressed image, as well as the stamp itself, where you need to shave a little more off. It's always better to not carve out enough then to carve away too much. You can't reattach the rubber. Once you've removed it, it's gone. Also, always start with the areas that you think you're most likely to make a mistake. There's nothing like spending hours on a carve to mess up the eyes or some other main detail at the end!
If you're carving a difficult image and you get a little overwhelmed, take a break, then give it a fresh look later. Remember -- carve away the white space (or in this case pink!) ;) and your image will almost magically appear!

Disclaimer: Please note that some of the links in this post are affiliate links. There is no additional cost to you, but The Scrap Room will earn a small commission should you choose to purchase through those links. Thank you for helping support our business!
You might
also enjoy...


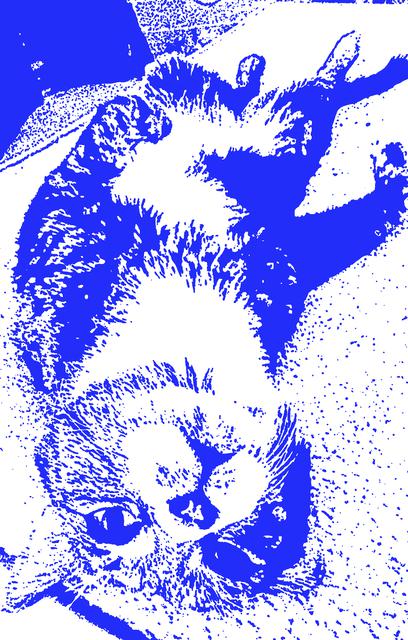
Before we can carve a regular picture, we need to edit it so it's something a little more manageable. Open your image up in a photo editing software. I used Photoshop to edit this picture of my little Milo. Do a "Save As" to preserve your original image.
In a few steps, when you go to transfer your image to the carving block, the ink can take a while to dry, and even then, the black seems to smudge more. I print mine out in a royal blue color. It is bright enough to see the image, but the ink seems to dry quicker and smudge less. The color doesn't have to be exact. It just needs to be something that you can see well. It's not going to have any effect on your final stamped image. Double click on the color selection tool and select a shade of blue that you can see well, and don't mind staring at for a while. ;)
Next add an "Effect" or filter to your image. Most programs have both a "Stamp" and a "Photocopy" option. Some images look better with one or the other. For this tutorial, I'm going to use the "Stamp" effect. This picture just has so much detail with all the fur, the image becomes a little hard to decipher with the "Photocopy" option. In Photoshop, it's very easy to adjust the light/darkness of the image, as well as the smoothness, with the "Stamp" effect selected. This is especially handy because it will help you adjust the image to something that matches your carving skill level. Make the image more smooth for less detail, and an easier carve.
You may need to crop your image to get rid of some of the extra detail around your carving subject. If you have an irregular shape, use the "Lasso" tool to select your image. On the menu bar up top, open the "Select" tab and click on "Inverse." This will select everything around what you originally circled. Right click on the layer on the layer tab off to the side and "Make a Layer from Background" to unlock the image. Hit "Delete" to remove everything but your subject. Once you have your image the way your want it, "Save" your project.
Watch the step by step of the editing process in the video below.