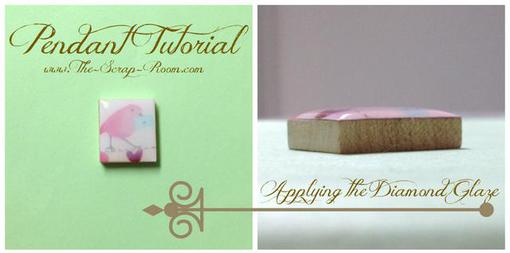
If you get a bubble, don't worry! You can easily pop it with a needle. Smaller bubbles are harder to get rid of and I found it easier to quickly remove the Diamond Glaze and start over than to try removing the tiny bubbles. The glaze will look convex (domed) if you view it from the side. Allow the Diamond Glaze to dry overnight on a flat surface.
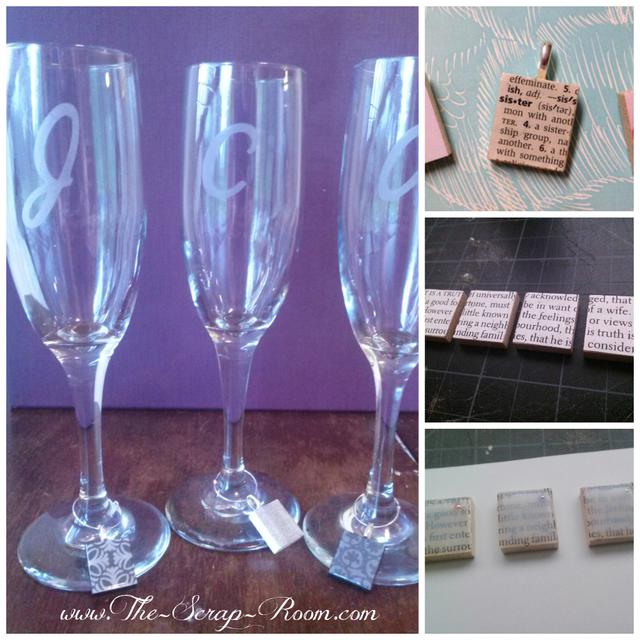
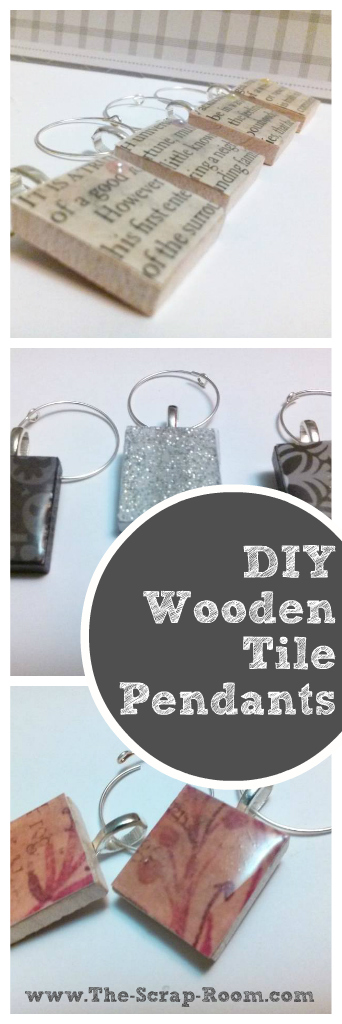
Once everything has set, string your pendant onto a chain or key ring and show it off! If you're on a budget and making a set of these to give to a larger group, try making them into necklaces out of a soft satin ribbon. These pendants also make lovely Wine Glass Charms. Just buy some 25mm earring hoops and slide the jewelry bail on!
Scrabble Tile Jewelry Pendant
This project is way easier than you might guess by looking at the finished handmade jewelry and is guaranteed to impress your friends! If you're anything like me, you may get carried away making them and have more pendants than you know what to do with... so keep one for yourself! These adorable DIY pendants make for a very affordable party favor or handmade gift, so if you're planning a baby shower or wedding shower, graduation celebration or birthday party -- no matter the occasion, grab a piece of cardstock that matches the event, some old game tiles, and a few other supplies, and make one for everyone!
Scrabble Tile Pendants

You might
also enjoy...


Supplies and Materials:
If you enjoyed our tutorial or found value in it, we'd love it if you'd give us a thumbs up or a share on Facebook or Pinterest!
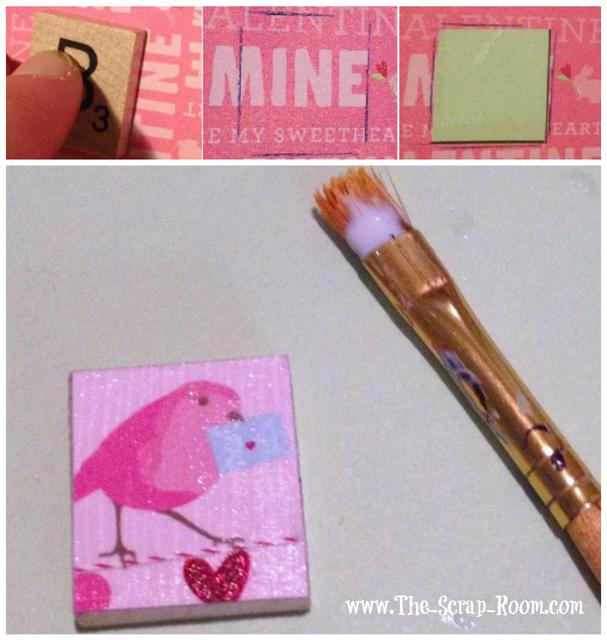
Before cutting out your image, make sure it will fit onto the Scrabble tile by holding it on top of the tile in front of a light. (If you don't have an old game piece to use, you can order these online that are created specifically for crafting!) Remember to position the letter on the back of the tile so it will be right-side up when it hangs from your key ring or necklace.
After using the light to align your picture with the tile, carefully place both onto a hard surface with the tile on top, and trace along the sides. Note that my example pictured below was traced onto two-sided paper; unless you also use double-sided paper, your tracing will be on the blank back side of the paper.
Remove the tile and cut along the inside of the lines you've drawn. Your picture should be approximately 3/4 by 11/16 inches. Place it on top of the tile to check the sizing; you may need to trim the edges just a tiny sliver at a time.
Using your paintbrush, apply a small layer of Mod Podge to the blank side of the Scrabble tile. Place your image on top and cover with another layer of Mod Podge. Allow this to dry for 10-15 minutes before proceeding to the next step.
After your Mod Podge has dried, apply a layer of Diamond Glaze. (I buy both of these in bulk -- I use them for a lot of projects and the savings are enormous!) Do not shake before use; shaking makes bubbles! I usually squeeze a small dab of Diamond Glaze onto a scrap piece of paper in case there are any bubbles in the applicator tip. Begin by outlining the edges of the tile, and then fill in the middle.

Disclaimer: Please note that some of the links in this post are affiliate links. There is no additional cost to you, but The Scrap Room will earn a small commission should you choose to purchase through those links. Thank you for helping support our business!