You might
also enjoy...
Disclaimer: Please note that some of the links in this post are affiliate links. There is no additional cost to you, but The Scrap Room will earn a small commission should you choose to purchase through those links. Thank you for helping support our business!
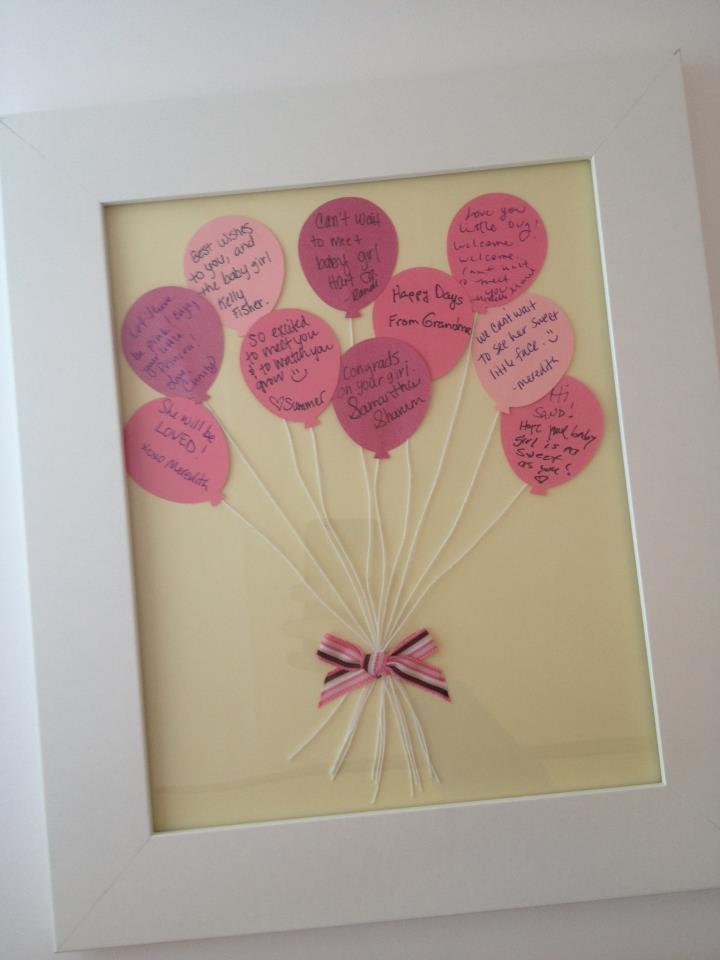
Shower Guest Book Wall Art
A modern approach to the traditional "Guest Book"
Traditional guest books are nice to have, but we thought it would be fun to mix it up a bit and give the mom-to-be something she could look at daily! Guests who attended the baby shower signed small balloon die cuts and we assembled them into a giant balloon bouquet and framed them for the nursery.


For this project, you will need:
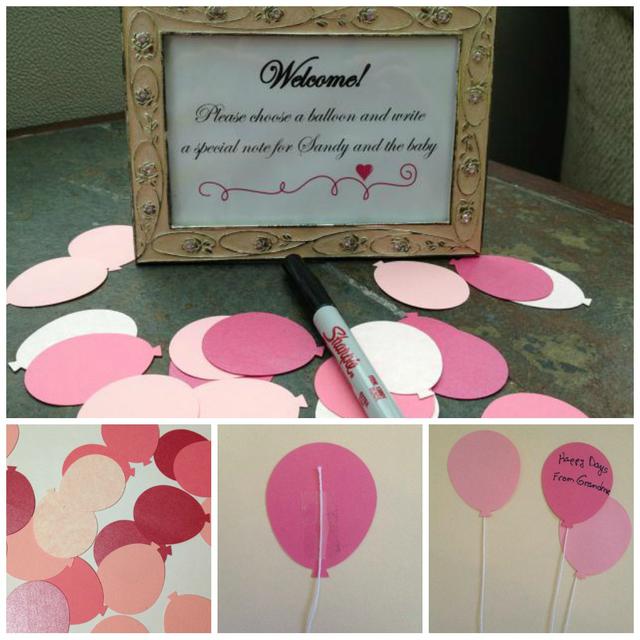
-2 picture frames -- you can pick any size, but I'd recommend a 4" x 6" or 5" x 7" for the instructions sign, and 8" x 10" for the actual guest book display.
-Printable Instructions Sign (below)
-Balloon Die Cuts
-String
-A pen for people to sign with
-A small piece of matching ribbon to tie the ends of the strings together
**You can use any balloon die cut you like for this project. If you don't already have a balloon digital cut file, click here to check out my Bulk Balloons SVG cut set. and cut out 10 round and 5 long per page!
This project is so easy, and so cheap, but oh so thoughtful. The Mommy-to-Be will love her new keepsake, and your guests will love they they got to be a part of such a modern, fun "guest book".
There's very little prep work involved for this treasure, and it's so simple to assemble, you can probably put it together at the shower, sending it home with the mom that day! If your hands are too full during the party, ask a guest to give you a hand. It's easy enough that a crafter (or non crafter) of just about any age can handle it! The hardest part is tying the ribbon
Begin by cutting the balloons and string. If you're using an 8" x 10" inch frame for the display, pieces that are between 3-6 will probably work best.
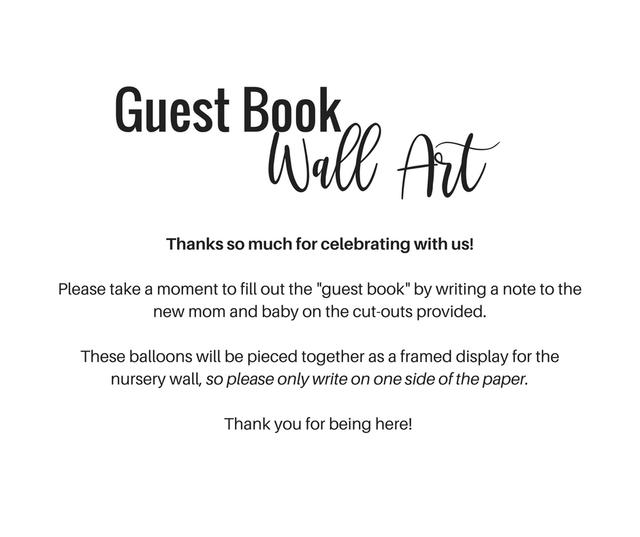
You can create your own instructions sign for your guests or print out this one Lindsay created below.
Put the printed sign in your smaller frame and prep your larger one for the guest book display. Add a blank piece of coordinating cardstock to the background, and if you like, add a meaningful quote or other sweet sentiment.
Be sure to bring to the shower:
The larger frame ready to go -- just add balloons!
Pre cut string
An pen for guests to write with (acid free is always best!)
Clear tape
A small piece of ribbon to tie together all the ends of the balloon strings
It will only take you a couple minutes to assemble the finished display once everyone has written their note. If your hands are full hosting the shower, as one of the guests to help you out -- this project is easy enough for crafters (and non crafters) of just about every skill level!
If you enjoyed this tutorial or found value in it, I'd appreciate it if you gave it a little love on social media!