You might
also enjoy...
Party Favor Gifts
Sweeten Your Baby Shower with DIY Candy Jar Favors
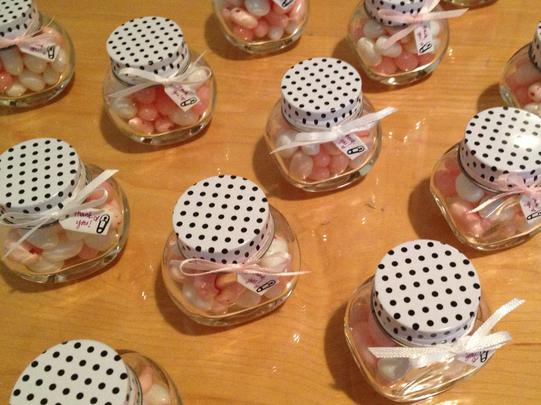
These shower favors received so many oohs and aahs! The added touch of tags with your own handwriting really makes them special!
If you enjoyed my tutorial or found value in it, I'd appreciate it if you gave it a little love on social media!
Disclaimer: Please note that some of the links in this post may be affiliate links or ads. There is no additional cost to you, but The Scrap Room will earn a small commission should you choose to purchase through those links. Click here for my full disclaimer. Thank you for your support.


| ||||||||

| ||||||||


Are you a CRAFT BLOGGER? Join my networking group here!

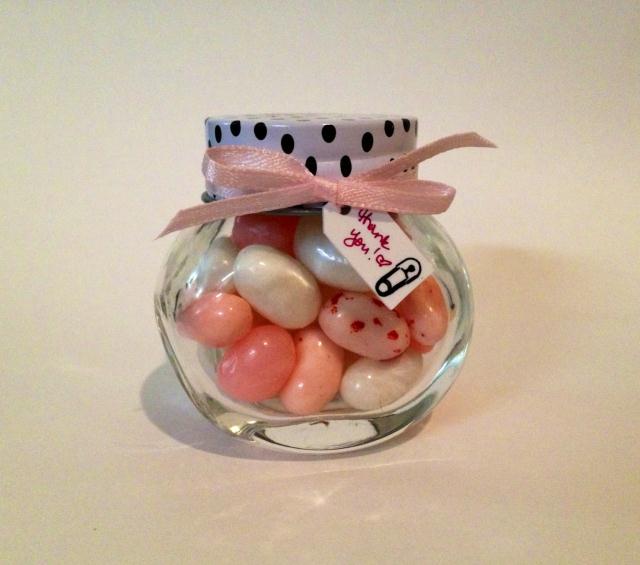
First things first – buy a boat load of candy! Our party is a shower for a baby girl so I purchased Jelly Bellies in shades of pink and white (which happen to be the best Jelly Belly flavors anyway – score!) Fill up your favor bottles and screw on the lids.
Supplies:
Miniature plastic or glass jars (I found these at Michael’s in the wedding section)
1/8” width ribbon
Shrinky Dinks paper
Small candies (M&M’s or Jelly Bellies are perfect)
Tools:
Scissors
Hole punch
Fiskars extra large squeeze tag punch
Permanent ink pad and stamp
Permanent marker
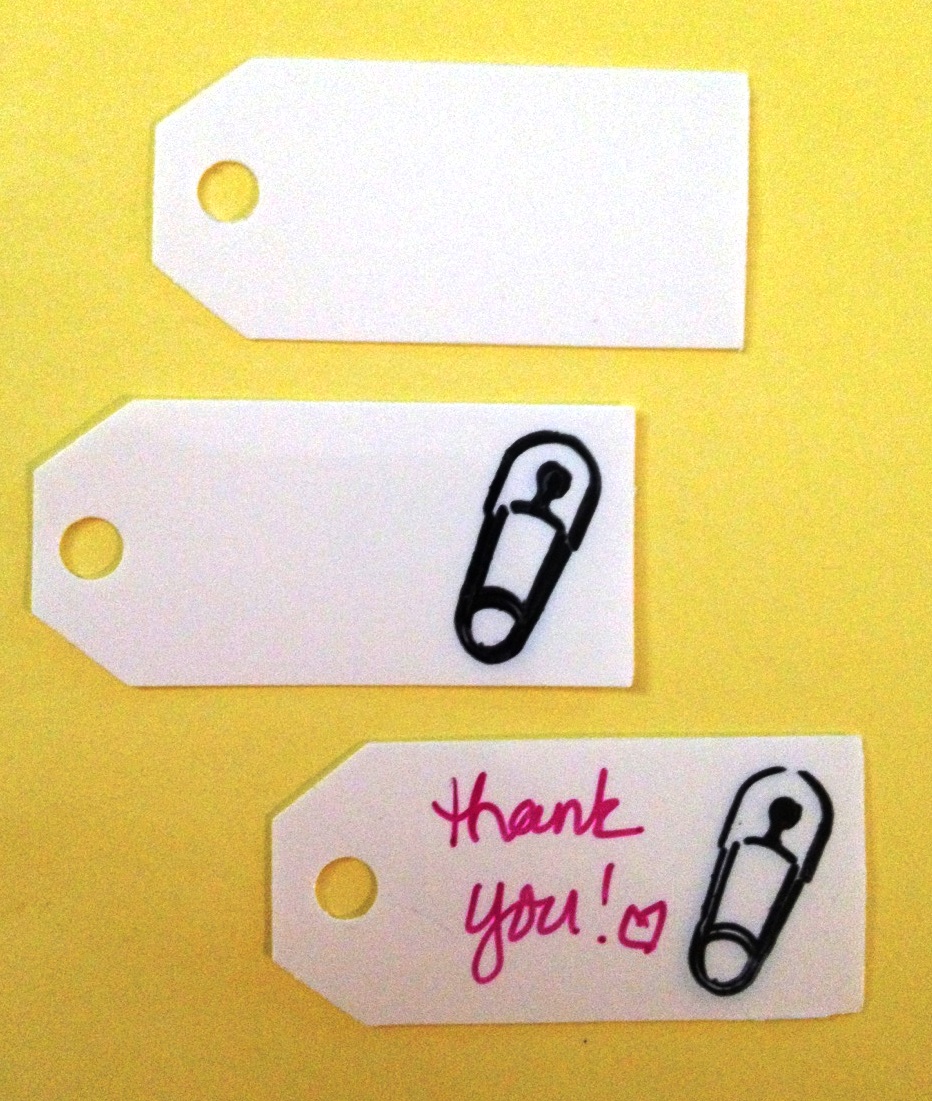
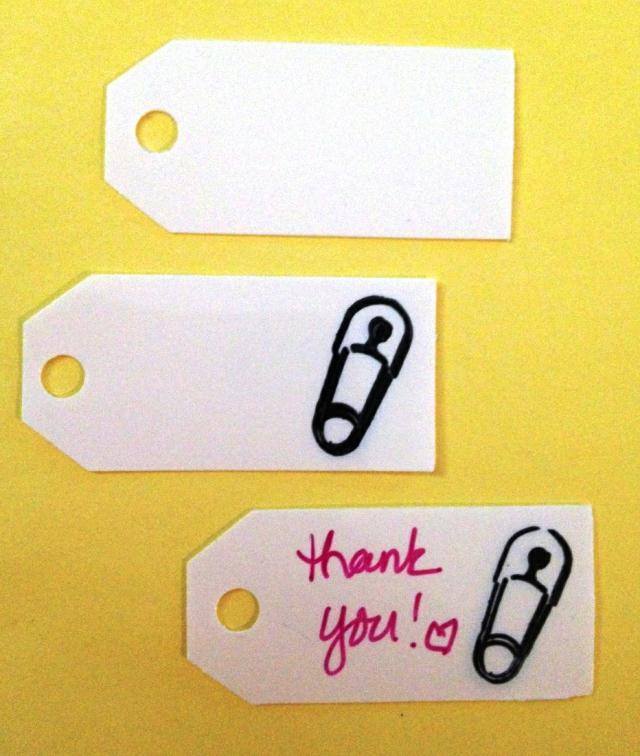
Use your permanent ink pad to ink the stamp and carefully place it on the Shrinky Dink paper; be careful because this stuff is slippery! If you have any scraps, you may want to do a couple practice stamps – it took me several tries to get a clean image without smears. Check your ink pad to make sure it’s permanent or it’ll just smear right off – even after it’s been baked.
After you’re done stamping, write a special message on each tag. I chose a simple “thank you”, but you could say “thanks for coming” or “celebrate” or even write the name of the mother-to-be and date of the baby shower.
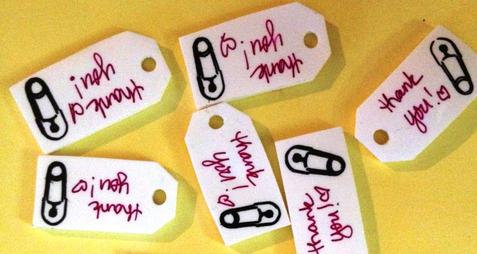
Now put those puppies in the oven! My tags took about three minutes at 350°, and I only baked three at a time since they don’t all harden at exactly the same rate. Your cutouts will curl up around the edges but don’t worry – that’s normal! About two minutes into the baking time, I flipped each tag over, and when I took them out of the oven I pressed them flat with a spatula for about 10 seconds.
Now it’s time for the final assembly. Tie a piece of ribbon around the lid of your favor jar and double-knot it. String a tag onto one side of the ribbon and finish it off with a bow. If you think the ribbon edge might fray, you can add a dab of glue to the cut edges. Now your favors are all ready! And you can enjoy those extra jelly beans you “accidentally” bought...
Cut ribbon pieces long enough to go around the lid and tie in a bow – I used 10” lengths. Now comes the fun part: Shrinky Dinks! Use the Fiskars punch on the Shrinky Dink paper; I cut out 15 tags in order to make 15 favors. Don’t forget to punch a hole in the top before they go in the oven!! And remember – it will shrink a lot, so even though a regular-sized (1/4”) hole punch might seem big, it’s going to end up fairly tiny.