You might
also enjoy...
If you enjoyed my tutorial or found value in it, I'd appreciate it if you gave it a little love on social media!
Disclaimer: Please note that some of the links in this post may be affiliate links or ads. There is no additional cost to you, but The Scrap Room will earn a small commission should you choose to purchase through those links. Click here for my full disclaimer. Thank you for your support.

If you love FAIRIES, or you have someone on your gift-giving list that does, HERE IS THE PERFECT DIY!
If you'll remember, I made a terrarium a while back using upcycled picture frames from a friends wedding. It turned out adorable, and I filled it with beautiful air plants before gifting the "mini greenhouse" to the happy couple for their wedding anniversary. They *loved* how it turned out and it still looks beautiful displayed in their home!
This year I decided to make another terrarium, but this time for someone else.
💗My MOM💗
My mom and step dad live on a beautifully forested, 10 acre slice of heaven in Michigan, and with all the amazing wildlife they get, it's pretty hard to keep a vegetable or flower garden without a pretty tall fence! So my mom loves to decorate her yard and deck with beautiful art, faux flowers, and other decorative things that won't temp the local animals.
She also loooves Fairy Gardens.
Her fairy garden collection is really cool! It consists of several small displays peppered around her porch. It's so fun to sit out back and enjoy the view, surrounded by her little magical garden. 💗
We recently made some glass yard art using some dishes together (tutorial coming soon!) and it gave me the idea for *this* Fairy Garden idea. A fully enclosed mini Eden.
SUPPLIES FOR THIS PROJECT:
-Old, clear glass dishes to stack and create your terrarium. I used a bowl, a salad plate and an old fish bowl. Make sure your dishes are very clean and completely DRY.
-A fairy statue that FITS INSIDE your terrarium
-Silica moisture absorbing packet (I save these when they come in other things, so I always have some on hand! Waste not, want not!)
-hot glue/glue gun
(This is SUPER important! This is THE BEST adhesive I found for this project to hold dishes together and keep moisture out to prevent fogging or mold.)
-Non-latex gloves + safety glasses
This project isn't very hard to do, BUT you will need to be patient when it comes to waiting for the silicone to dry, so plan to work on this project over a couple day period. The actual work involved isn't very much though, and other than the waiting, this project shouldn't take you more than a couple of hours.
Okay, ready to get started?
There are several steps in this tutorial that are CRUCIAL. If you skip them, or don't do them 100% right the first time, it *will* affect your terrarium. Moisture in your terrarium can cause small, occasional water droplets to form on the inside of your glass on warm sunny days, So PLEASE READ CAREFULLY and don't skip or get lazy on the steps I've shared! They aren't difficult things to do, but they are very important if you don't want your bowl to fog up!
The first crucial step being: Begin with completely clean and DRY dishes for this project.
Now, you can purchase beautiful terrarium displays for this project, and cut out a lot of the work, but I had a lot of fun creating my own glass sculpture and it cost me a fraction of the price. If you're going to build your own from dishes, I recommend keeping an eye out for great pieces at garage sales. You can pick up mis-matched dishes for next to nothing. I've found a lot of great glass totem pieces for less than a couple of bucks! However, if you want something fast and easy, here are a few of my favorite Amazon picks that would work great for terrarium projects:
Work outside for this next part, so you have plenty of good ventilation. You'll want to put down a protective surface (newspaper, disposable plastic tablecloth, etc.) and wear some safety gear. Grab some gloves, safety glasses, and even though the instructions don't call for it on the tube of silicone, I recommend using a mask that covers your nose and mouth as well. You can never be too careful, and this stuff is nasty to breathe in, or get on you! Read all the warnings and instructions on the back of the silicone before you start, and keep some paper towels close by for fast and easy clean up.
All that being said, by the time I was done with this project, I *only* had silicone on the paper towels I planned to get it on, so if you're careful, this isn't actually *that* messy of a project. The silicone step is 100% NOT FOR KIDS though, so if you're working together on this project with little ones, let them watch from a safe distance, but don't let them be hands on for this step!
This silicone holds GREAT! It creates a tight bond, is weather safe in 30 minutes and it won't shrink or crack over time. This is super important because we want this fairy garden to last for years to come, and it won't if you use an acrylic caulking! The 100% waterproof 100% silicone is the way to go for sure! And be GENEROUS with it! Pipe out thick solid lines when applying to the glass surfaces.

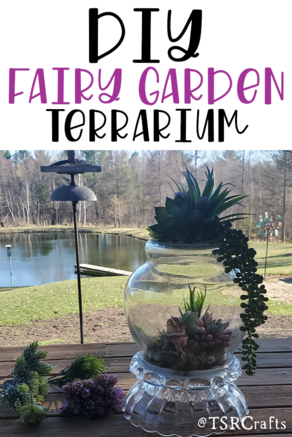
DIY Fairy Garden Terrarium
This handmade creation is perfect for the garden, porch or even inside!
This DIY no-maintenance fairy garden terrarium is the perfect project for crafters, upcyclers, and garden lovers who enjoy adding a touch of whimsy to their outdoor or indoor spaces. Whether you're looking for a unique way to create a no-maintenance fairy garden or a fun way to repurpose old glass containers, this project is budget-friendly, simple to assemble, and bursting with creative possibilities. Using a mix of upcycled materials, decorative moss, and miniature fairy garden accessories, you can design a charming terrarium that brings a magical touch to any space—without the need for watering or upkeep!
This handmade fairy garden terrarium also makes a wonderful gift for gardeners, fairy garden enthusiasts, or anyone who loves artistic garden ideas but prefers a no-maintenance plant alternative. Whether displayed on a patio, tucked into a flower bed, or showcased as an enchanting centerpiece indoors, this DIY craft is a delightful way to bring a little fairy magic into your home or garden. If you love upcycling and creating unique garden décor, this is a must-try fairy garden project to add to your collection!
I've made dozens of glass totem yard art, but this one has been one of my very favorites! I originally planned to add the fairies and faux succulents just to the inside, but was so glad I decided on this faux succulents set, with it's beautiful cascading greenery that allowed me to let it drape gracefully down the side! I think the whole thing turned out really cool, and my mom just LOVED IT when I gave it to her for Mother's Day!
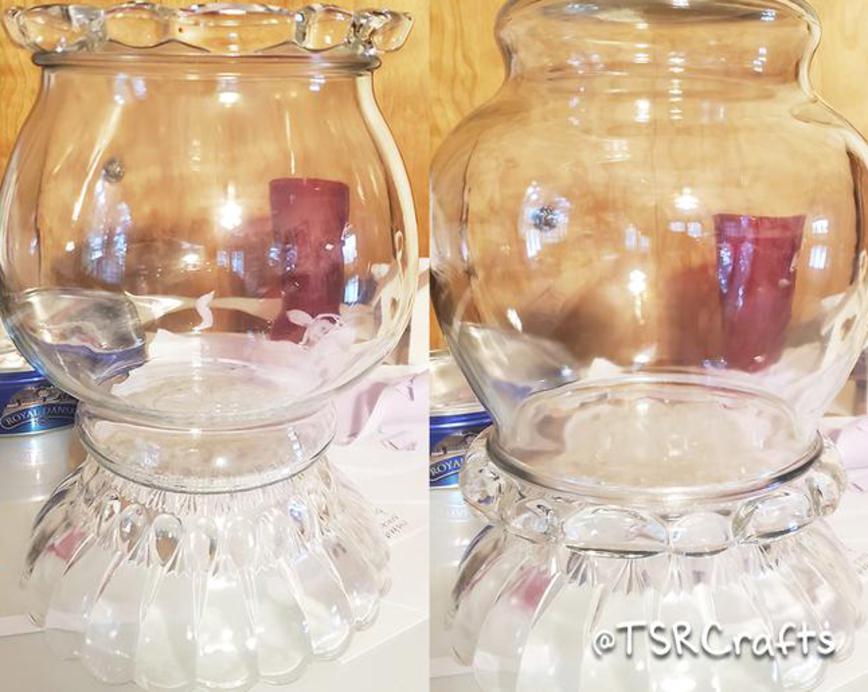
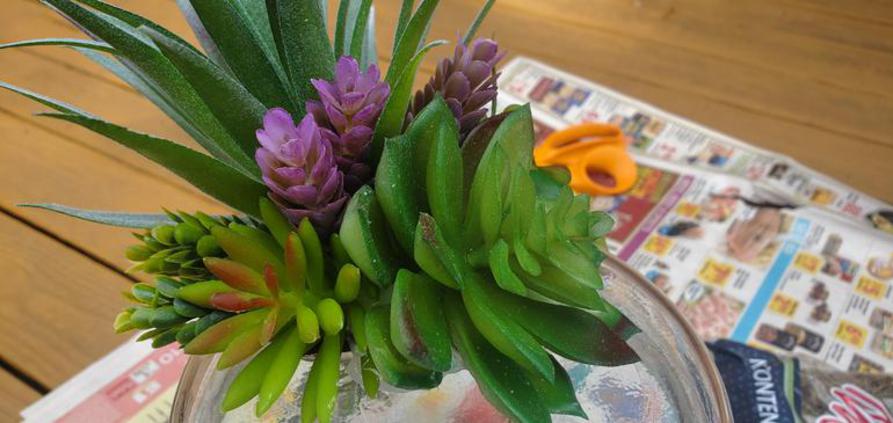
There are a lot of different ways you can stack dishes to create an enclosed terrarium. I was lucky enough to find a $2 fish bowl at a yard that was beyond perfect for this project! (If you have a fish bowl like this, with real fish in it... Maybe it's time to upgrade them to a bigger home and steal their old bowl! These things really are too small for fish anyway! <3 )
I also used a salad sized serving plate, and a small crystal serving bowl. Even with only these three items, there are still options on how to put it all together. I played around a little and was down to the two variations I've shown in the pic above. Ultimately I decided to go with the design on the RIGHT, so I'd have a flat top that was easy to see in, with nothing to catch water if it gets wet in the rain. (Though I later decided to add the extra greenery up top, so you can't see EVERYTHING inside from up top, but you can see most.) :)
It's really important that you actually play around with all your pieces and make sure that everything fits together before you start gluing. The silicone glue I used in this project CAN be sliced, cleaned off, and redone, but it's a ***LOT OF WORK***. It's SO MUCH EASIER to get it done right the first time. So take a little extra time to set things up WITHOUT glue in the beginning.

You might choose to do some of these next steps in a different order than me, and that's just fine. The important thing to remember though is that when you're gluing with the silicone, LET IT DRY COMPLETELY before moving on. Don't try to glue multiple pieces together at a time. Glue one connection, then wait for it to dry before you add on anything else. It's too easy to slide around, get off centered, squish out extra glue, etc. Just focus on one piece at a time.
Since you might not be using the same style or shape of dishes as me, you may have to adapt your design to work with what you have. If you get stuck, and aren't sure how to stack them, just arrange them neatly and snap a picture of them, then post the pic in our Craft Chat Facebook group here, and ask for help! Our community is full of helpful crafters who'd love to help give you some suggestions!
Creating the Garden:
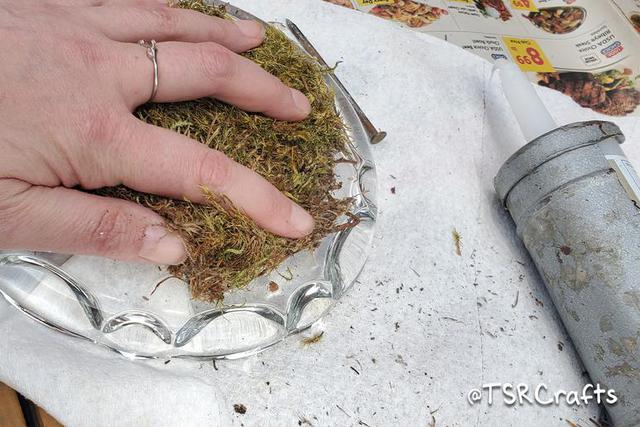
Remember those SUPER IMPORTANT STEPS I was talking about earlier? HERE'S ANOTHER. Hide a silica packet underneath the moss!
Now, if you're making a terrarium that DOESN'T need to be water proof, and you *don't* plan to permanently glue it together, you won't have to worry about this next bit. But I like the low maintenance, weather-proof appeal of the solid, glued, glass totem that can be left out in the yard, so if you're making a permanent piece of art like me, you'll want to be sure to GLUE EVERYTHING DOWN so nothing moves around. Like, EVER. It's going to be pretty hard to open this garden up!
Add your moss to your plate, and squish in all the edges so that there's plenty of room to place the fish tank or dome on top without touching it AT ALL. When you have it fitting how you like, carefully pick up the moss, place a SILICA PACKET underneath, but out of the way of where you plan to place your fairy or anything else that needs to sit flat. Add a few good beads of silicone to the plate without covering the silica packet, and then place the moss back down, over the glue and silica, so that all you see is the plate with a nice, moss ground cover. The silica is important because it will help absorb any moisture that gets trapped in your terrarium, and keep the sides from fogging.
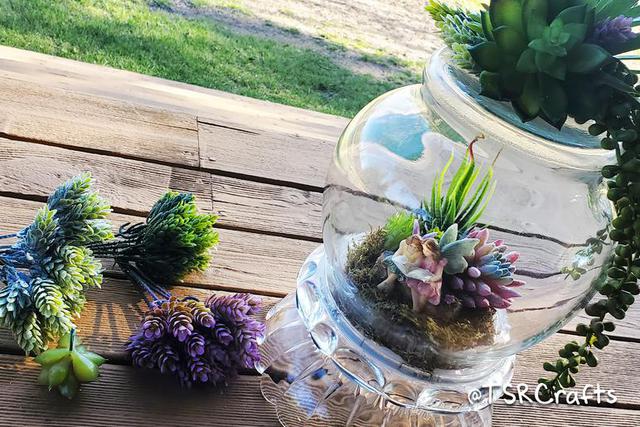
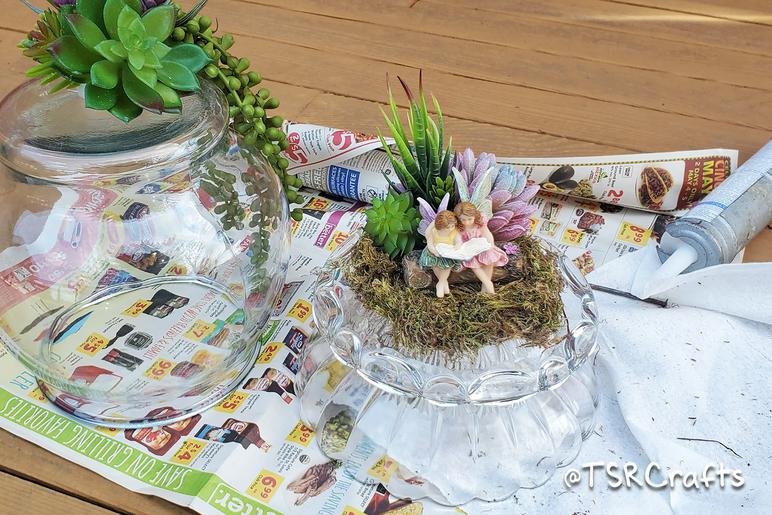
Add your other fairy garden elements SECURING THEM IN PLACE with the silicone. I found this freakin ADORABLE fairy garden statue on Amazon. I got one of the last ones they had in stock, but hopefully they'll get more in soon! The two little fairies sitting on a log, reading was PERFECT! My mom is a bookworm, and they're a wonderful addition to her fairy garden collection! Then i add 3 larger succulents from the set that I purchased on Amazon, and a few of the smaller bits as well. Since they come with stems attached, so you could arrange them in a vase, I cut most of the stems off, but wth the larger succulents, I bent them into a flat circle to give a little added support before gluing.
ANOTHER IMPORTANT, DON'T SKIP, STEP: Let ALL of the silicone that is holding your Fairy Garden together dry before you glue the dome top on. If you don't, you'll be trapping water inside that can fog up. So take a break. Let it dry.
Another important step for this project is to GET A GOOD SEAL, with no holes. When you're ready to glue the dome on top, take your hands and carefully press in the edges of your moss a little, so they are completely out of the way, and run a solid bead of glue around the edge of your fish tank or dome. This can be a little tricky, but just go slow, and have patience. You can also run the glue along the plate, but it can be harder to get the circle exact.
I was lucky enough to have a plate that happened to have a natural line I could follow that was exactly where my bowl would sit and it was very easy to pipe a line around. If you don't have a clear line however, you'll want to add the silicone directly to the bottom thin edge of the dome to ensure that it's a SOLID seal. If there are any holes, moisture will get in, and especially on sunny days, you may notice some fogging.
MAKE SURE YOU GET A GOOD SEAL! It's better to err on the side of caution and use too much, than to use too little.
Great! Now that the Fairy Garden part is done, it's time to finish the rest of this terrarium!
Piece by piece, assemble your glass totem using the silicone, letting each addition fully dry/cure before adding your next piece. Pretty easy, right? This project really isn't very hard -- as long as you know the tricks!
-Glue everything REALLY well
-Let each new addition of silicone cure completely before adding another piece
-Use Silica inside the enclosed garden area
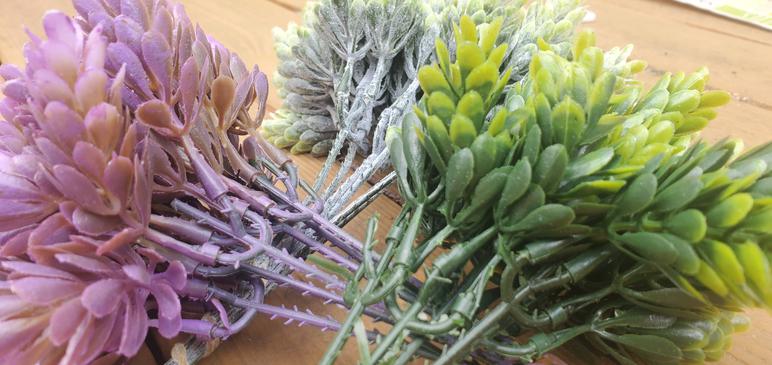
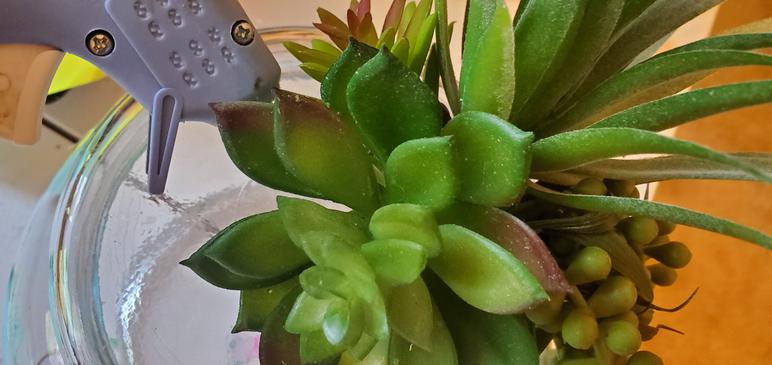
If you'd like to add some faux succulents to the top of your garden like I did, I recommend getting everything in place using a minimal amount of HOT GLUE (just enough to hold everything in place) then fully secure to the glass totem using the silicone. The set of faux succulents I purchased came with some really great greenery on stems that could be easily popped off. These are invaluable for this project! Everywhere there was a "hole" or some glue showing, I just dabbed a bit of silicone onto the end of remaining bit of stem and shoved it in the hole! It looked natural, and was just what I needed to fill the gaps!
When you're all finished with your glass terrarium, let everything dry for a full day to let the silicone fully cure, then set out in the yard, or share with someone special!
While you're waiting for your glue to dry, check out my printable Fairy Garden Planner set! I offer a FREE SAMPLE that you can get your hands on, just for being one of my VIP subscribers. Click here to check it out. There are over 150 pages to help organize your life! It includes daily, weekly and monthly planning pages, habit trackers, plant water schedules, flora and fauna sighting lists, recipe cards and so, so much more! The free sample includes 6 pages, or you can purchase the entire bundle in my shop here!
I really enjoyed doing this project, and am happy to report that I still have about half of the succulents left! I'm already on the hunt for more glass wear and my next fairy statue so that I can make another one with my remaining supplies! I gave this one to my mom for Mother's Day and she just LOVED it! She says it's one of her very favorite additions to her garden! I'd love to see what you create, so be sure to post a pic in my Facebook group here so we can all check it out! <3
Looking for more terrarium projects? Be sure to check out my upcycled picture frame terrarium here! It's another that would make a great fairy garden (though less waterproof... but perfect for a porch or inside!)


