You might
also enjoy...
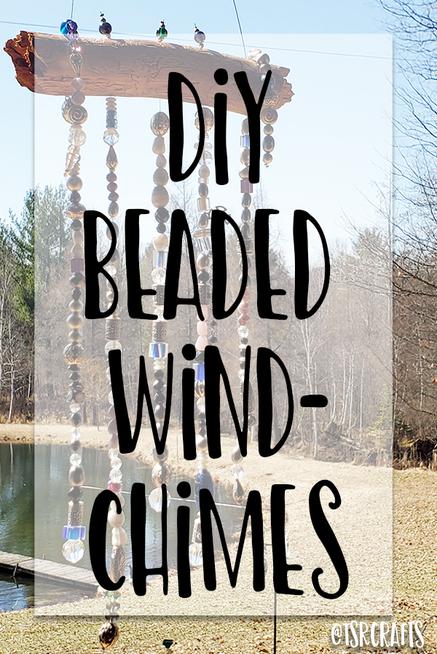
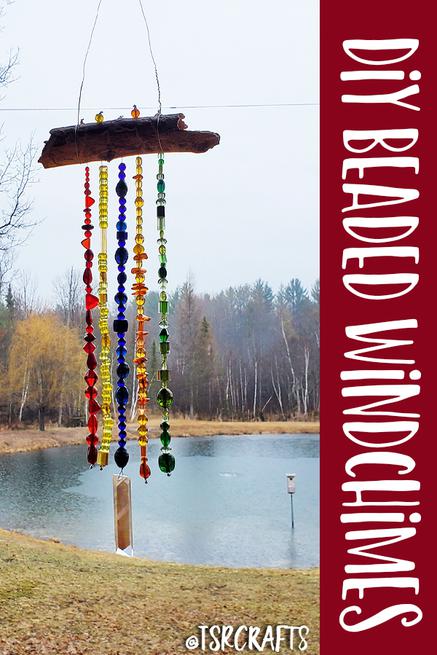
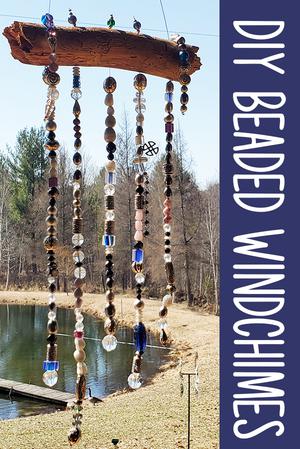
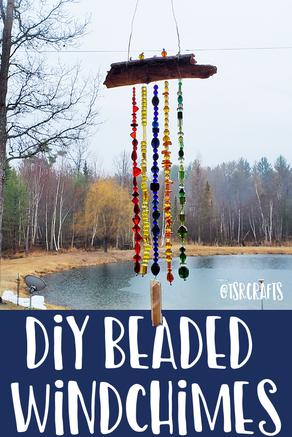
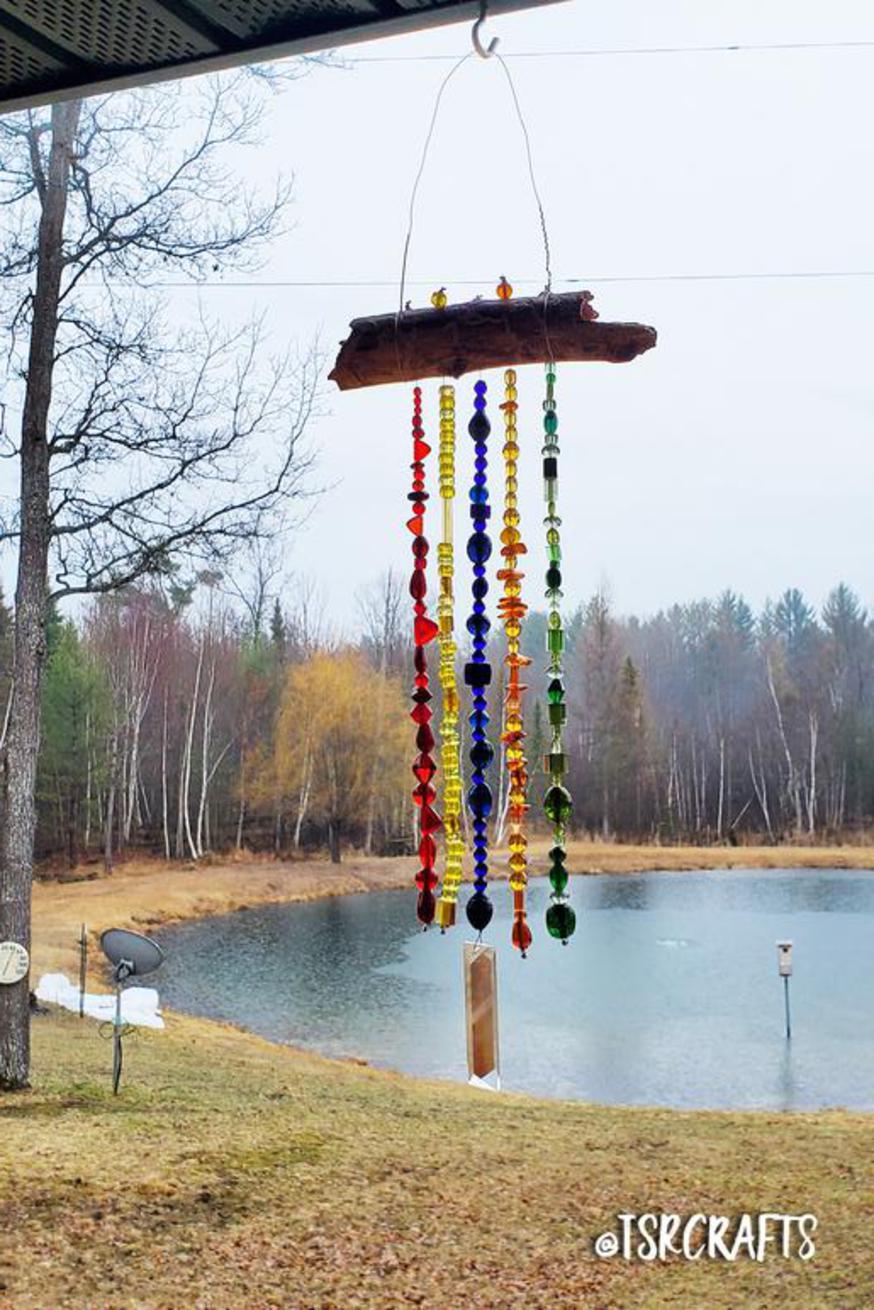
Beaded Wind Chimes
This DIY project is perfect for the yard, garden, porch, or even a sunny window!
This budget friendly craft project is great for adding a pop of color and sparkle! They make wonderful handmade gifts, but I bet you'll want to keep one to decorate your own home too! They look beautiful hanging in the yard and garden, or could even be displayed in a window. Not only do they not cost much to make, you may already have everything on hand that you'll need!
If you enjoyed my tutorial or found value in it, I'd appreciate it if you gave it a little love on social media!
Disclaimer: Please note that some of the links in this post may be affiliate links or ads. There is no additional cost to you, but The Scrap Room will earn a small commission should you choose to purchase through those links. Click here for my full disclaimer. Thank you for your support.

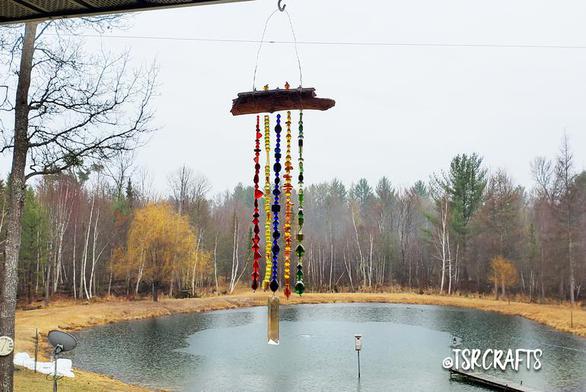
I did this project as part of my 30 Day Craft Challenge and I have to say, it was one of my FAVORITES. I even got my mom to join in and we spent a couple hours watching some TV and making two new decorations to hang in her yard. They both turned out beautiful! No sooner had we finished them, we ordered some supplies to make more -- crystal prisms, large glass beads, and a few other goodies (that you'll just have to stay tuned for. ;) #futuretutorial)
For this first round of beaded wind chimes that we made though, we happened to have everything on hand. Including 2 amazing sticks that mom found out in her yard, that inspired this project!
So start this project out by finding your perfect, whimsical, stick!
The sticks we used were about 2" in diameter. Nice and chunky. We weren't as concerned about length, we just wanted something we could drill holes through without needing to worry about it breaking. Also, make sure you choose a nice sturdy stick. Not something that's half rotted and only going to last you one season. The stick I used was about 6 inches long and my mom used one that was about 10.
You'll need to make a plan for how many strands of beads you want to hang from your stick, and how you want them to hang. We both chose 5, but we decided to hang them differently because our sticks were shaped differently.
**There are two different ways you could attach the strands of beads to your stick. You can simply string them on wire and wrap the wire around the stick several times (no drill needed!!!) or you can attach them like we did, by drilling holes through the stick, feeding the wires through, and adding a couple more beads on top.**
My stick was shorter, and I wanted a row of colorful beads along the top so I utilized a smaller section of the stick so the top beads would all be in a row. (One end of my stick was more roughed up, and if I put a strand close to the end the bead on top would have been noticeably lower than the other 4.) Because I did this, I decided to stagger my holes in a zig-zag pattern to keep the strands of beads further apart. Since my mom had a longer stick to use, we drilled her holes in a straight line. Get a game plan for your particular stick before you actually start drilling holes!
Once you have an idea of what you want to do, and the beads you want to use, start laying out your beads how you plan to string them. This will allow you to look at your entire design as a whole and shift things around before you start adding them to the wire.
I love how whimsical and fun these are. Rummaging through my craft supplies I found an AMAZING prism (that I didn't even remember I had! I'd saved it ages ago "for something special"!) I couldn't find more of these same prisms online, but I found some others that we decided to order. (YES we're making MORE!!!)
SUPPLIES FOR THIS PROJECT:
-A colorful assortment of large beads
-A pretty stick (we used 2 we found out in the yard that were about 2 inches thick, removed the bark and cleaned them off. $0)
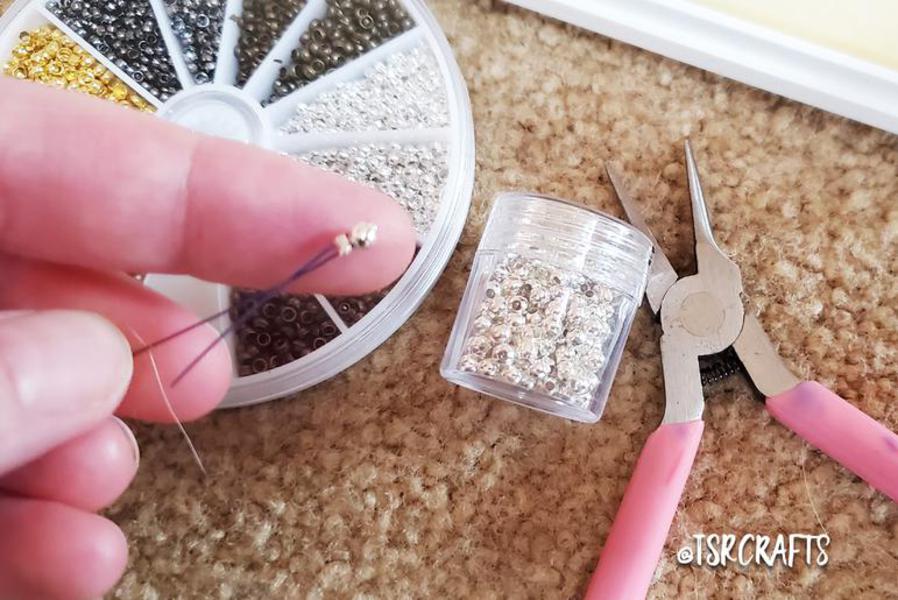
-Needle-nosed pliers
-**Small drill
You're going to need *something* at the bottom of each strand to hold your beads on.
This could be something as simple as a knot in the wire (assuming your bead's hole isn't too big, and it won't slip over it). You could also throw a crimping bead on there to hold things in place. (Again, make sure your bottom bead won't slide over! #BeenThereDoneThat). You could also just use the bottom of the wire and wrap it around your last bead and around your main strand a few times. It's up to you and you personal preference.
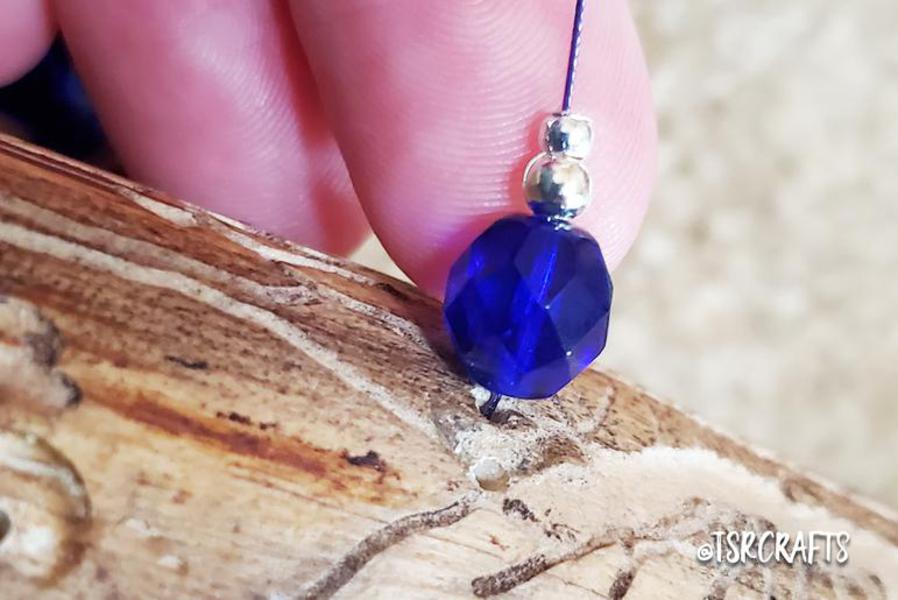
I ran the wire through a small crimping bead, then a round silver bead (that was big enough to support my colored glass beads), then back through the crimping bead; then crimped. (Crimp VERY WELL if you do this method. You don't want this baby to slip!) This provided a nice sturdy base for my strands of beads.
Create your strand, and if you drilled holes like me, run your wire through the hole, add another bead (or a handful -- my mom made a couple that have bits that hang off the top that turned out really fun!). Add another crimping bead to the top (crimping VERY WELL), or tie/wrap off your wire so the beads won't come off.
Add some wire for a handle. To do this, I simply cut a long piece of wire, looped an end around one end of the stick and twisted it tight to the itself (the handle part). Then I took the other end of the wire and created the size hanger I wanted, and looped it around the other end of the stick, again, twisting the end around the hanger several times to secure it.
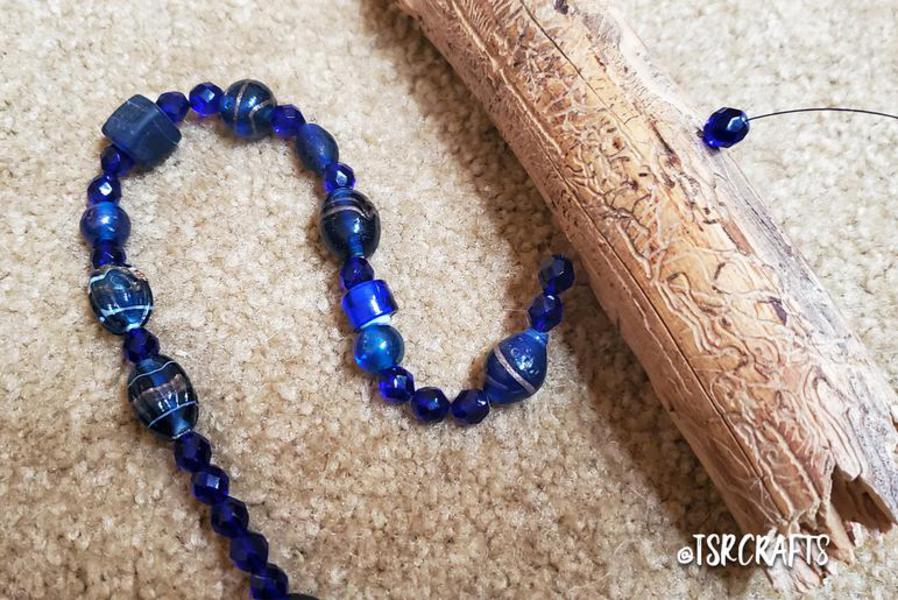
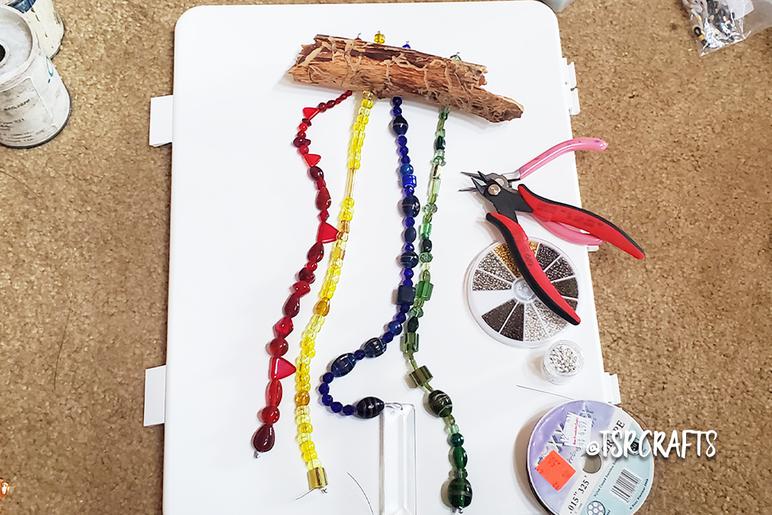
Add your strands to your wood as you string them so you can see how they hang and how they look overall. You may decide to move beads around in your design, depending on where they sit and how your overall project balances. You may also decide to add or remove beads to adjust the length of your strands. So adding them to the stick as you go can be really helpful!
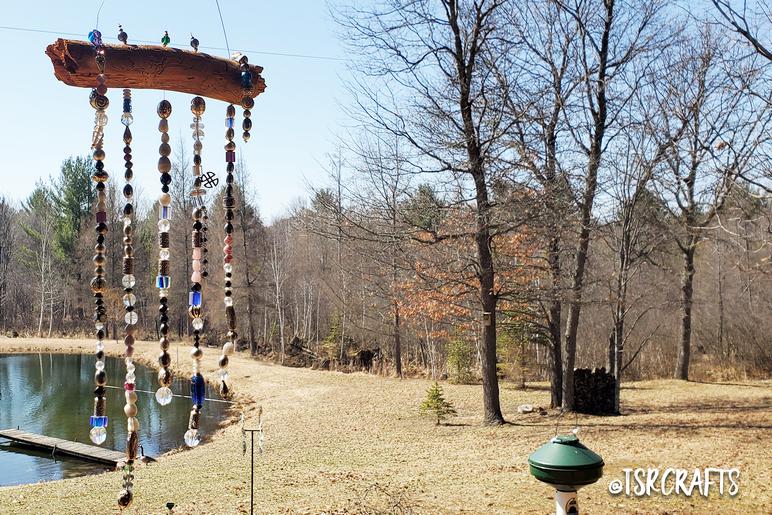
Here's the one that my Mom made. She used some amazing blue and silver beads, and added on some extra charms to her strands, as well as, like I mentioned above, a couple of extra strands that spill over the top.
There's so many ways you could personalize and customize this project! The bead color, size, add bells, change the style or placement of things -- you could even swap out the stick up top with something else that you have lying around!
If you haven't already started, START! This project is so much fun! If you're a craft hoarder like me, you probably have most, if not all of these supplies lying around, so go on a little scavenger hunt for the perfect stick and the rest of your supplies and get beading! (Or at least save it to make later!) ;)