How to Create "Kiss-Cut" Printable Stickers
Learn how to create easy to peel sheets of stickers using your Cricut cutting machine!
If you have a Cricut cutting machine, and use their Design Studio program, you don't want to miss this super helpful tutorial that will have you creating your own easy-peel stickers, right at home!
"Kiss-Cuts" are different from die cuts, in that the don't cut Alllll the way through your material. The cut leaves the backing in tact so you can easily peel your stickers off the page, like you would from stickers you buy at the store.
Once you know how to do this (super easy!) process, you'll be able to make all kinds of useful stickers! Functional stickers for your planner or bullet journal, sticker embellishments for your scrapbooks, custom labels to decorate gifts or items you sell... You can cut printable stickers you buy online, or stickers you create yourself!
For this project, you will need:
-Cricut electronic craft cutting machine that uses Cricut's Design Space program. (You don't need the latest, most expensive model for this project! Anything that can read PNG files will work great! I recommend the Explore Air 2 if you're on a budget. Amazon sells a great bundle kit at a really good value, but you can also buy the machine by itself if you're really tight on money. You WILL need to buy a standard grip cutting mat to go with it, bare minimum, and when you can afford it, a tool kit with spatula, scrapper and a few other tools will be really helpful for a lot of your crafting.)
If you enjoyed my tutorial or found value in it, I'd appreciate it if you gave it a little love on social media!
It's important to upload the PNG version. The reason for this is because it's already a flattened image. You CAN upload an SVG set, but you will have to go into all the cut layers, and manually flatten them. By using a PNG design, this is already all done for you.
You will notice that the ENTIRE IMAGE is highlighted in grey, these are the areas due to be printed and cut. Since you Don't want to "print" the background, click to erase the it. When you do this, the background will cease to be grey.
Once you have just the areas you want to cut out highlighted, CONTINUE to the next page, where it will give you the option to save this design. From this point you have the option to save it as a PRINT THEN CUT file or a CUT file. Select PRINT THEN CUT (cause that's why you're here, right?) ;)
-Avery Sticker Paper, 8.5" x 11", BY THE SHEET (You Don't want one with precut labels -- you're going to be doing the cutting!) This is the paper that I used for the project. It's a matte white paper, but if you prefer, you can use something different. Cricut sells sticker paper, but it's a little stiff, and can jam easily in some printers.
-A Printer to print your design. I use my trusty (and VERY inexpensive) Canon Pixma printer.
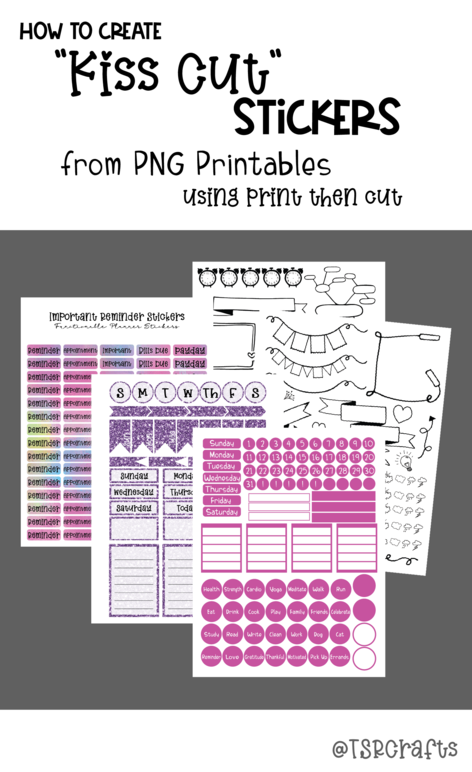
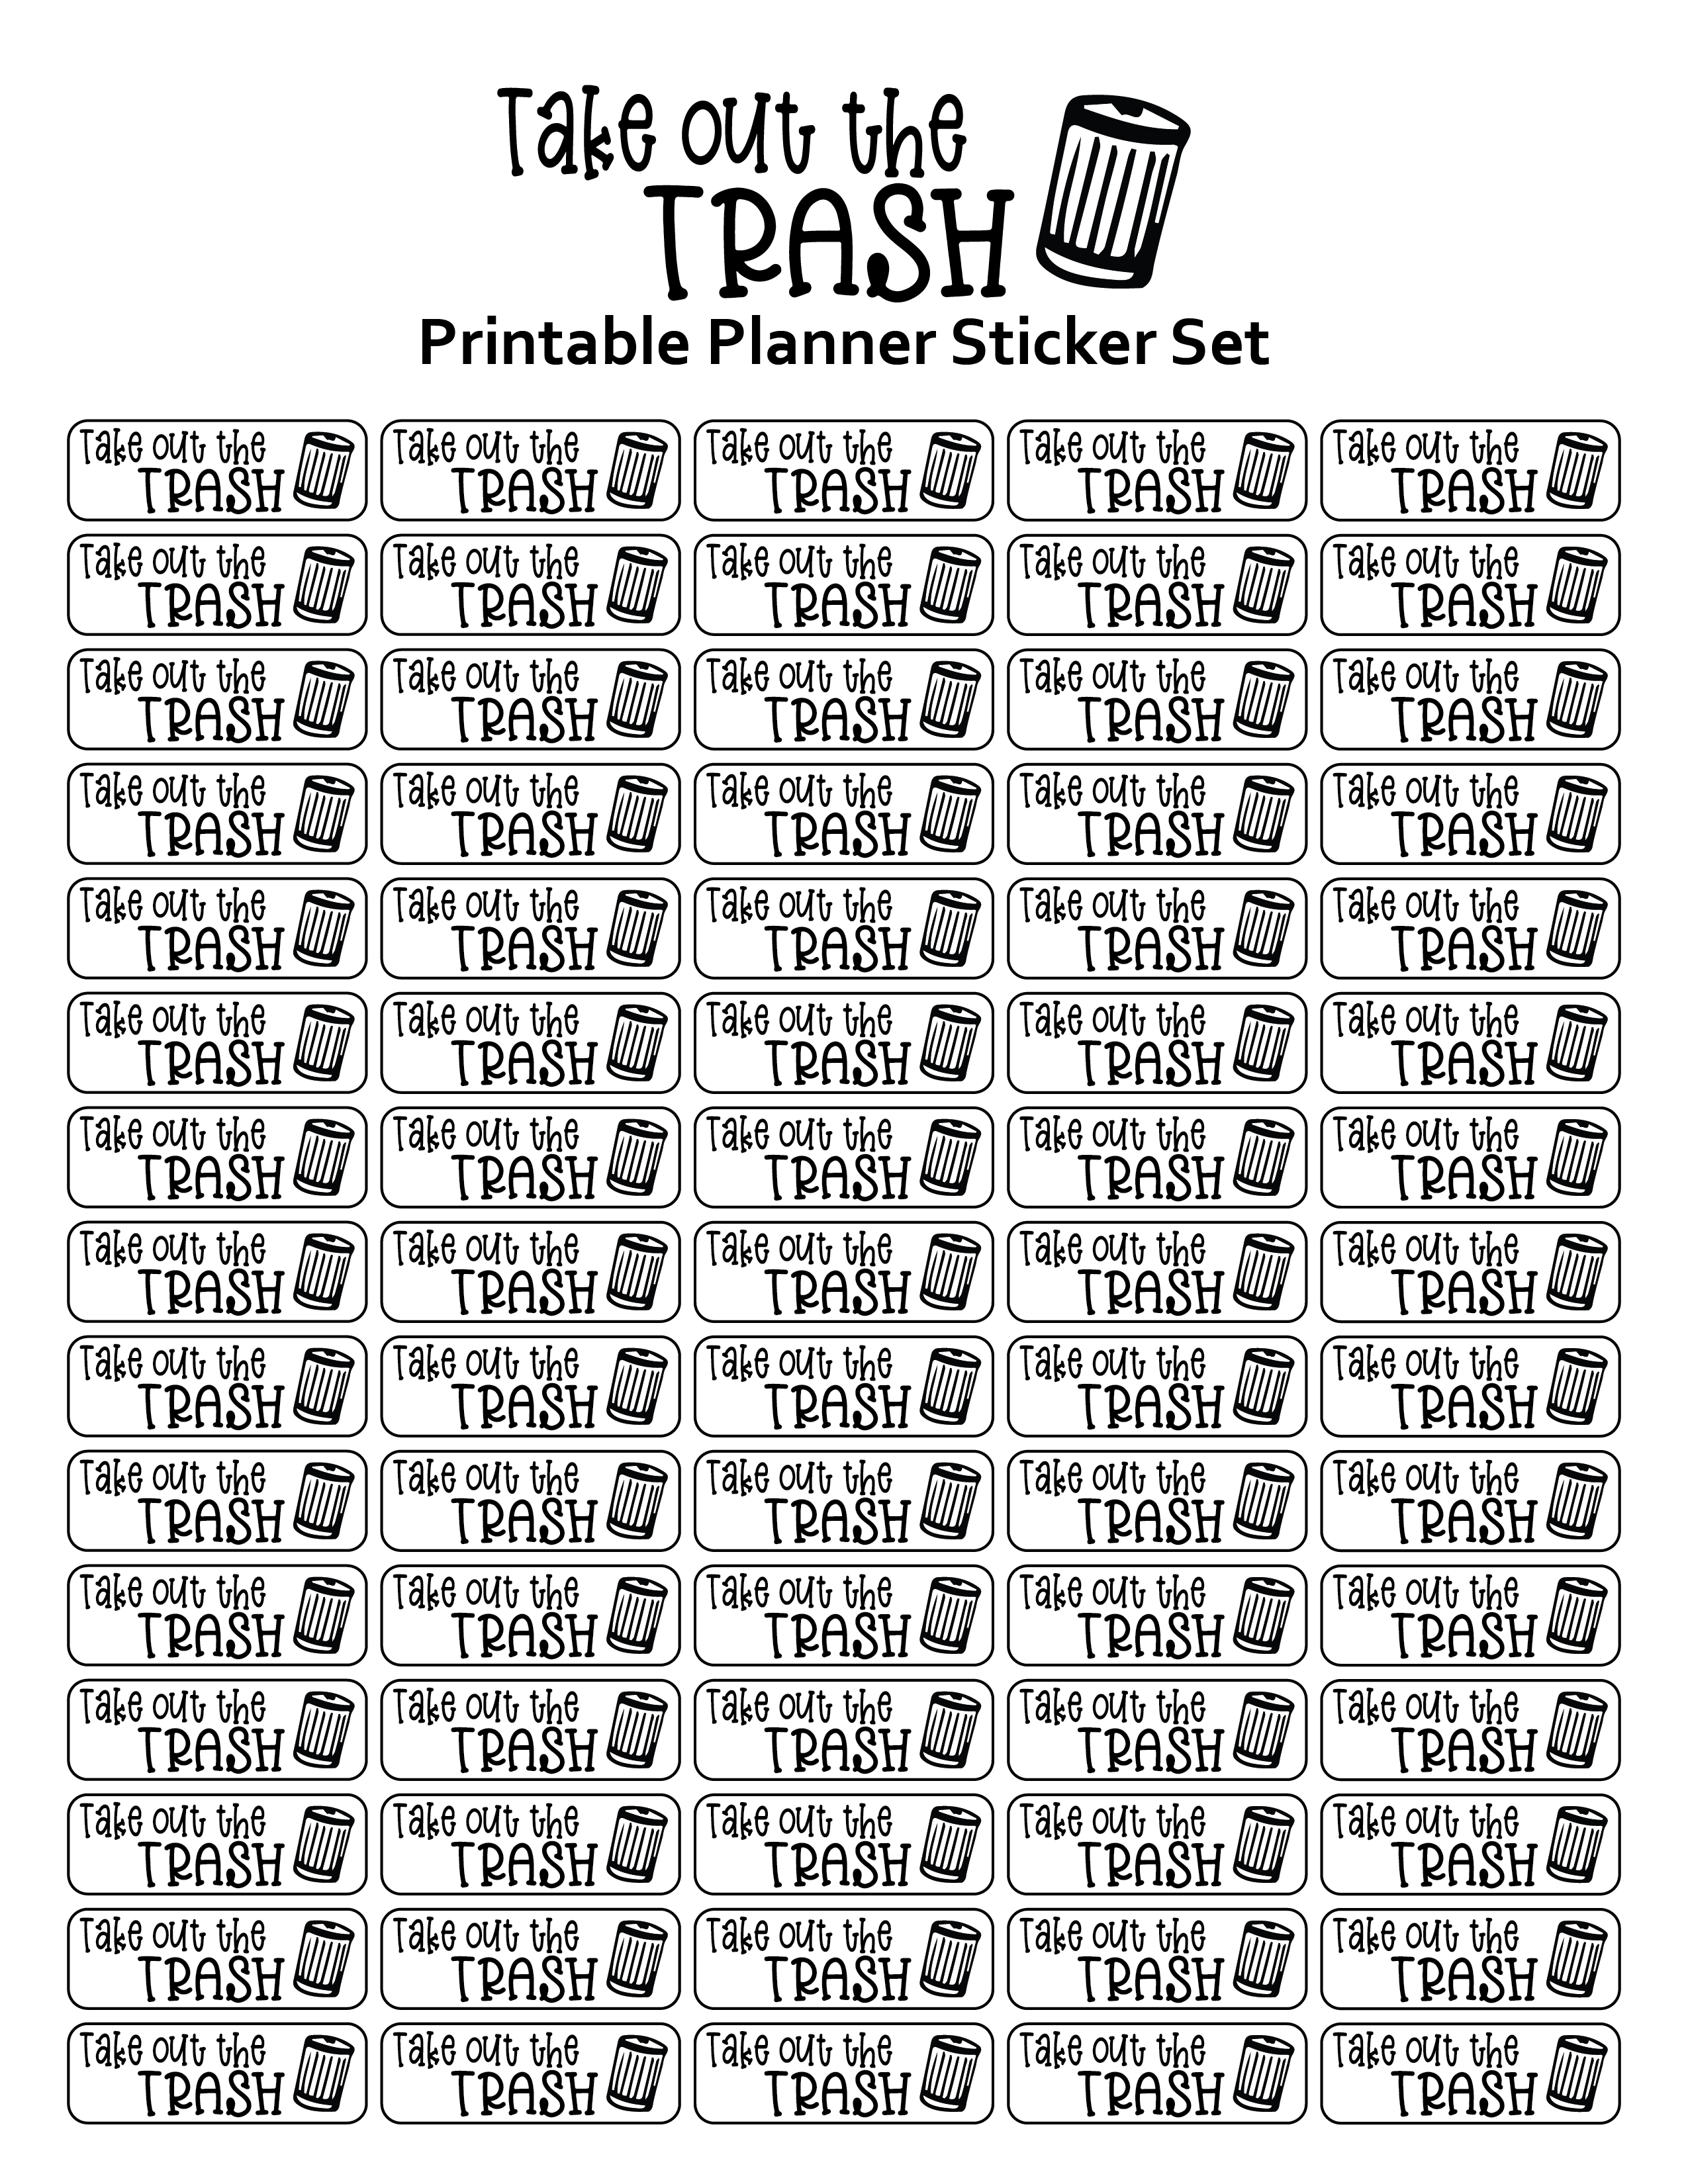
-A PNG Sticker design, created by you or purchased online. You can download a free copy of the sticker set I created and used in this tutorial below!
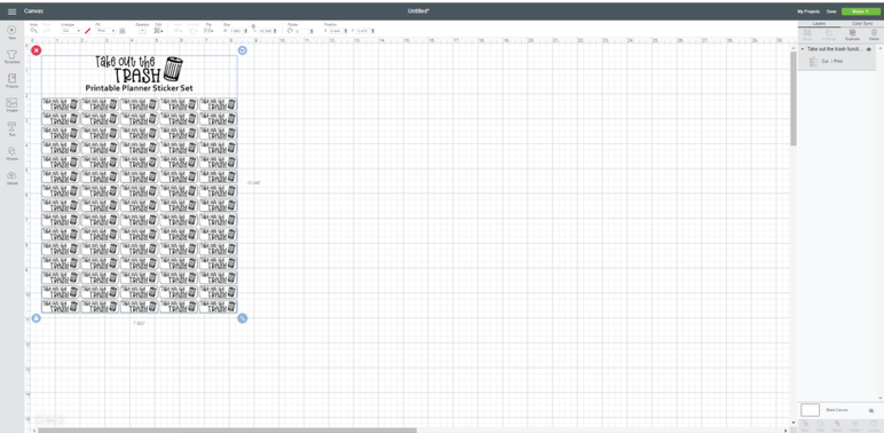


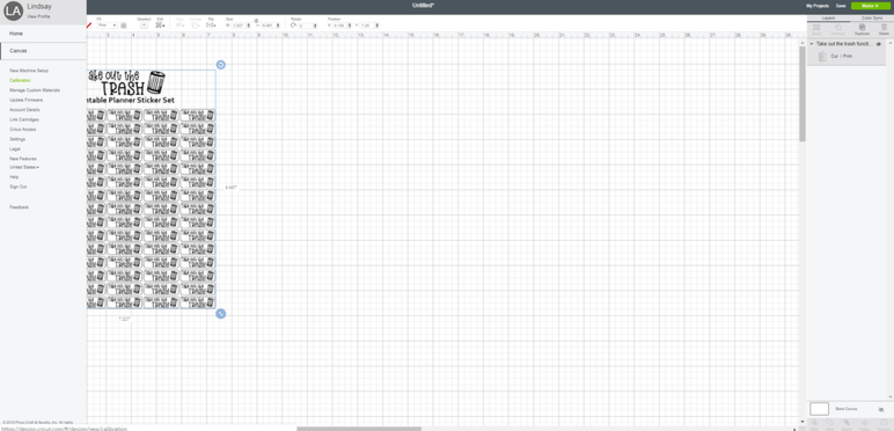
This will take you back to your library of uploads. From here, simply select the design you just created, and "INSERT" the image into your project.
Resize the image as necessary, and click on MAKE IT! NOTE: Currently (while I'm writing this post in April 2019) Cricut's Print then Cut function IS LIMITED TO A 9.25"x 6.75" in area to accommodate it's printed bounding box it uses to scan and cut the design with, so you May need to slightly reduce your design to fit this.
After printing is complete, your screen should automatically prompt you to CUT. Remove the printed design from your printer tray, allow ink to completely DRY, then carefully place it IN THE UPPER LEFT CORNER SHOWN ON YOUR SCREEN, on your cutting mat. Load the mat into your cutting machine.
(Are you scared yet? Not gonna lie, I was at this point! lol!)
Follow any directions on your screen, TURN YOUR MIRROR CUTTING SETTING ON. If you're using adhesive backed paper, and want to create kiss cut sheets of stickers (like the one's you'd buy in the store) try setting your cut depth to the "PAPER" setting. This should cut through the paper part, but shouldn't cut through the backing paper. If it does, just try a lower depth cut setting. On the Cricut Air 2, there's one setting lower than the paper option.
If you'd like to cut all the way through to give you individual stickers on their own backing -- alone -- just up the depth setting to VINYL, or higher if needed.
When you're ready, PUSH THE CUT BUTTON ON YOUR CRICUT MACHINE.
A small light will illuminate on the bottom of the box that houses the cutting blade, and you'll see it go around your sticker(s) scanning the bounding box.
Then watch in amazement as it cuts out your stickers!
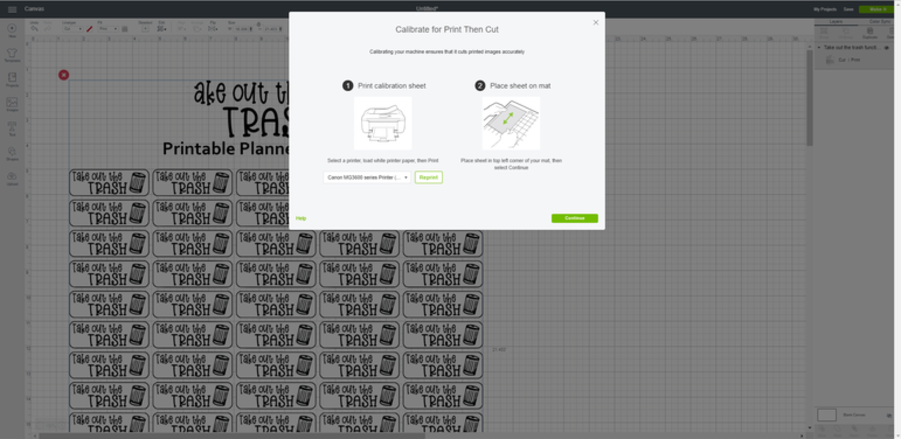
If you haven't already run a calibration on your machine, take a quick moment and do that now -- otherwise you'll go to all this effort, only to have your cuts off by a 1/8th an inch or so! This just takes couple minutes. Click on your menu bar in the upper left hand corner of your screen and select CALIBRATION.
Follow the on-screen directions to print out their test page, load it in the upper left hand corner of your cutting mat, feed it into your machine and CUT! It should *hopefully* cut out the smaller box in the center of the page. Follow the remaining on screen instructions until you've finished the calibration. If after running a calibration, your cut is NOT lined up correctly, click here to visit Cricut's help page for troubleshooting tips.


You might
also enjoy...


Disclaimer: Please note that some of the links in this post are affiliate links. There is no additional cost to you, but The Scrap Room will earn a small commission should you choose to purchase through those links. Click here for my full disclaimer. Thank you for your support.
When I first set out to try the Print and Cut method, it seemed a little overwhelming and confusing. Lining UP everything, so the designs cut out perfectly? I was pretty sure I was going to be wasting some supplies!
NOPE! First time was a charm! This process really is SO easy with a Cricut. (I can't say about on other machines, as I've only done it on my Cricut.) ;)
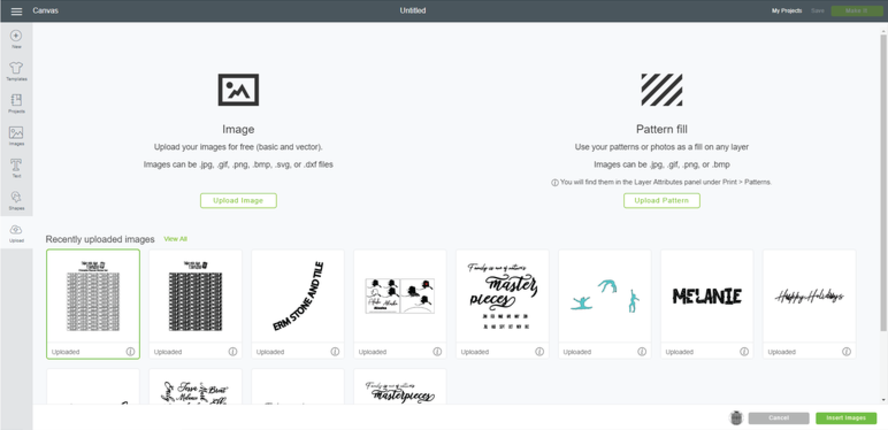
SVG designs, the designs you likely often cut out on your machine, are a little complicated. There are many cut lines, and they are great -- if you want all the lines in the design cut out. The thing I LOVE about the Cricut, is that you can upload PNG and JPEG images to it, and then CHOOSE the level of complexity you want it cut out!
This is PERFECT for cutting printed sticker designs! Begin by opening up Design Studio and start a NEW PROJECT.
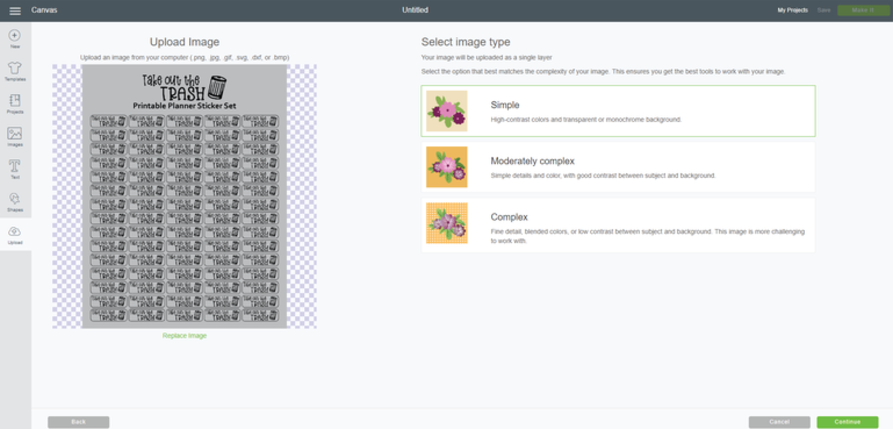
Upload a PNG printable sticker/sticker set. When you do this, it will automatically prompt you to select "SIMPLE" "MODERATELY COMPLEX" or "COMPLEX".
CHOOSE "SIMPLE" and click "CONTINUE"