You might
also enjoy...
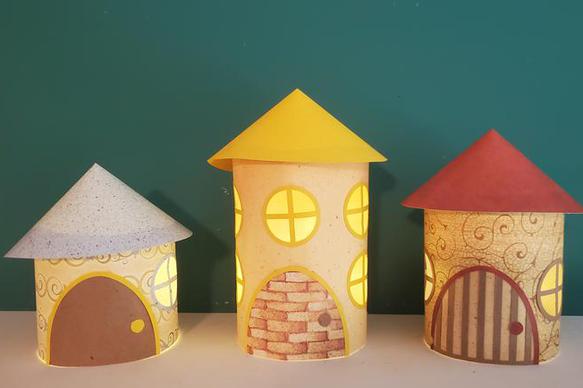
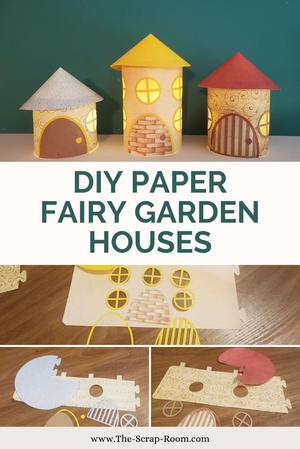
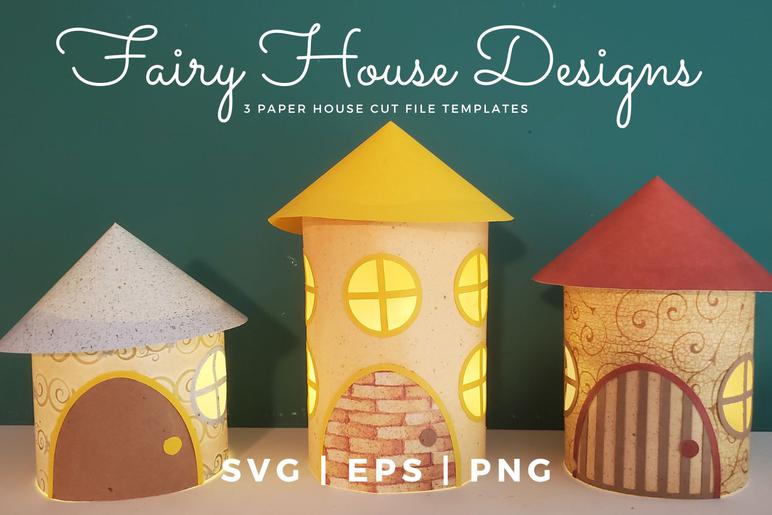
DIY Paper Fairy Houses
Make these adorable little houses using your cutting machine or by hand
These little houses only take a few minutes to cut and put together, but can provide hours and hours of playtime for kids. They're also cute as decorations -- try lighting them up with fake tea lights and add them to your indoor fairy garden!
(Since these are made with paper, they aren't made to be used outside or wet or windy conditions. If you're looking to make more durable fairy garden houses that can withstand a little rain or hot sun, try this fairy garden house project instead.) ;)
Disclaimer: Please note that some of the links in this post may be affiliate links or ads. There is no additional cost to you, but The Scrap Room will earn a small commission should you choose to purchase through those links. Click here for my full disclaimer. Thank you for your support.


For this project, you will need:
-3 Fairy Garden Paper House Template Bundle (Available in my digital Kid's Activity Bundle, here)
-SVG, EPS, or PNG cutting machine
-Your favorite adhesive
-Patterned or solid paper or cardstock of your choosing
If you haven't already picked up the templates for this project, you can find them in my shop here. They're one of the many activities included in my Huge Kid's Activity Bundle
This bundle comes with "blank" patterns for the 3 houses shown above. Please note that they are "blank" -- you'll need to cut the designs out with your favorite pattern to give them some color.
You can also cut them out in white or other solid papers, and decorate them by hand. (Especially fun for kiddos! If you're having a fairy or even a gnome party, add this to your project list for sure!
These little houses could be used for as many different things as your imagination chooses. Tiny doll houses for play time, a paper snow village for Christmas, just for fun to create some ambience...
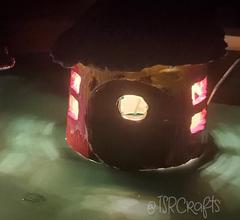
I made these specifically for an indoor fairy garden, so I chose to glue them and make them "permanent" and light them up with fake tea lights, but you could also skip a couple of the gluing steps and make them portable for travel. An imaginative, light-weight "toy" you can slip in your bag, without adding hardly any weight to carry is always a win!
These little houses are soooo easy to put together. The "hardest" part is often waiting for my cutting software to open up. 😂
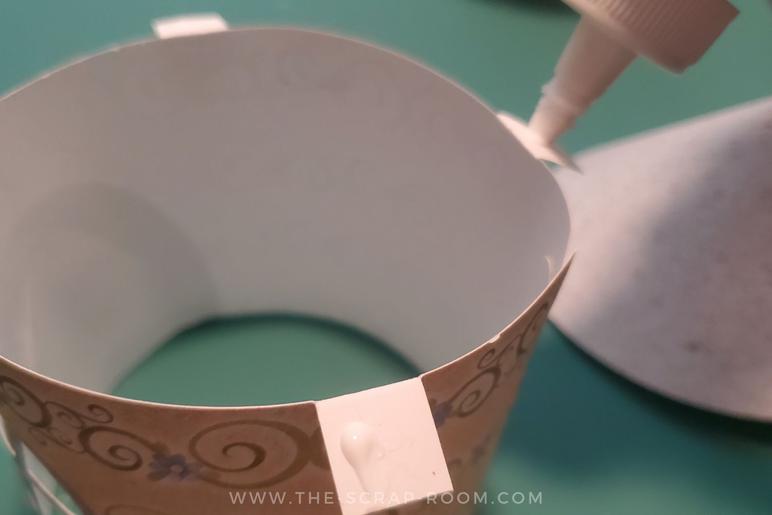
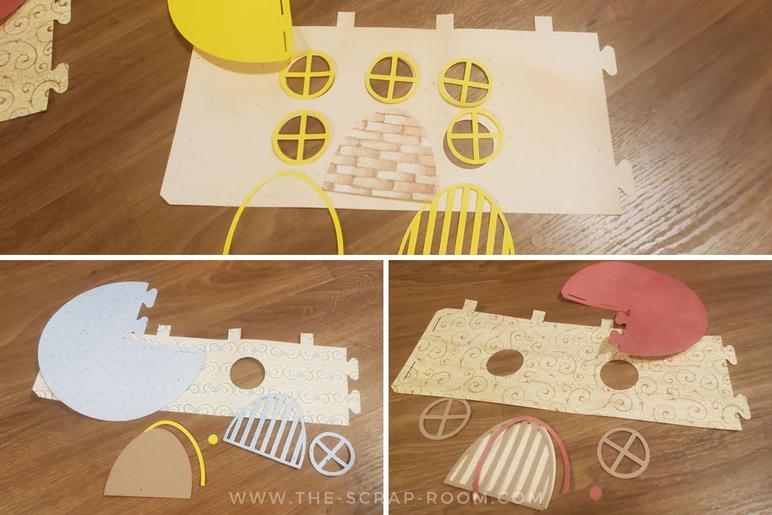
Once you've cut out the layers, you'll need a little adhesive to add the window frames and door layers to the base layer of the house. They're all pretty self explanatory -- the window frames fit perfectly over the window holes, and the door, well there's no wrong way to add the door. Adhere the base layer for the door down. You can choose to use the extra door layers, or not. There's a layer that fits over the door with slats in it to add texture, plus a frame and door knob too.
Fold the 1/2" square tabs on the top of the house walls out (so when the house is assembled, they stick outward).
If you want to leave these houses flat for travel, stop here. You can slide the tabs into the slits to assemble the house and roof when you're ready to set them up.
If you're going to keep your houses set up, you'll want to glue them, so they are more sturdy.
Assemble the house and roof by inserting the tabs into the slits, add a touch of glue to the rounded tabs, and press them firmly to adhere them into place. You'll also want to add a little adhesive to the square 1/2" tabs, place the roof upside down, and carefully place the house, upside down, into the center of the roof, and gently press the glued tabs down onto the inside of the roof.

Once you've finished your paper fairy house, you can add a fake tea light for ambience!
These little fairy houses take almost no time to throw together, and we've already reached the end of this tutorial! (See I *told* you they were really easy!) ;)
Have fun using the templates to create all kinds of fun variations for different holidays and special occasions. I'd love to see what you create, so be sure to tag me @TSRCrafts on Instagram with your pics!
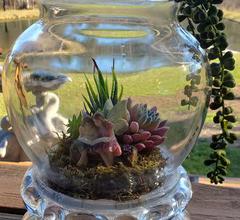
Want another fun Fairy Garden project? Check out my fish bowl Fairy Garden Terrarium project, here!