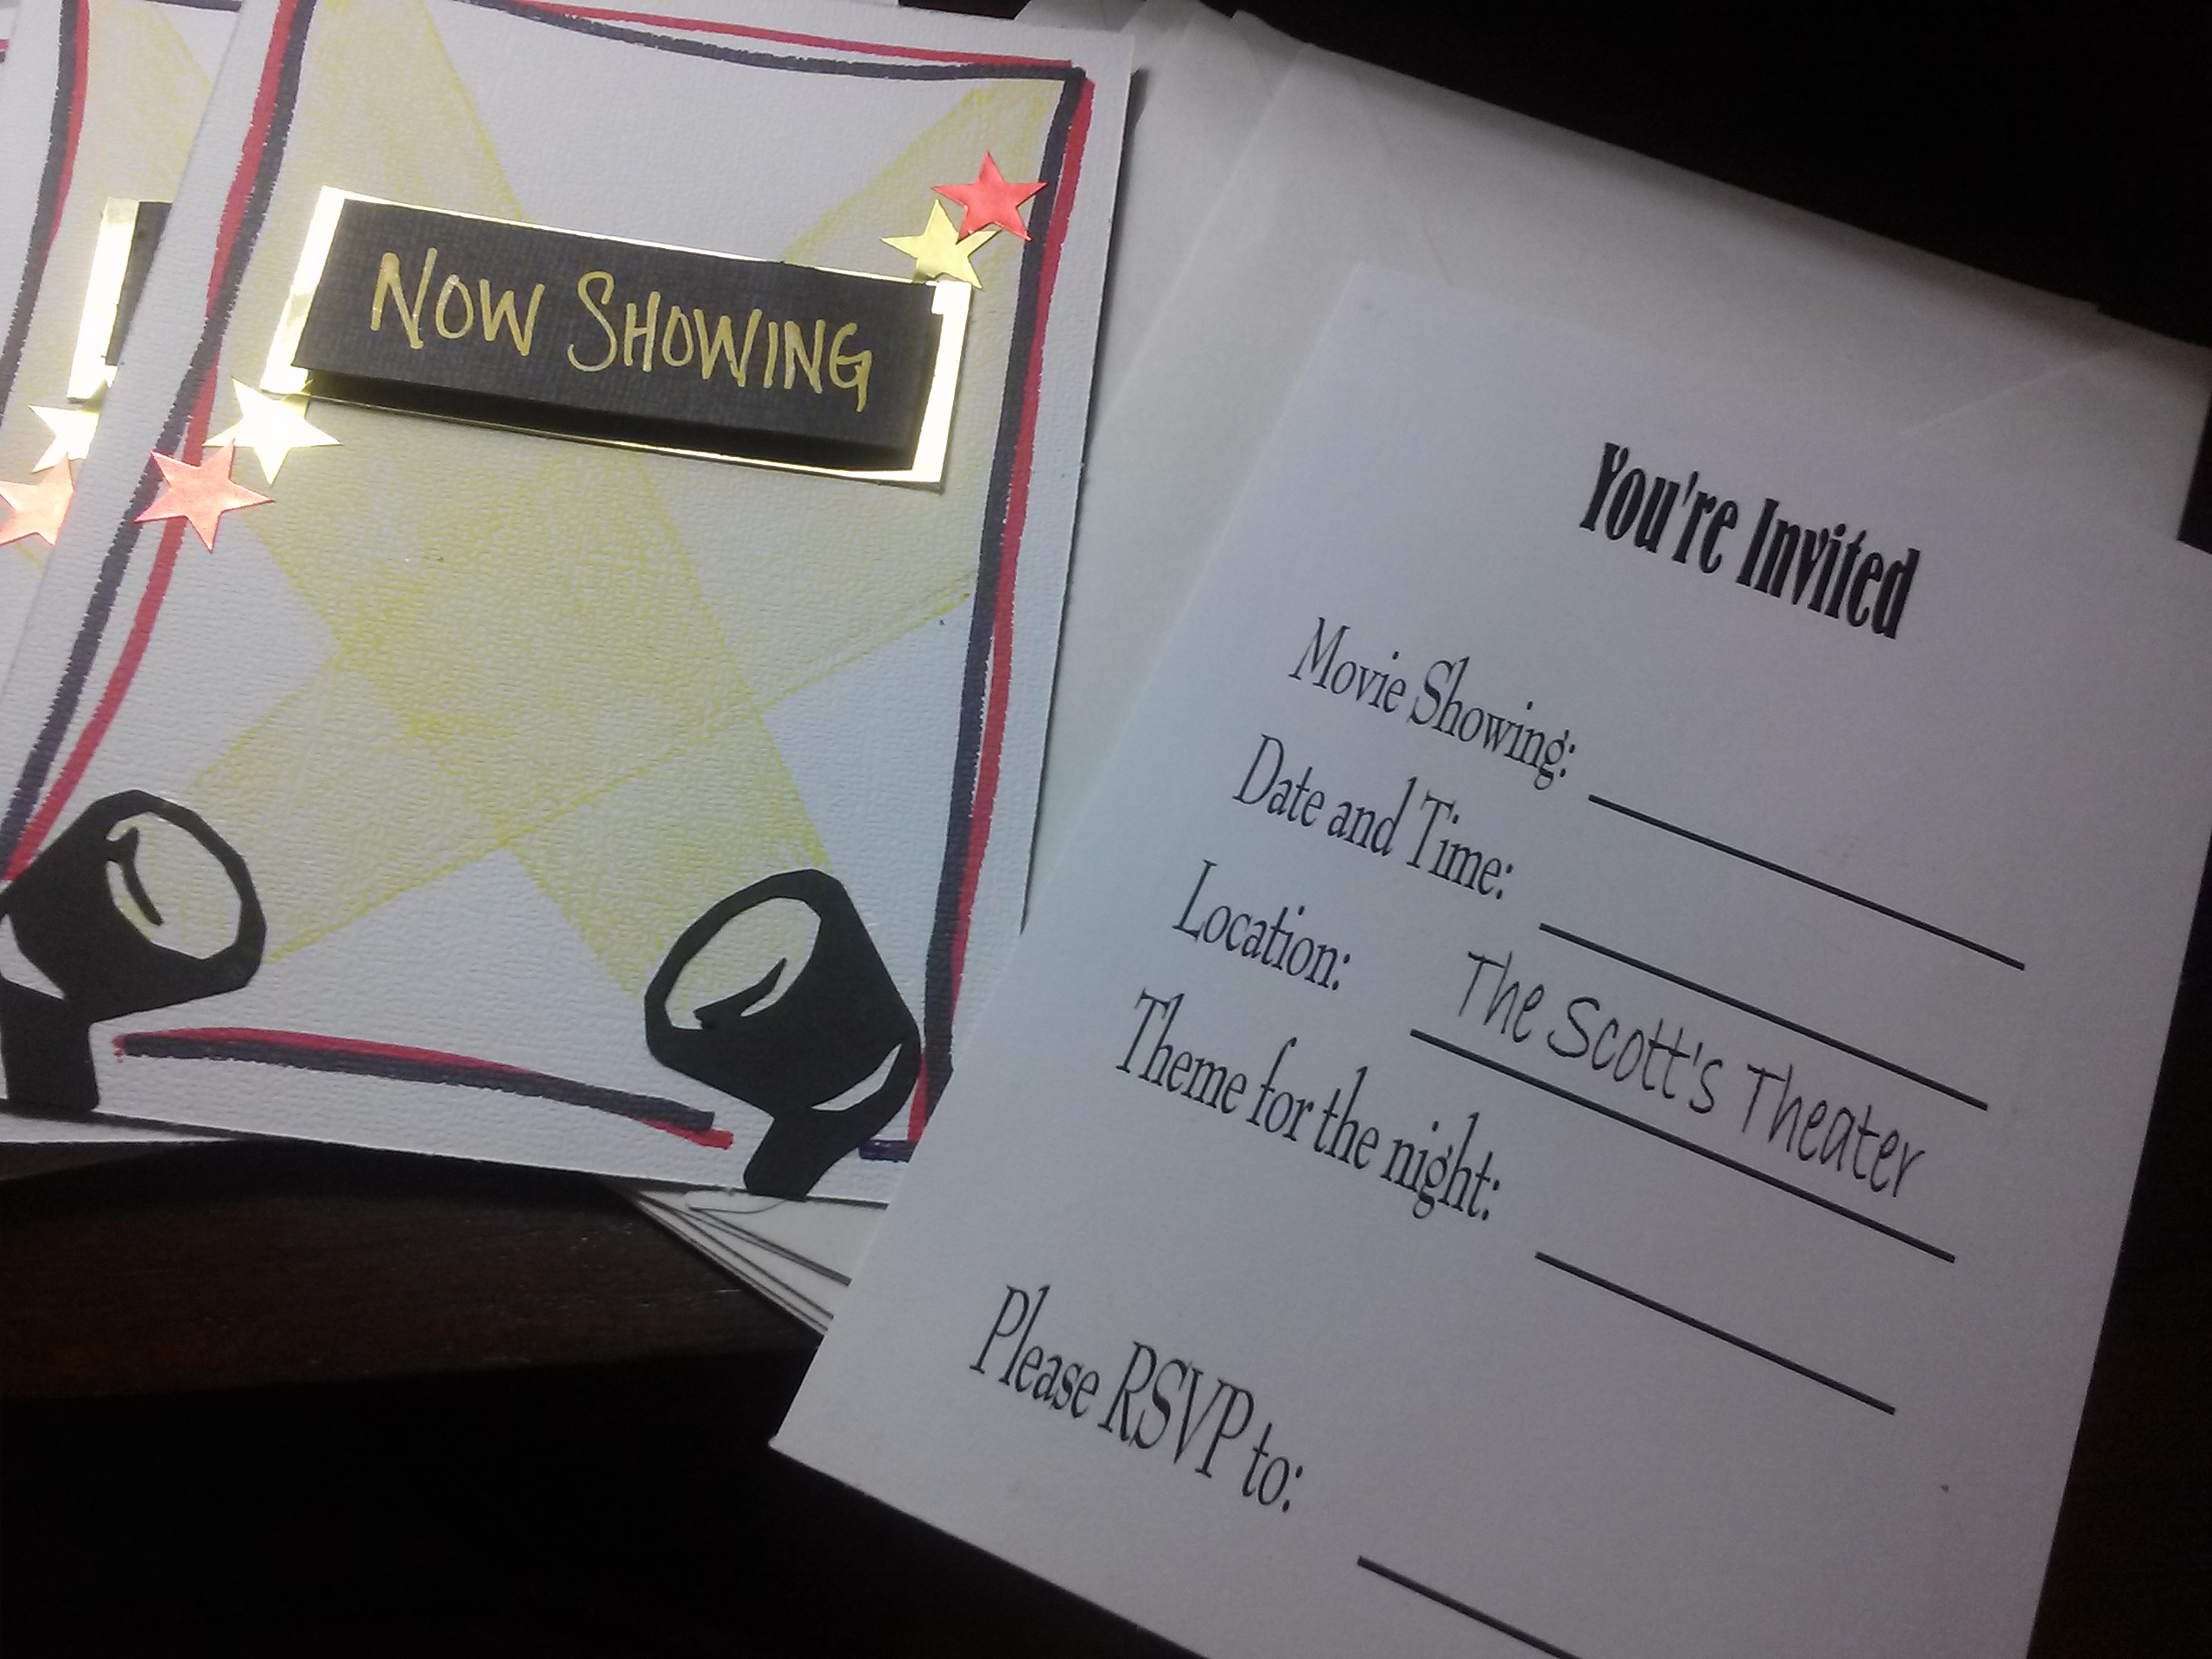
Movie Night Invitation
Throwing a movie night? Here's an easy invite that is inexpensive to make. Pair this up with our Movie Night Shadow Box and you're ready for a memorable night with friends and family!
Supplies and Materials:
Makes a set of 6 cards
-Six (6) 5"x7" one sided invitations (Printable PDF below-2 per page)
-*Twelve (12) spotlight die cuts
-Six (6) 3"x1" pieces of black cardstock
-Six (6) 3.25"x1.25" pieces of shiny gold cardstock
-3D adhesive
-Black and red marker
-Yellow colored pencil
-Ruler/Straight edge
-Gold and red stars (12+ of each)
Print out three copies of the above downloadable template, and cut out the six postcard style invitations, or create your own single sided invitations. Since you'll probably be making these as a set, make sure you have all of your embellishments ready so it's easy to put the cards together assembly-line style.
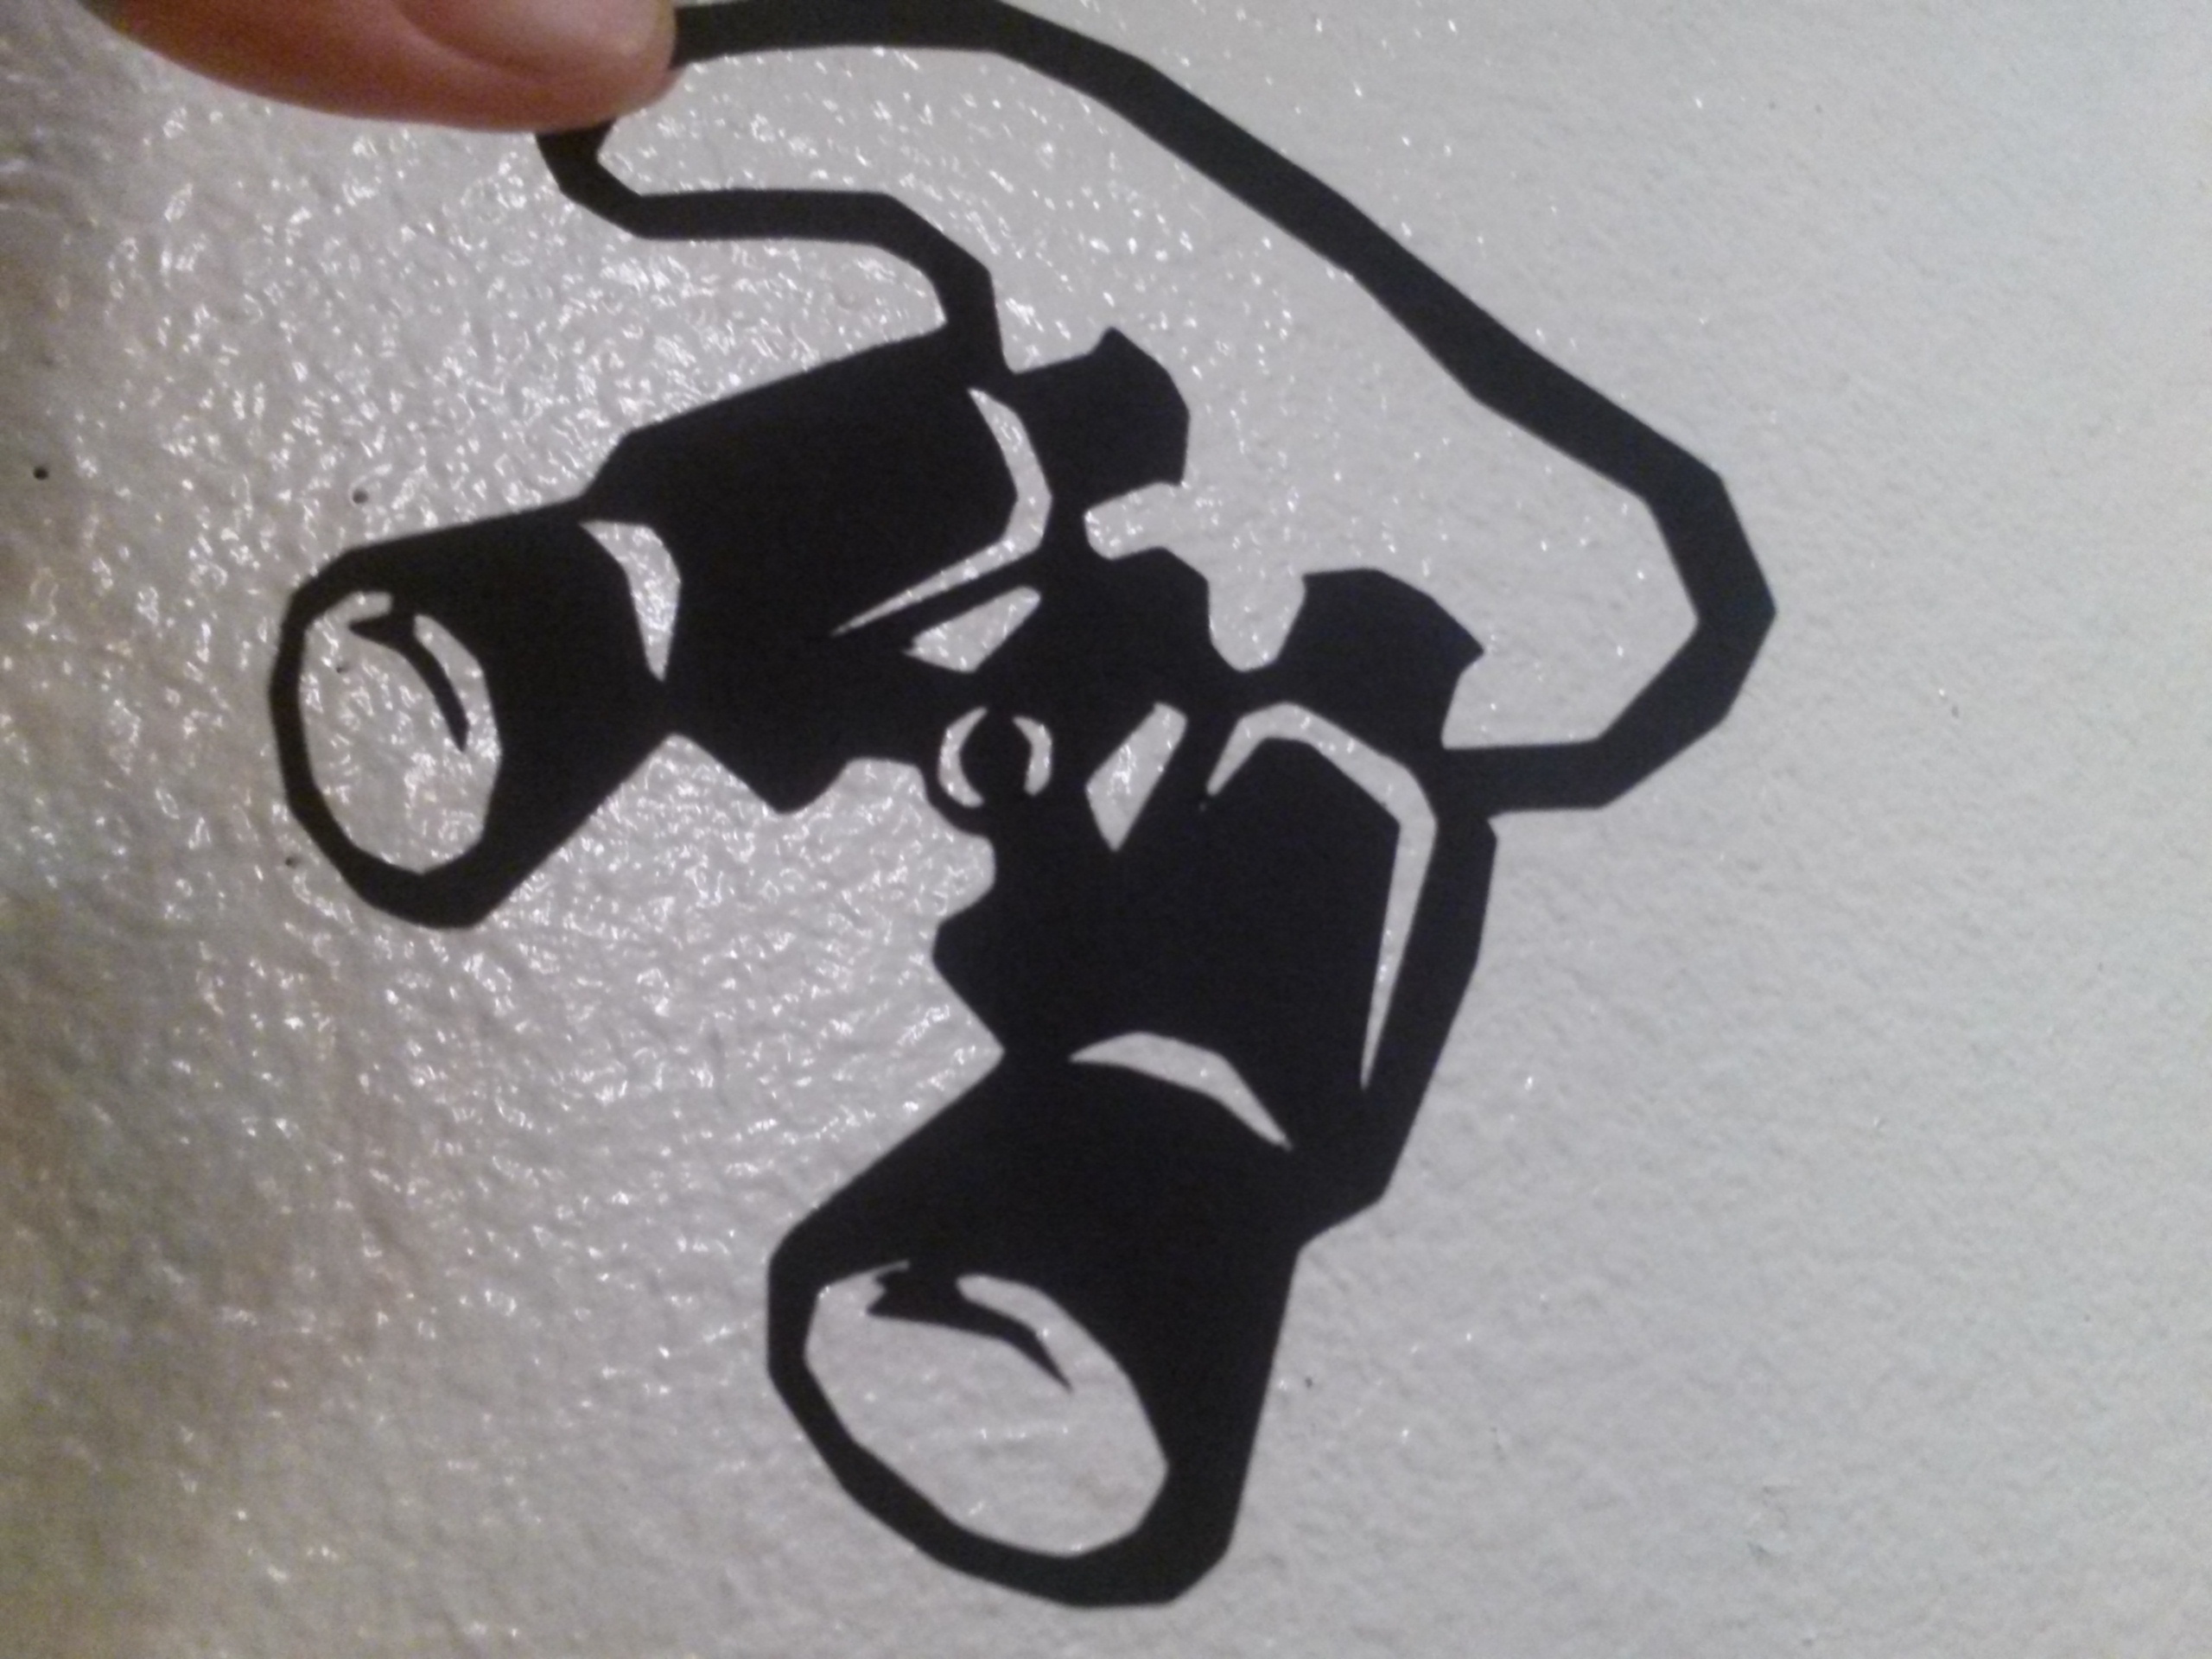
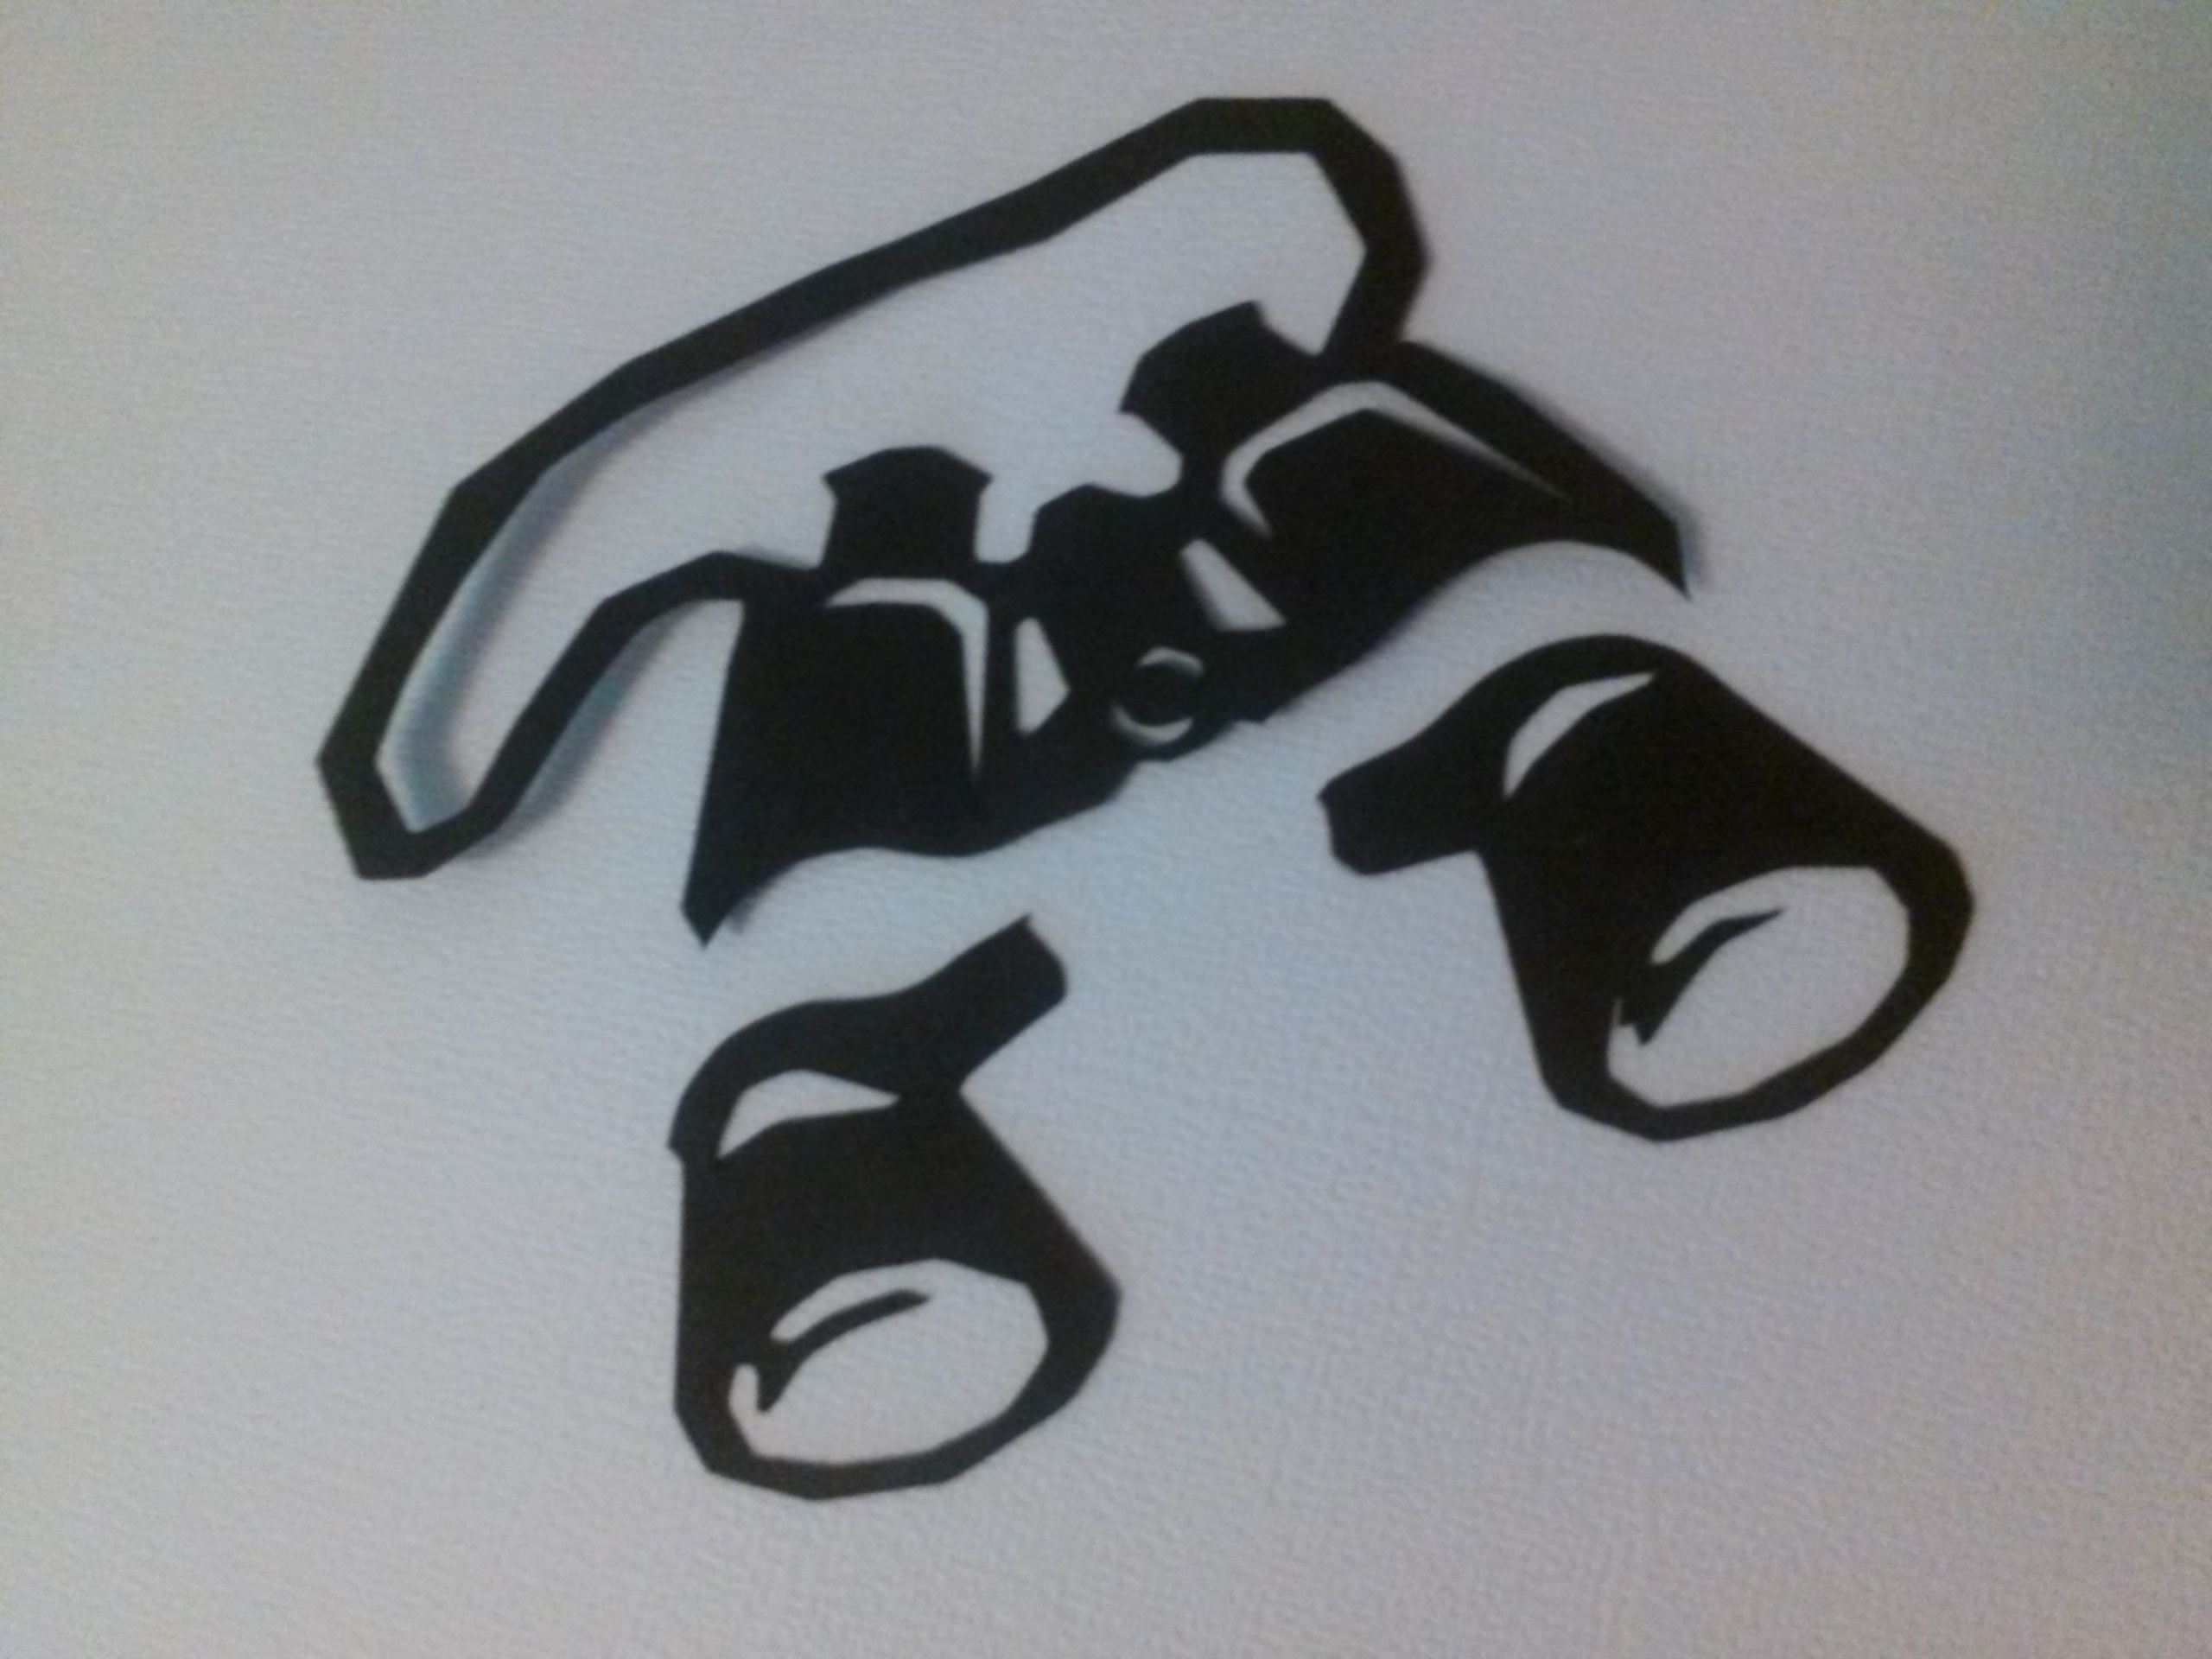
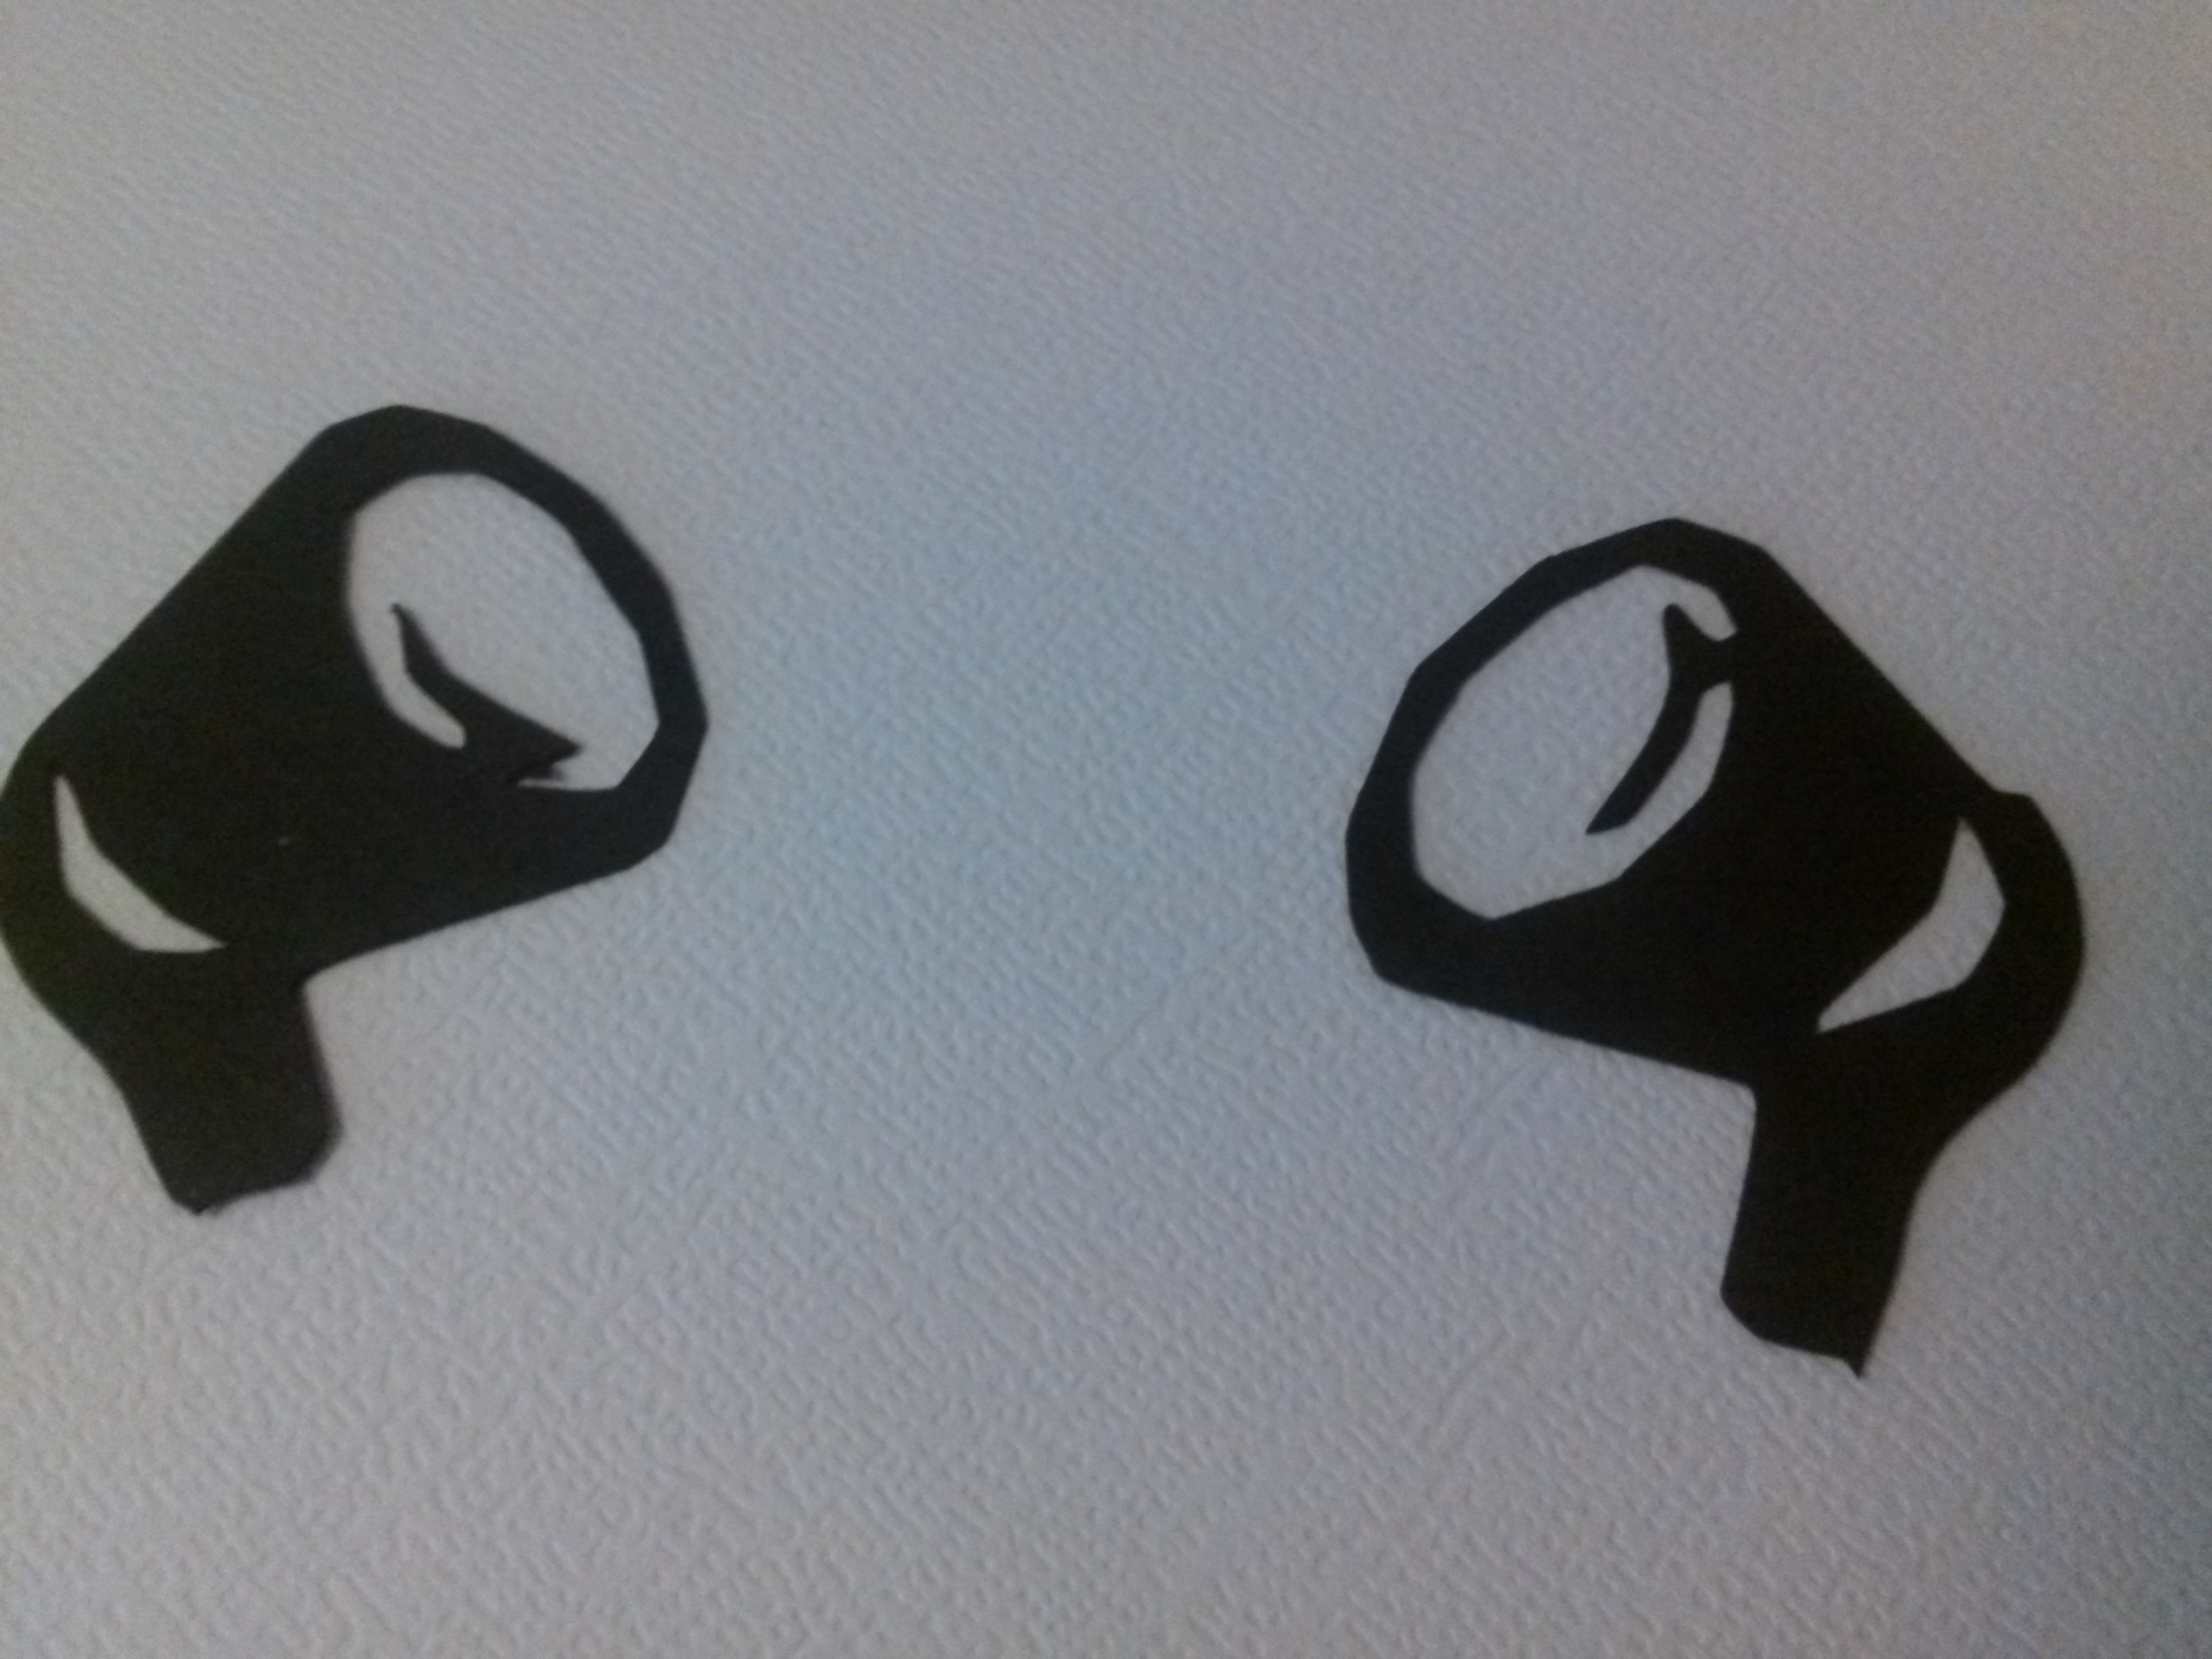
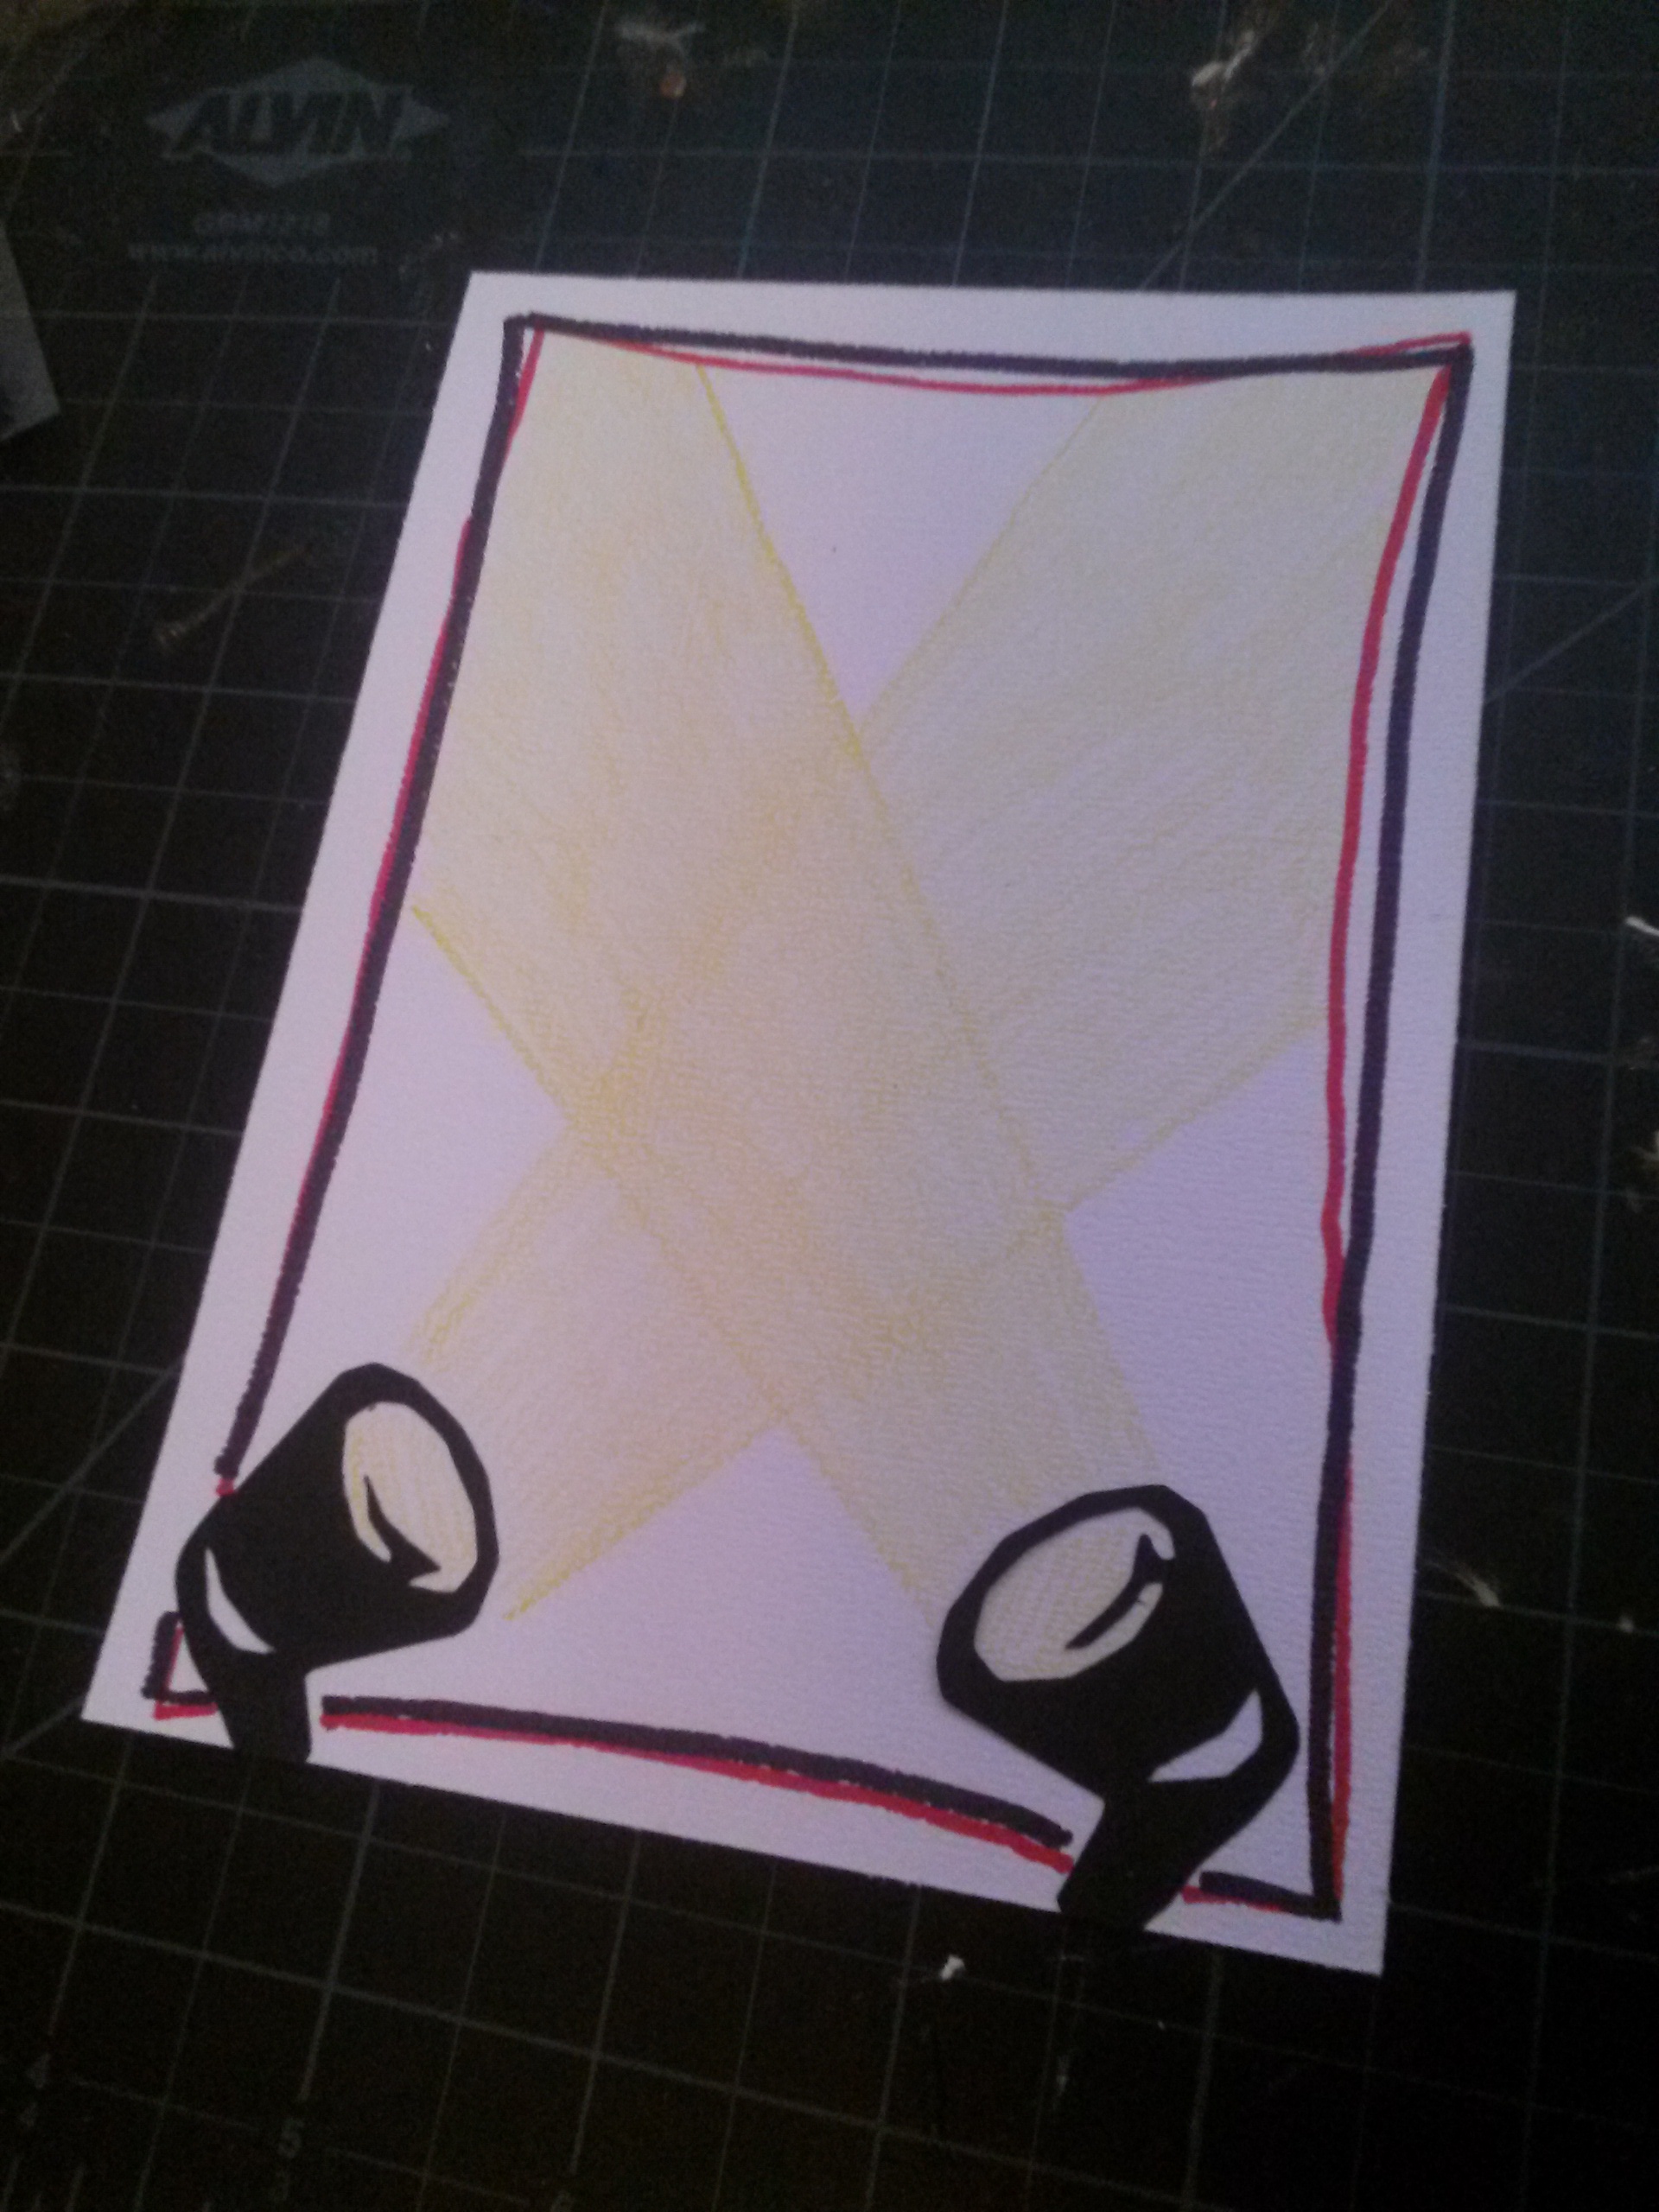
Since I didn't have any spot light die-cuts, I used a pair of binoculars from Cricut's "Camp Out" cartridge (3 1/2" tall) -- just cut them down with scissors to create two spot lights from each pair.

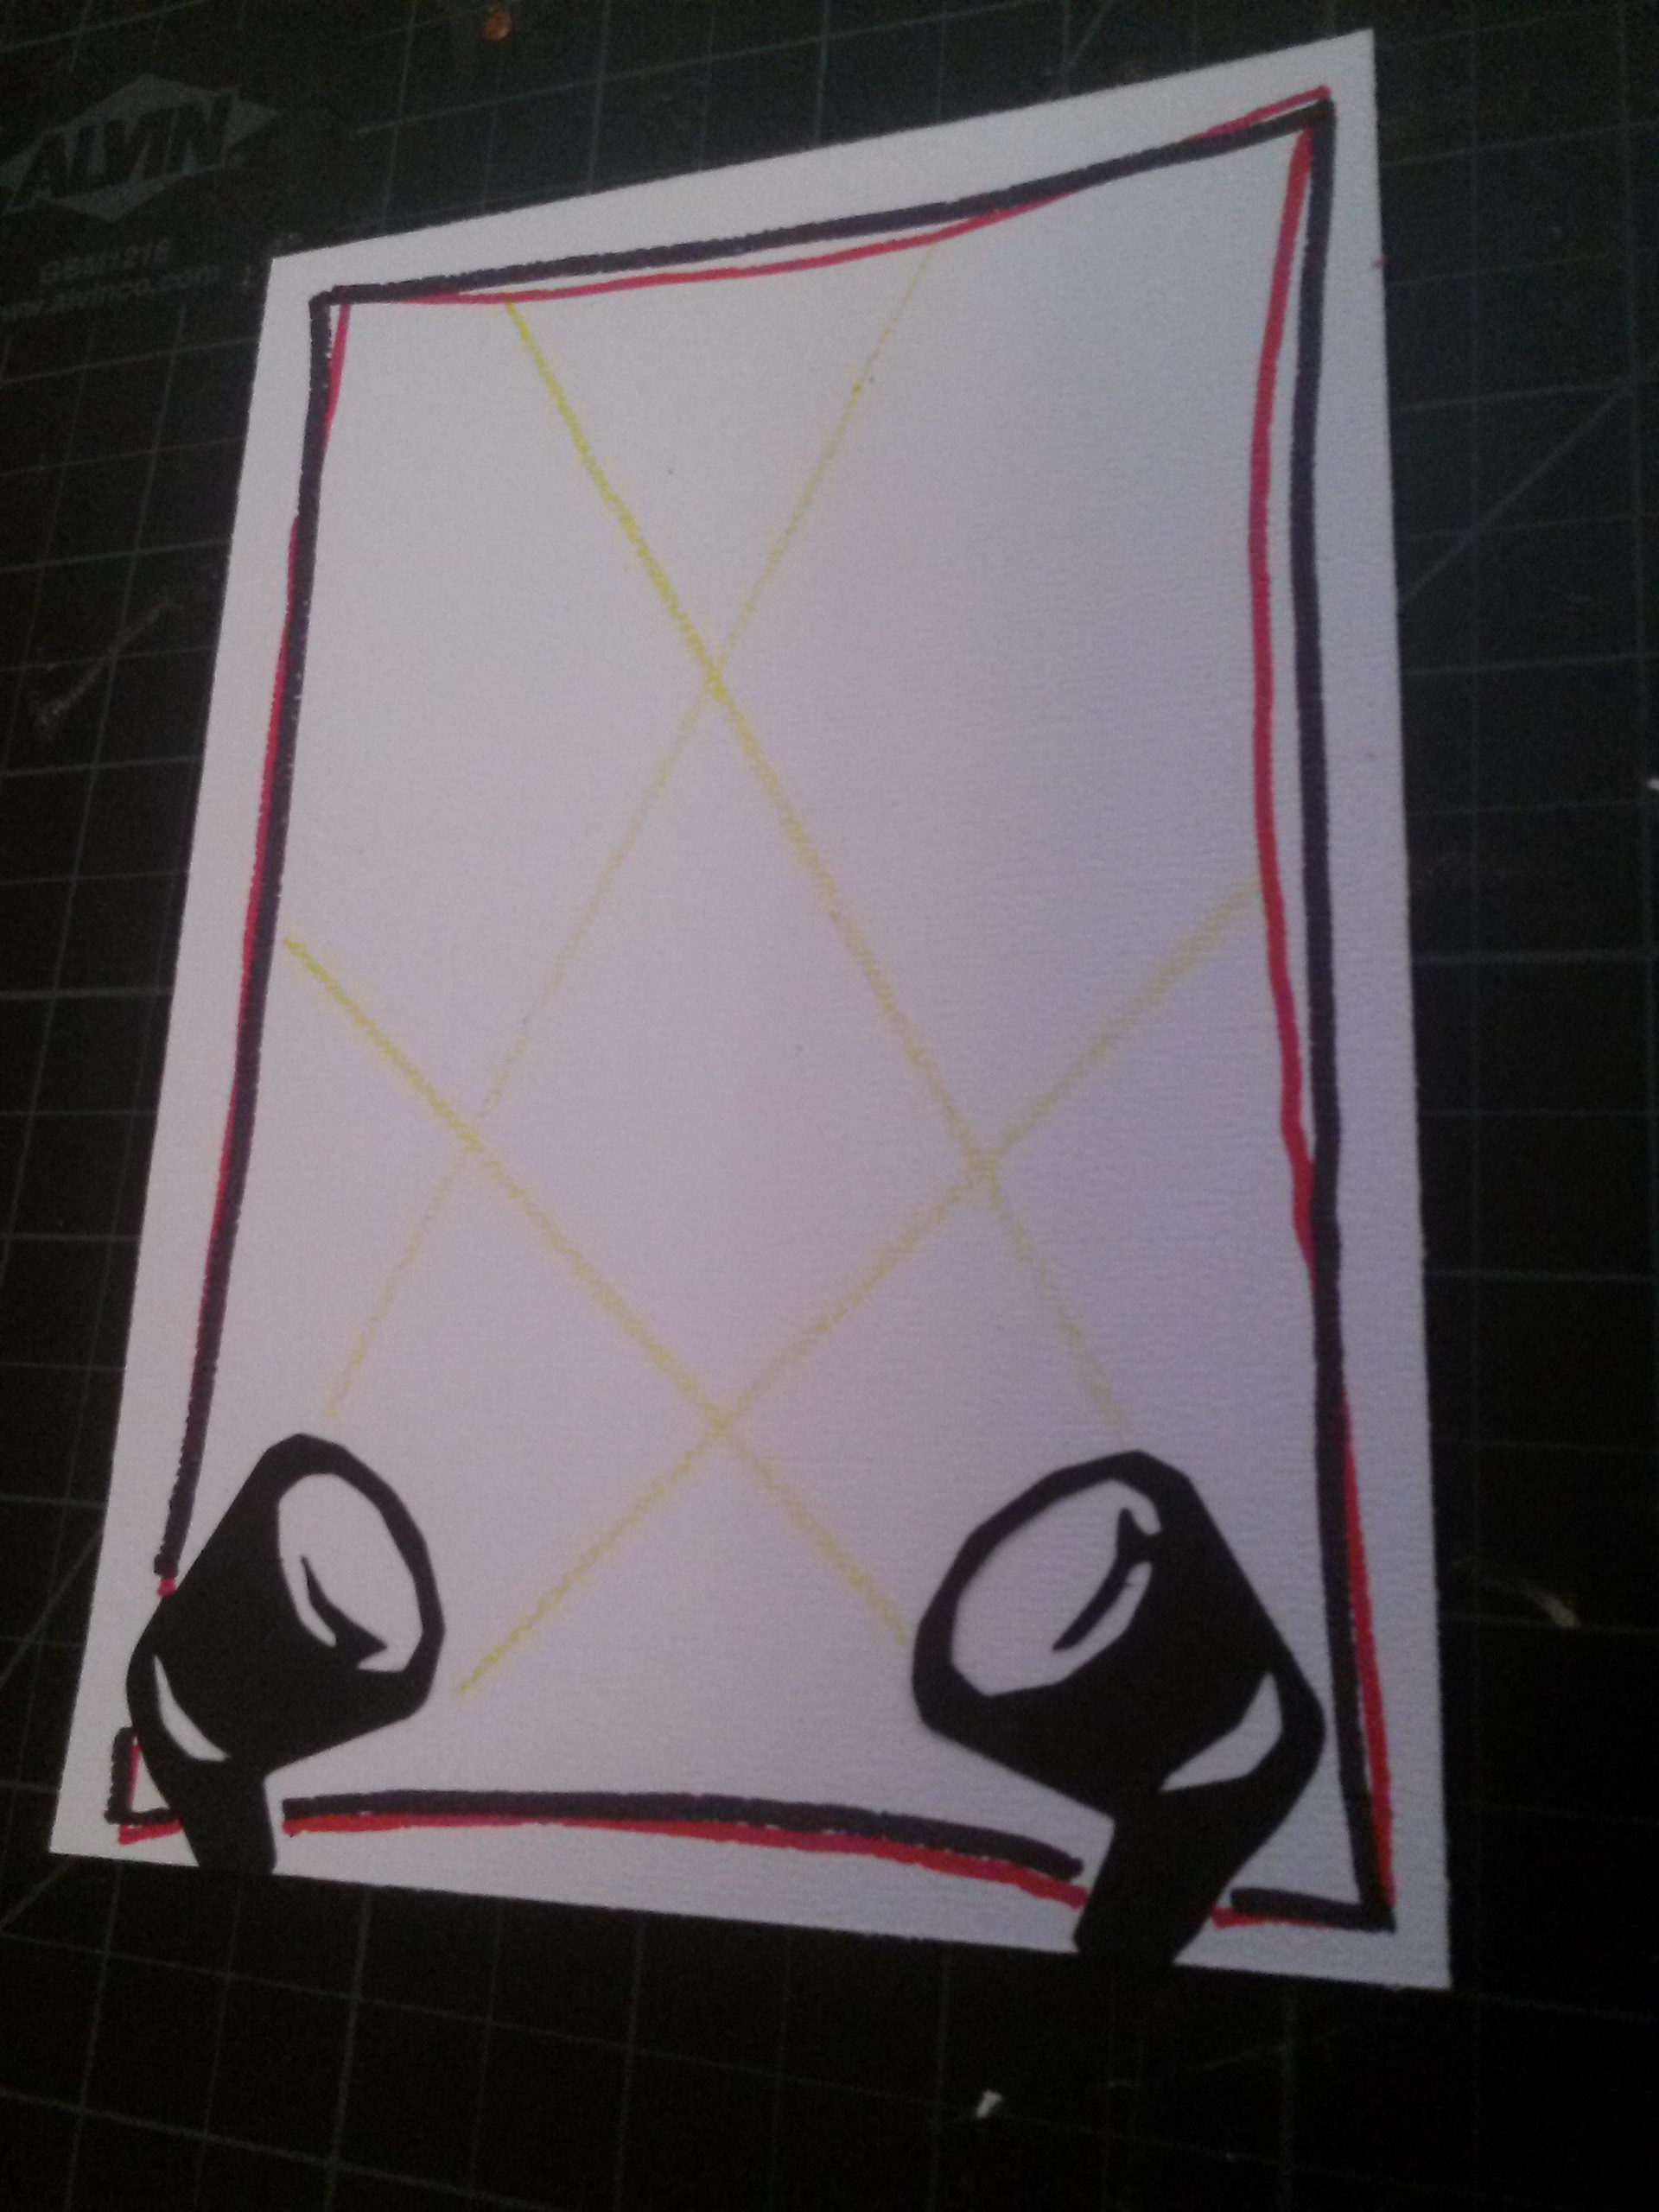
Use the ruler and your yellow pencil to draw the edges of the beams coming out of your spotlights, as well as to color in the lens on the spotlight itself. Draw the beams any width your choose, from the lens of the light all the way to, but not past, the drawn border around the edge of the card. Lightly fill in the "beams of light" with the colored pencil.
Now it's time to come back to the title blocks. Add the 3D "Now Showing" signs and adorn them with a few matching star stickers. Be sure to fill in the blanks on the back of the invite and line your envelopes. If you're mailing them, be sure you check the weight before you post them, in case they need an extra stamp.
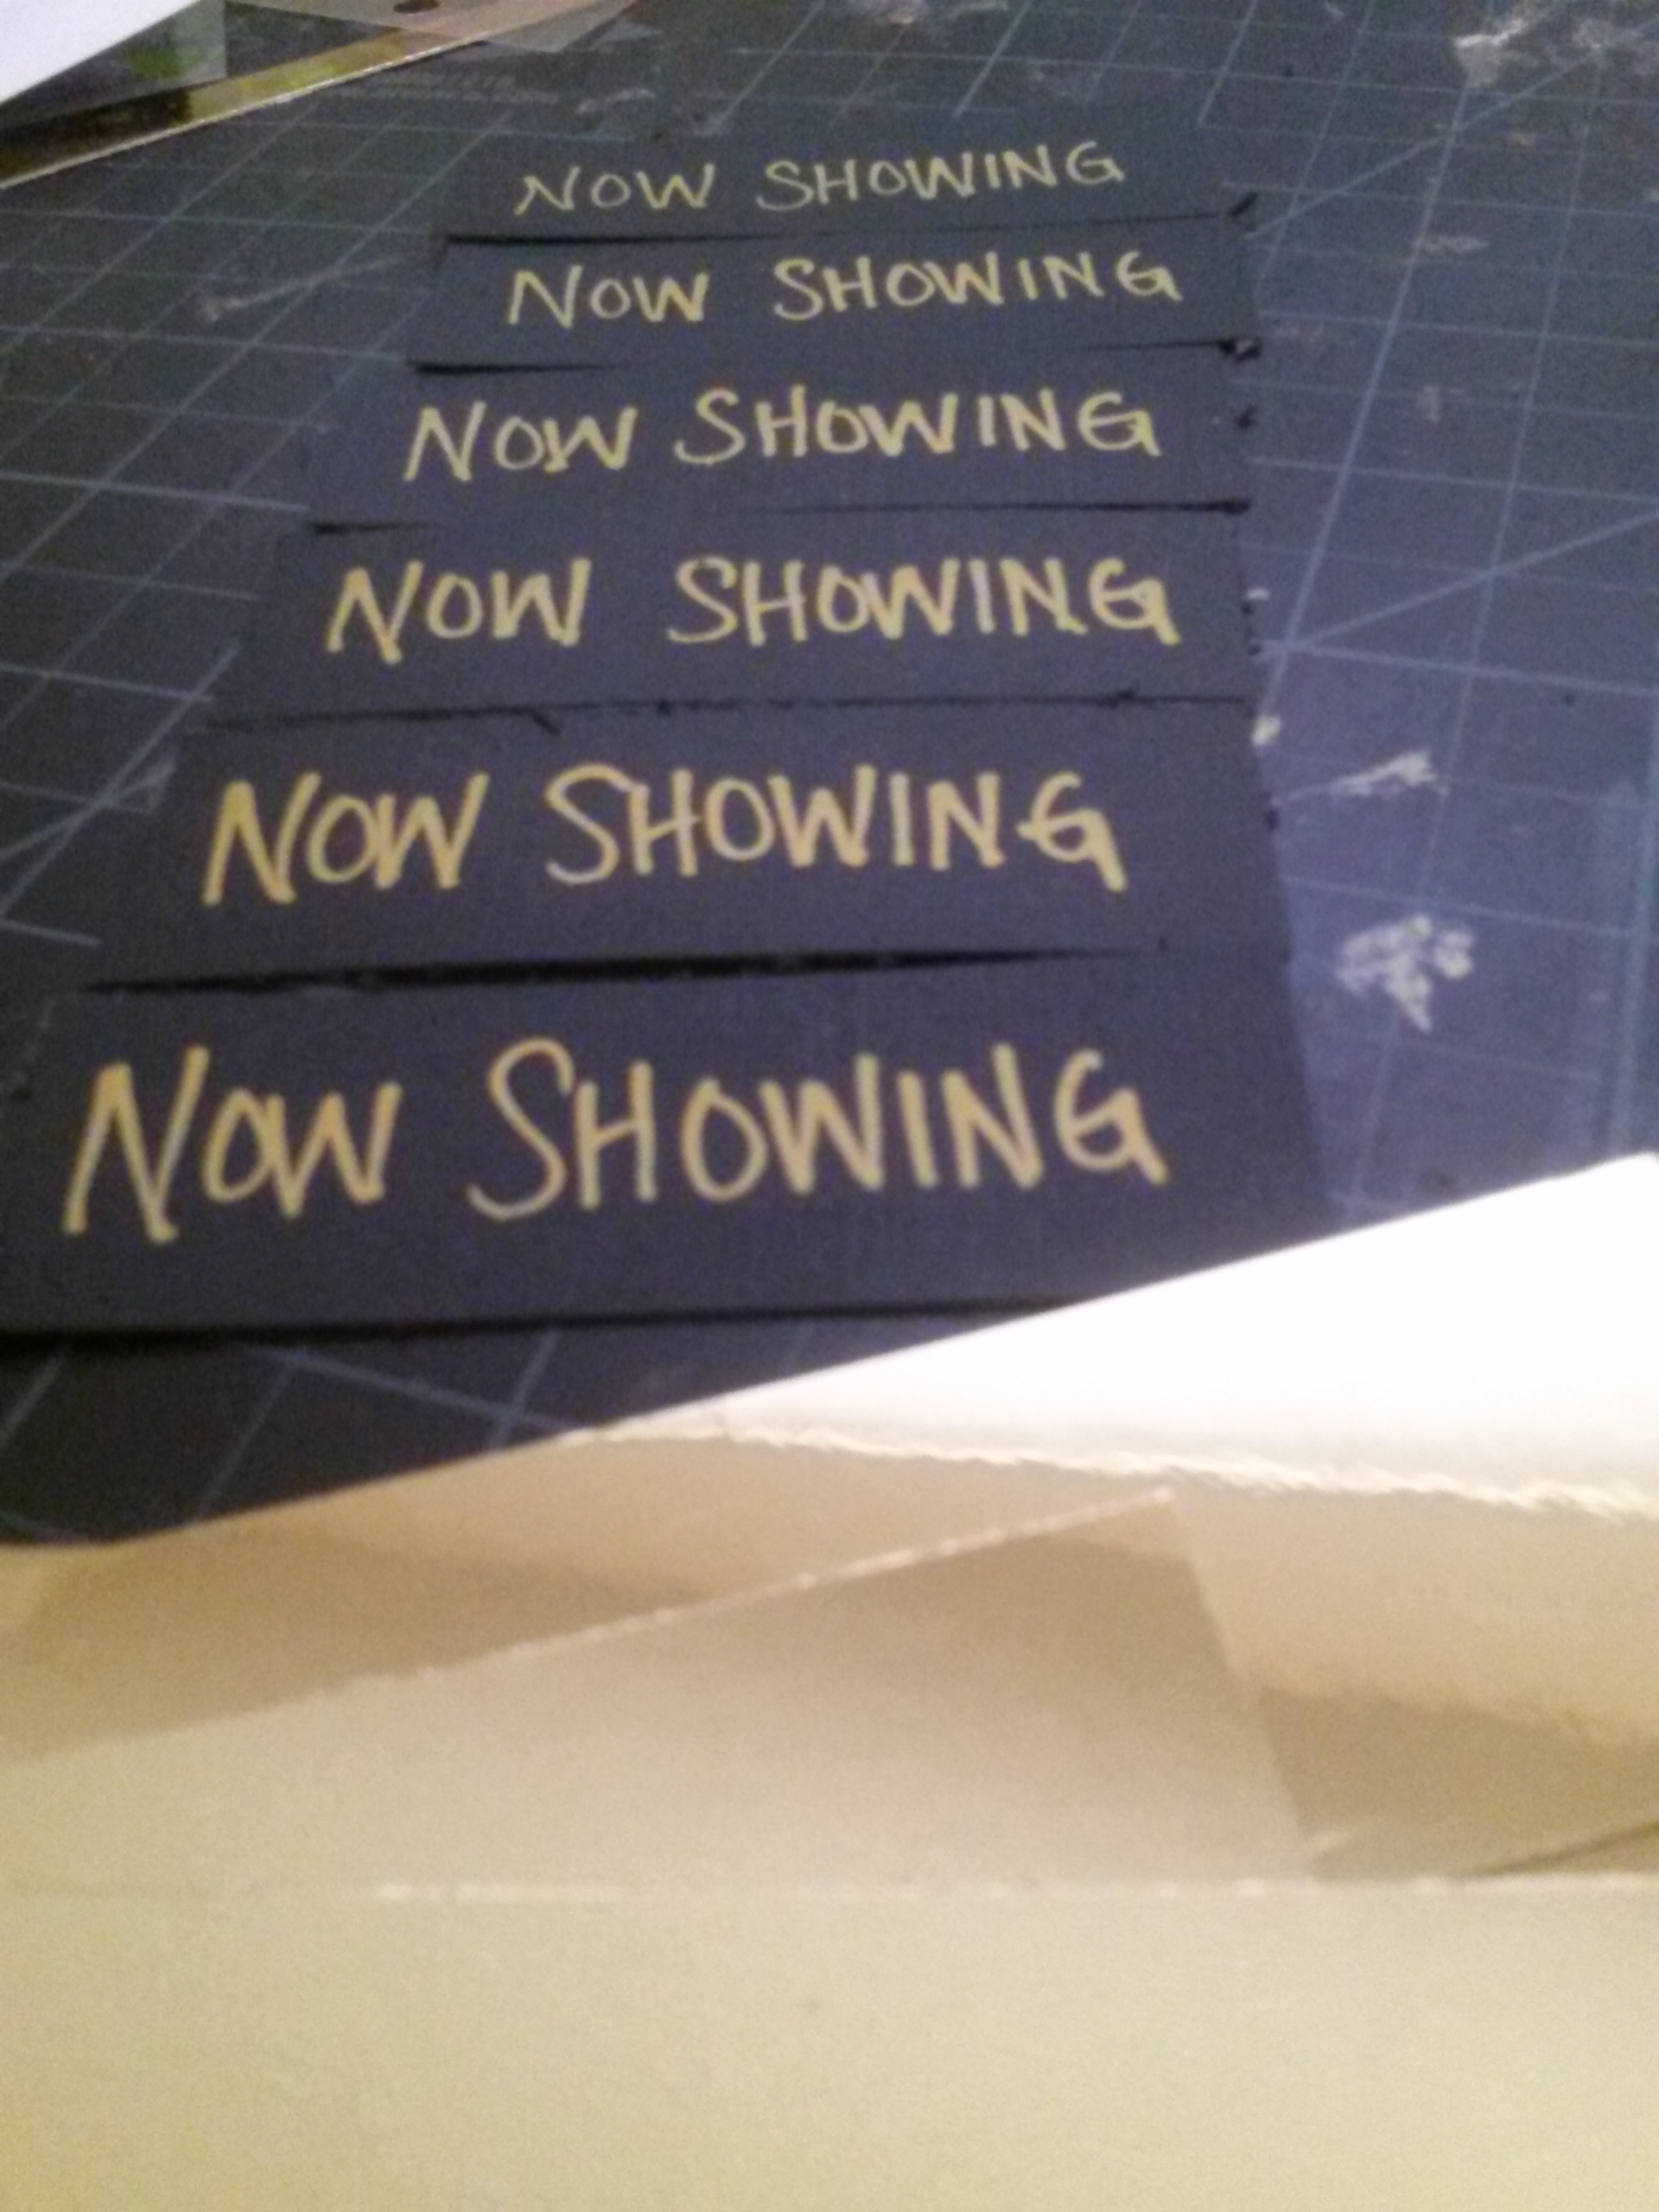
Use a gold metallic pen to write "Now Showing" (or another title) on the black strips. Allow the ink to dry completely before layering them on top of the gold strips with 3D adhesive. Set them aside for later.

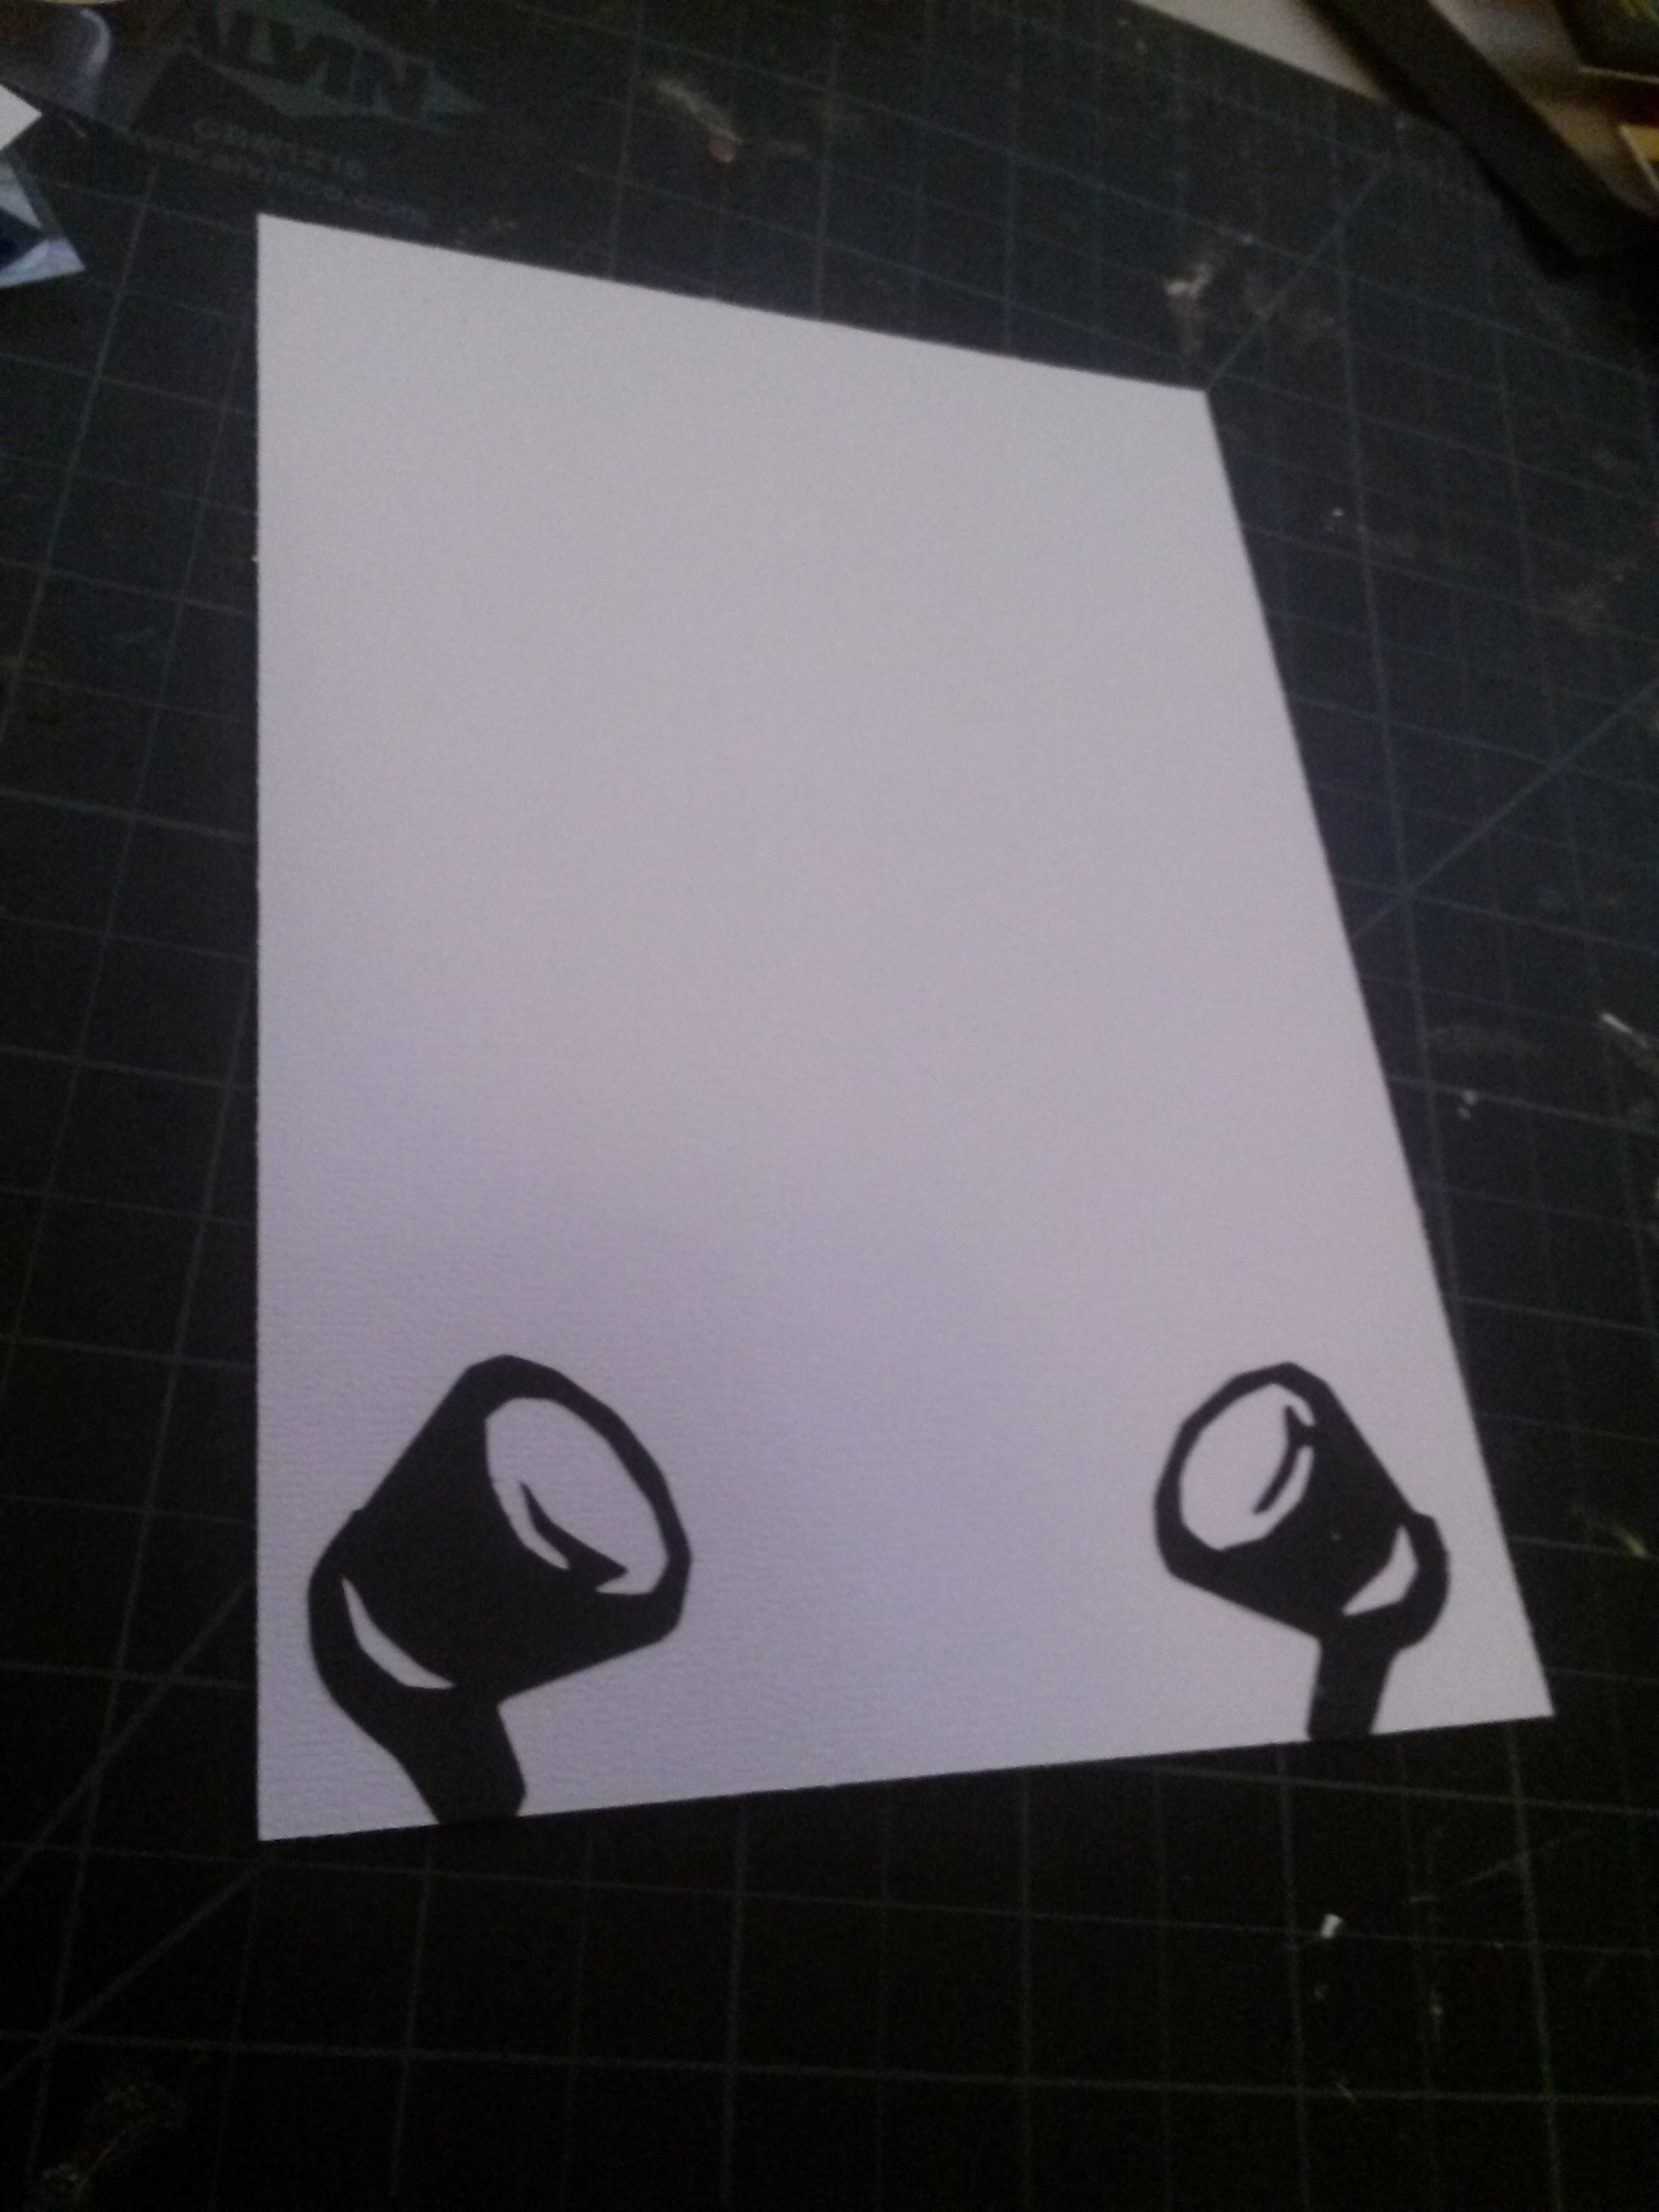
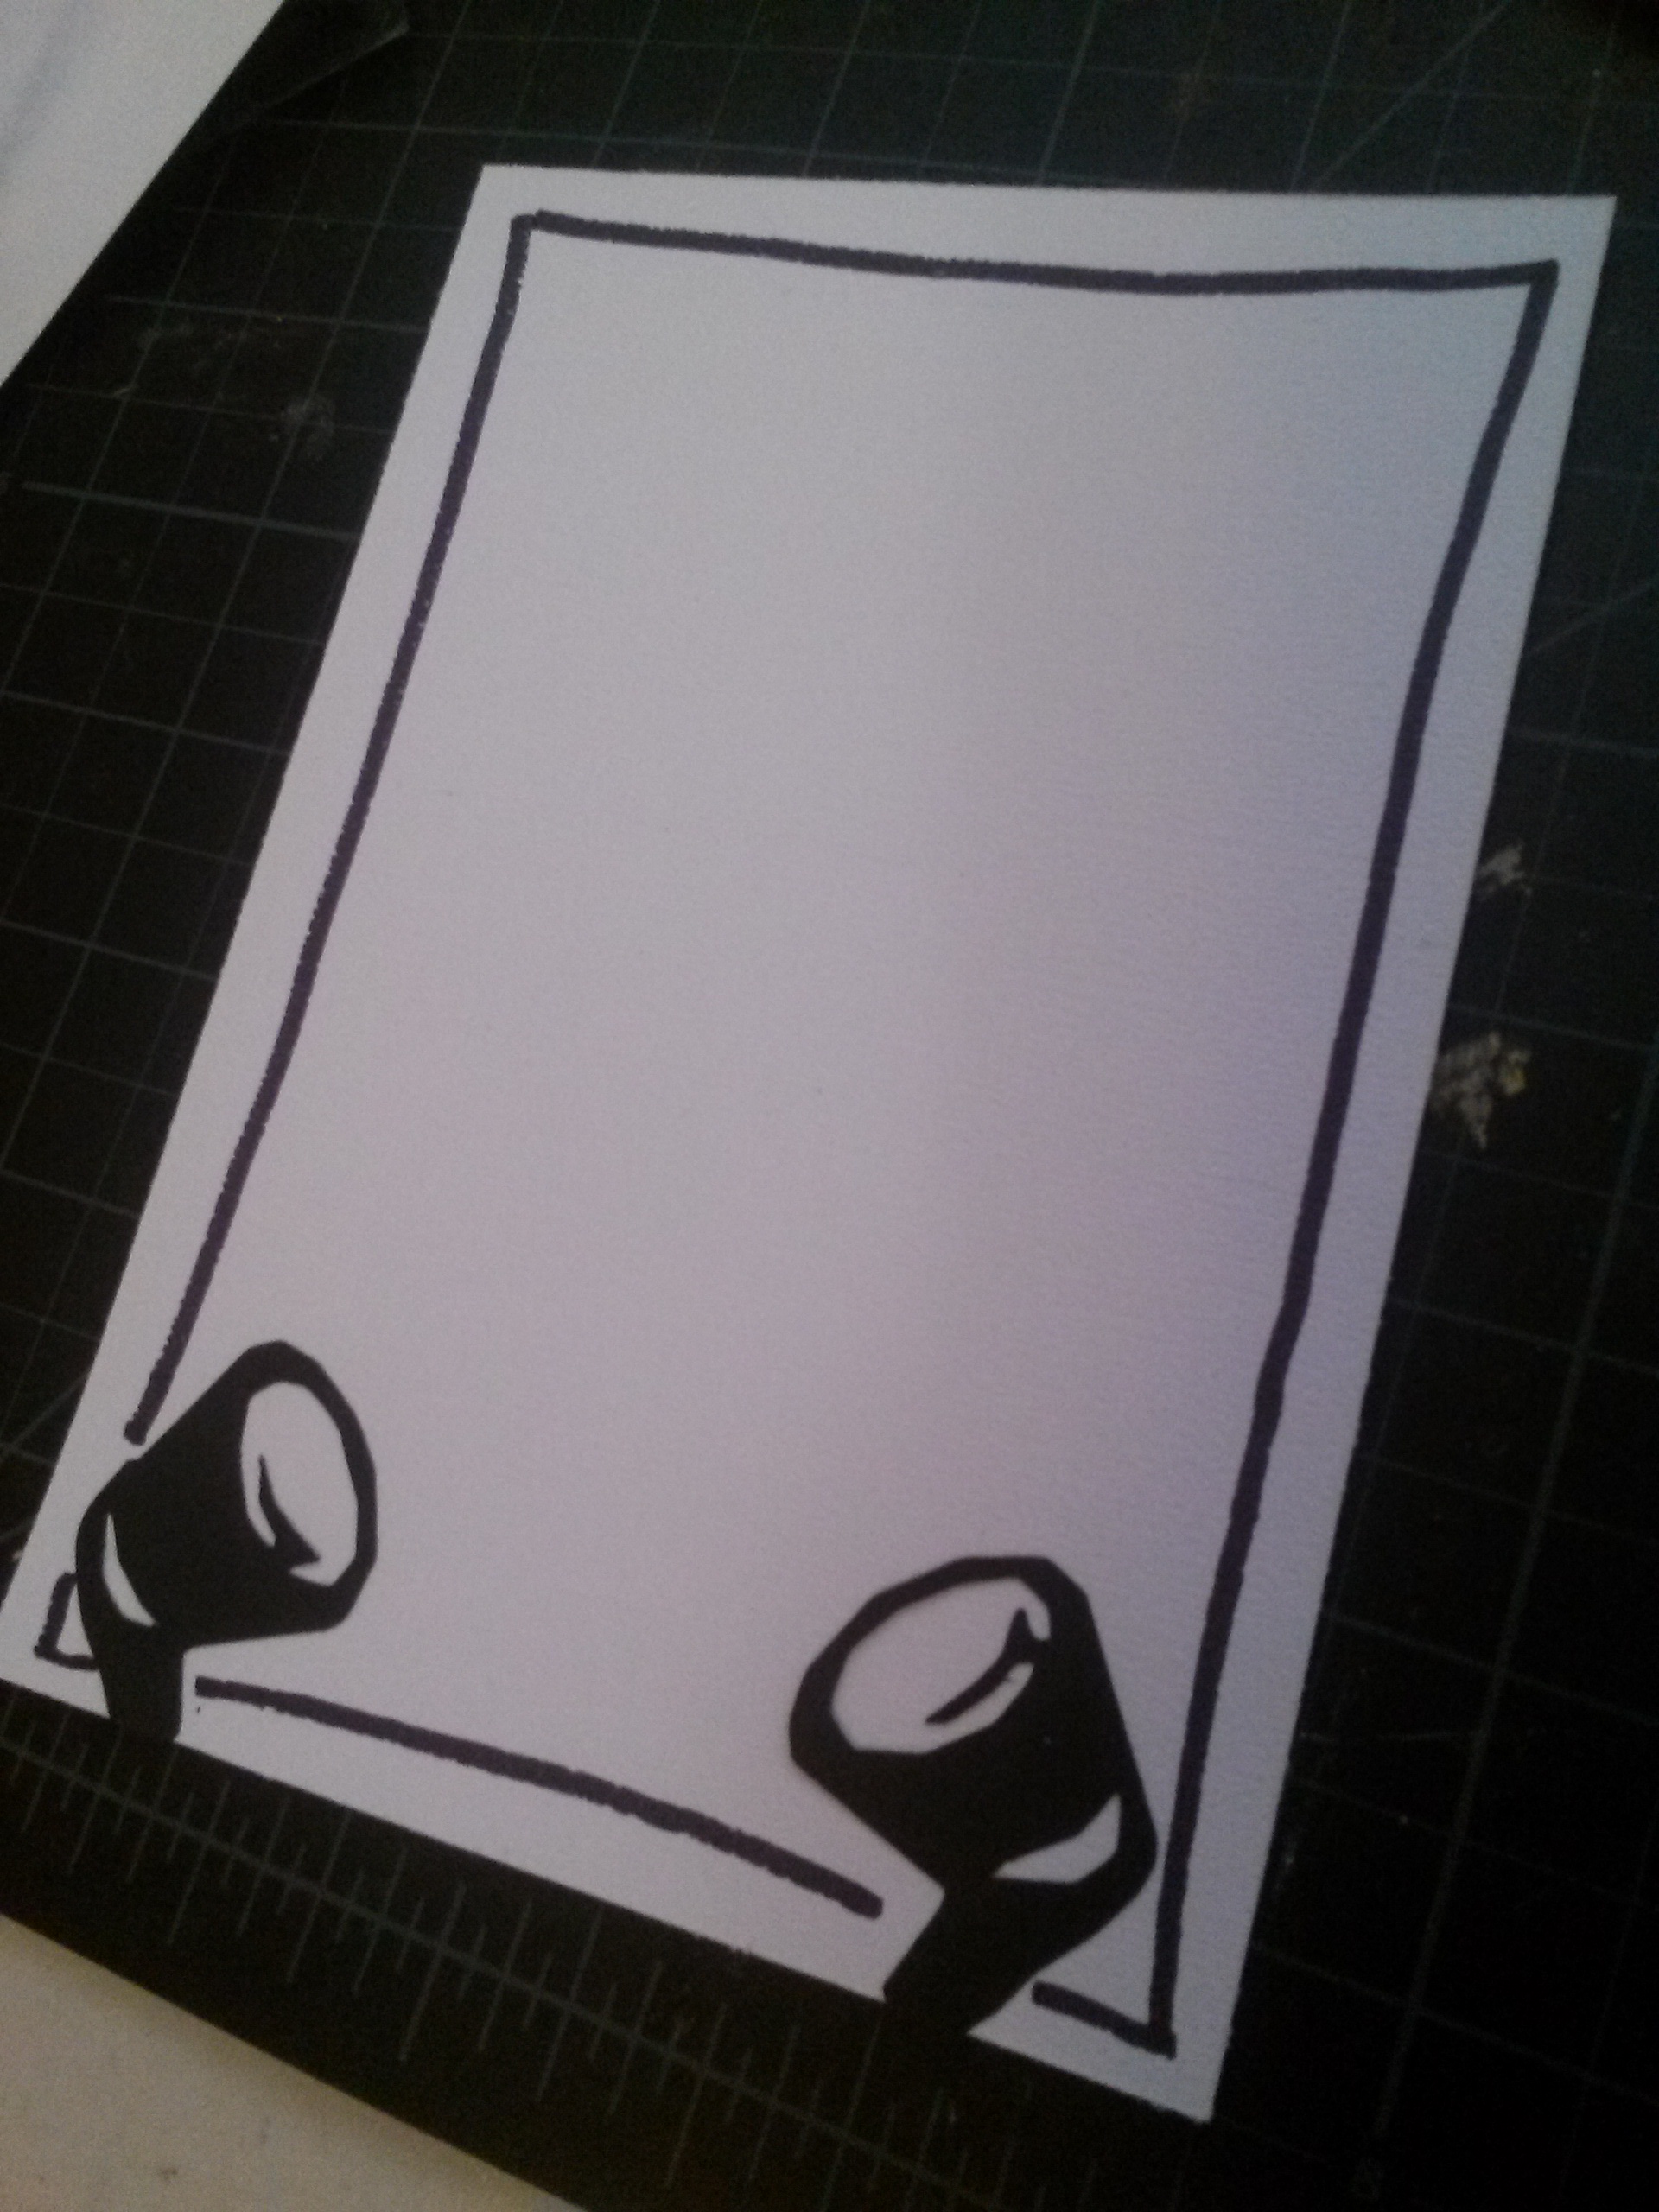
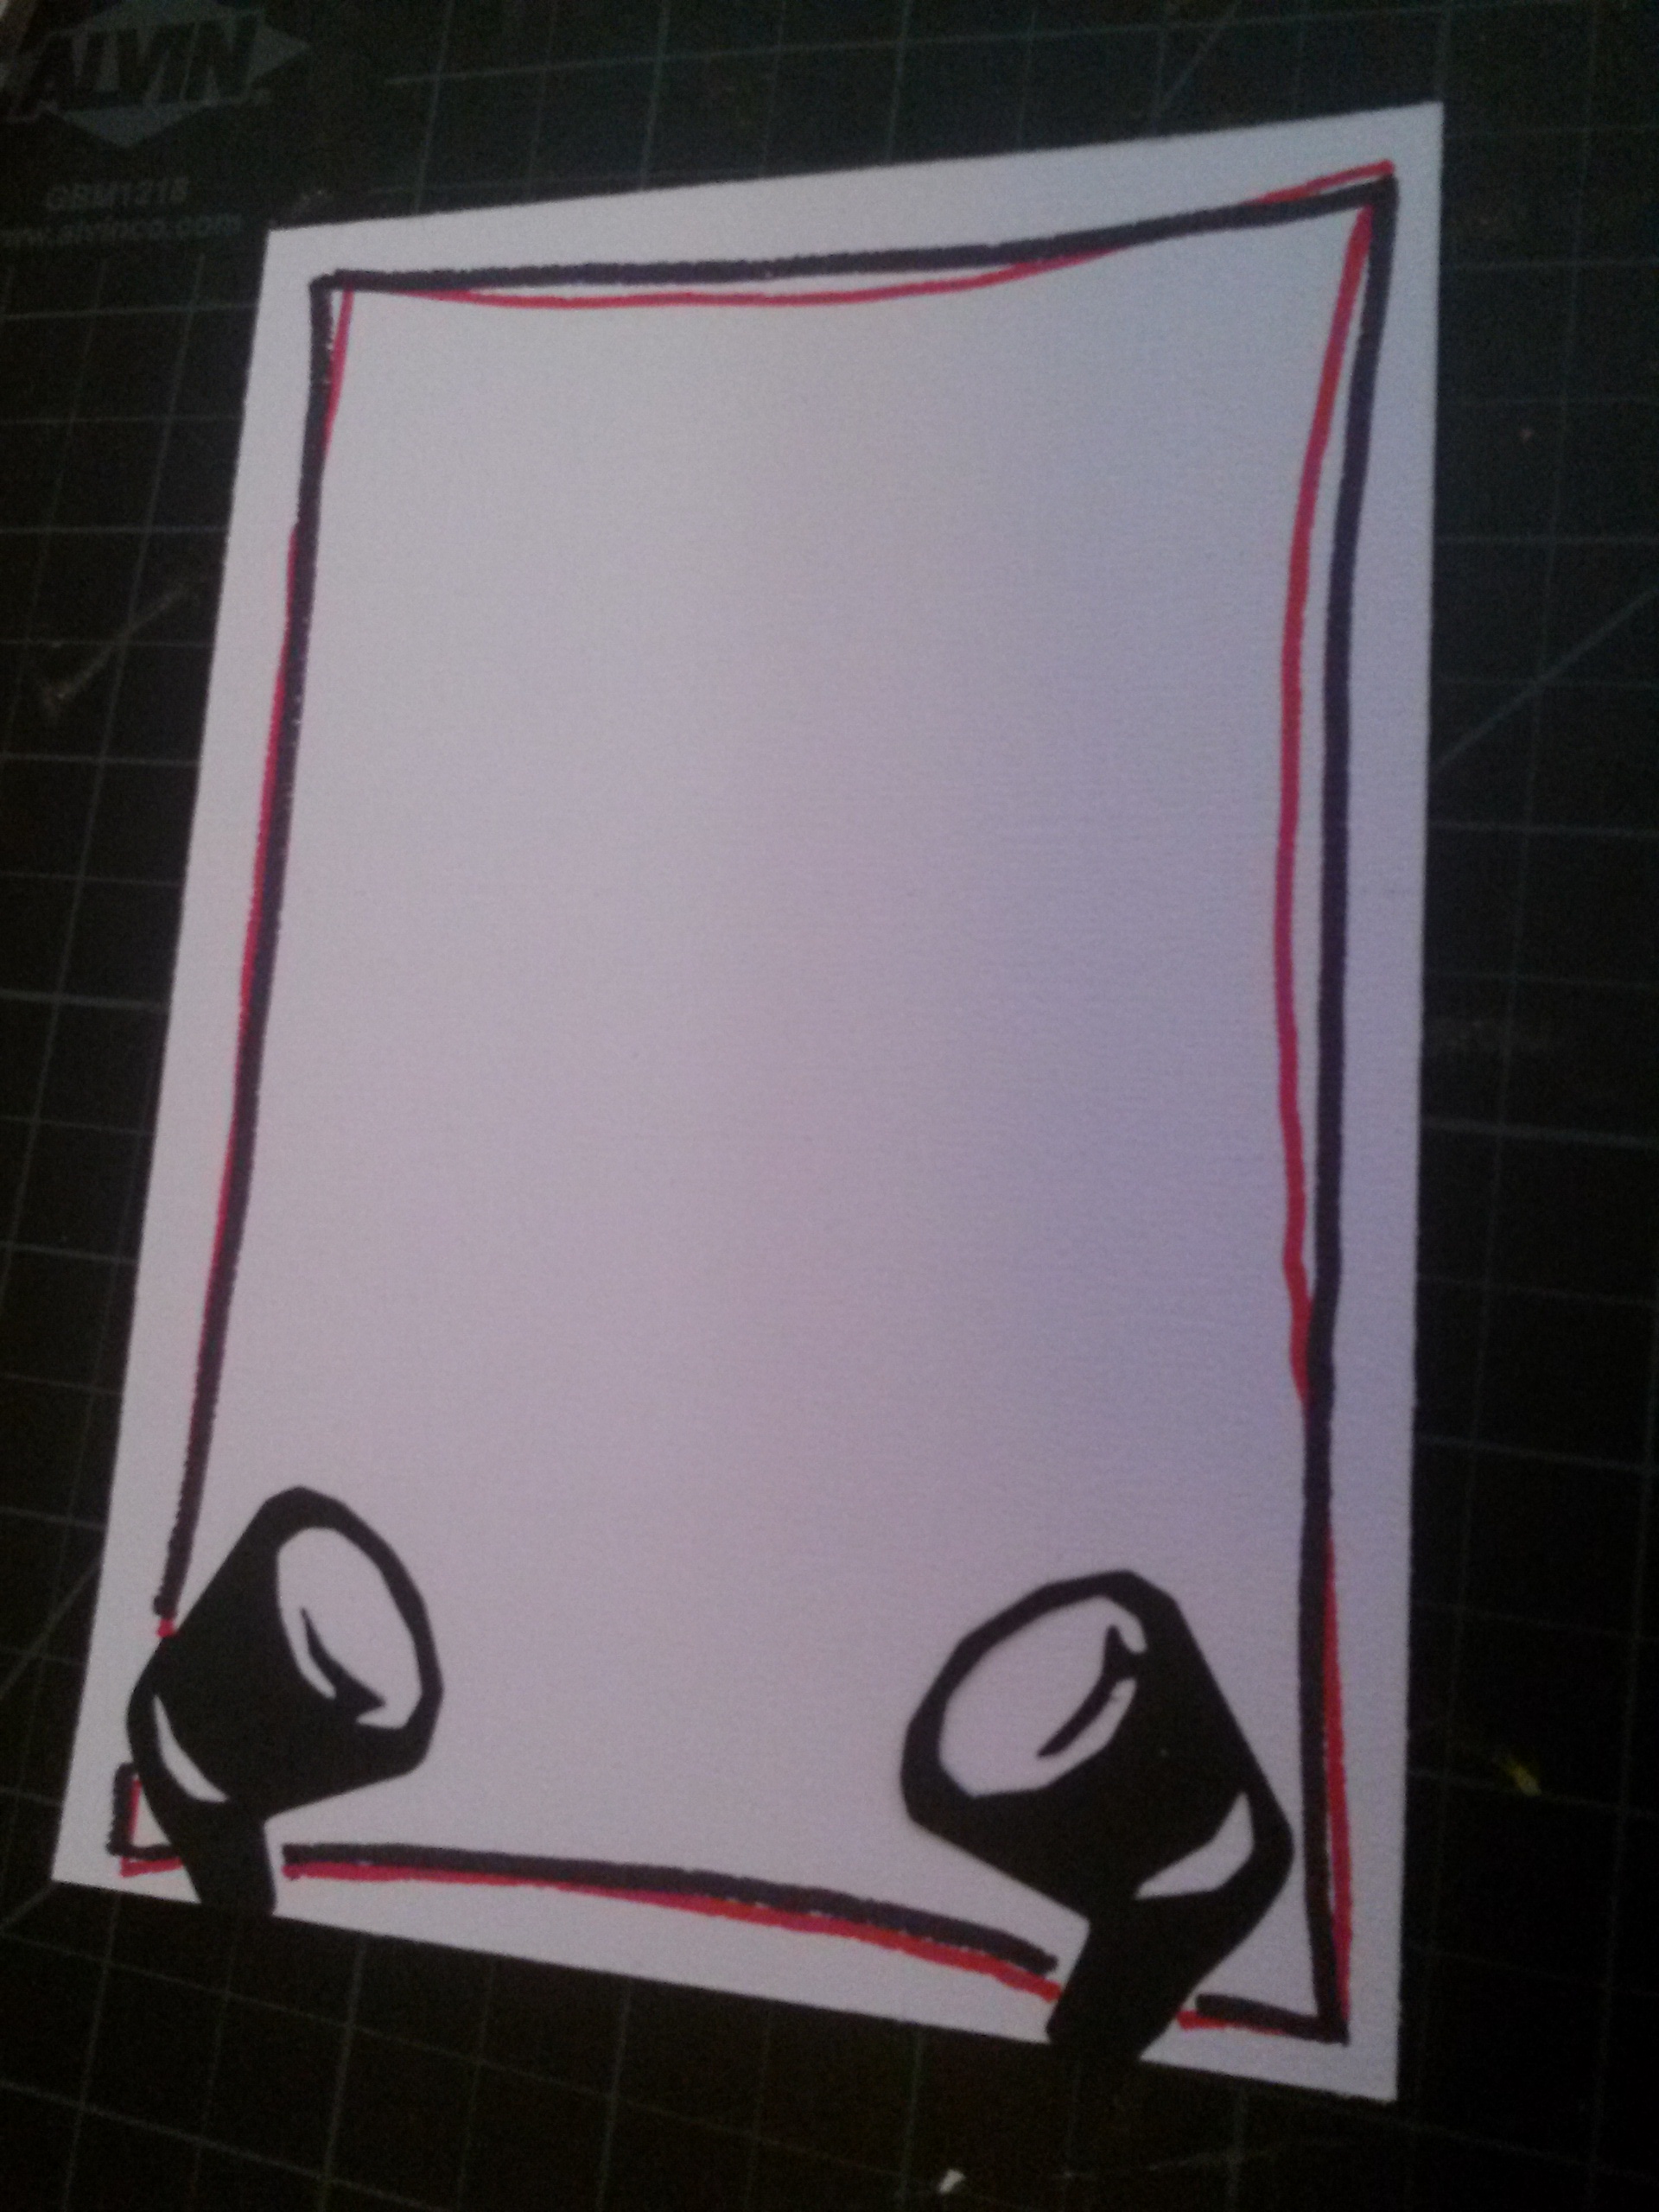
Position two spot lights at the bottom of each card so that they point to the diagonal corners of the card. Trim the bottom of the spot lights so they are flush with the bottom of the card. Use black and red markers (or other matching colors) to draw a free-hand border about 1/2" in from the borders of the card.

Looking for an extra special treat for your movie night? Don't miss our easy Candy Drizzled Popcorn Recipe!
You might
also enjoy...


