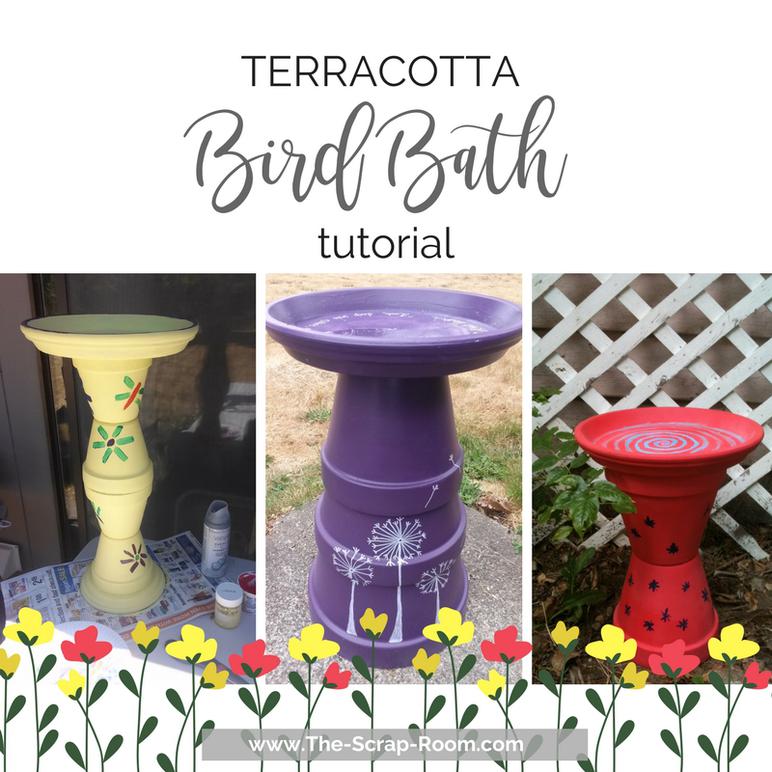
Stack your pots (the same or alternating directions) and adhere together. Let your epoxy dry completely before painting. Start with a base coat of primer, especially if you're planning on painting your bath in a lighter color. Many birds don't seem to enjoy light blue, so I'd recommend using something other than that. We made ours purple, red, and yellow, with text or drawings to decorate them. Allowing the paint to dry completely between applications, give your bath 2-3 coats of paint.
Make sure that you use a good sealer over the top to not only protect the paint but the birds as well! This is very VERY important! I recommend DecoArt's Americana Multi-Purpose Sealer. It's non-toxic and does an awesome job at protecting the birds and the baths. Let your bath dry until any smell from the sealer dissipates before filling it with water to share with your birds.
**Update** My birdbath has now spent a couple of cold Washington winters outdoors, at times being completely covered in snow. This last winter was especially harsh, and I found I not only had to touch up the paint in the bowl of the bath, but the extreme temperatures caused a hairline crack in the bath part. Luckily it still held together well, but was having a hard time holding water. After touching up the paint, I added a couple more layers of the sealer and it's in much better shape! I would definitely recommend bringing it in the garage if you have harsh winters and are worried about it. However if you Do have a problem with yours, I imagine the E6000 will help you piece things back together again!
You might
also enjoy...
If you enjoyed this tutorial or found value in it, we'd love it if you'd give us a thumbs up or a share on Facebook or Pinterest!
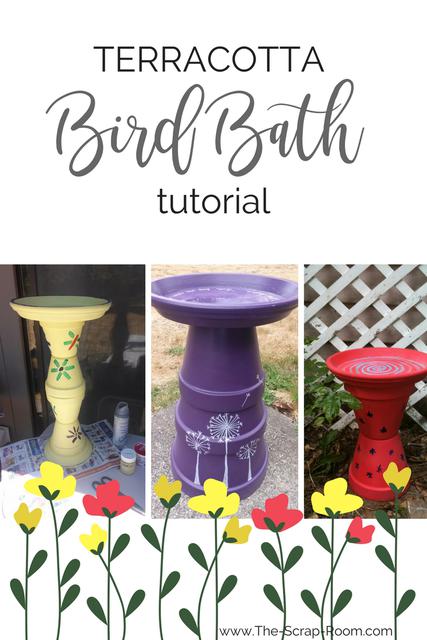
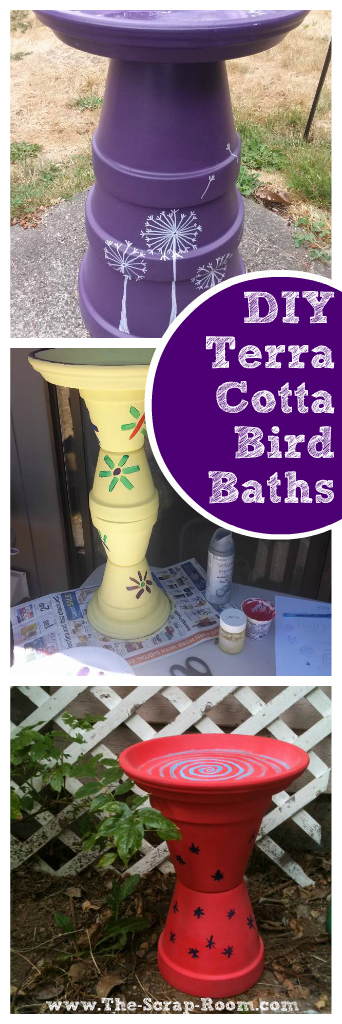
Terracotta Pot Bird Baths
A fun and frugal project for your yard!
This budget friendly project is for the birds -- no literally! Made from terracotta pots and assembled in less than an afternoon, this easy project is fun for crafters of all ages!
For this project, you will need:
-Terracotta pots and saucer(s)
-Paint Brushes
**For the extended version of this project, check out my book, The Handmade Gift Guide.
Disclaimer: Please note that some of the links in this post are affiliate links. There is no additional cost to you, but The Scrap Room will earn a small commission should you choose to purchase through those links. Click here for my full disclosure . Thank you for helping support our business!

These adorable, made with love, bird baths are just as much garden art as they are functional. Although little ones may need help with the assembly, gluing and sealing, the painting part is great for crafters of all skill levels.
We made the baths the center of a recent craft party and they were a hit with crafters and birds alike.
Start out with a selection of terracotta pots and a large saucer from your local garden store or upcycle some pots you already have. Make sure your bath is only an inch or two deep so the birds don't drown. (Yes, this Can actually happen!) We all made our baths differently with varied sized pots, and they all turned out great, so get creative here! If you need more weight on the bottom, consider adding a saucer to the base as well to give it more stability. I used an 8", 10" and 12.25" pot and a 12" saucer on mine (the purple bath).
We tried out a couple different kinds of epoxy and they both held great. (I'd still recommend carrying it from the bottom when moving it, just incase!) The E6000 held great and is a less expensive option than the Elmer's Fast Dry epoxy, but if you're pressed for time (such as a three hour craft party) try the fast drying Elmer's. I glued mine together a couple days early so I could try out the E6000 method and it took a while to dry. If you go this route, take your time and don't try to glue it all together at once. Glue two or three pieces together at a time and wait until they are dry before stacking on more layers.
Enjoy this page?
Pin it for later!